
File manager is a great functionality for debugging. It enables us to see files, to upload them, and to download files to a remote node (to the remote server, for example). Now, let’s first figure out how to configure it.
To manage files on a specific node, an agent must be installed on that node with the necessary configurations. Let’s go through the required agent configurations.
Configuring the Agent
- Enable the Sub-Agent: The file manager sub-agent must be enabled.
- Define the File Manager Section: A dedicated “file manager” section should be created in the agent’s configuration file.
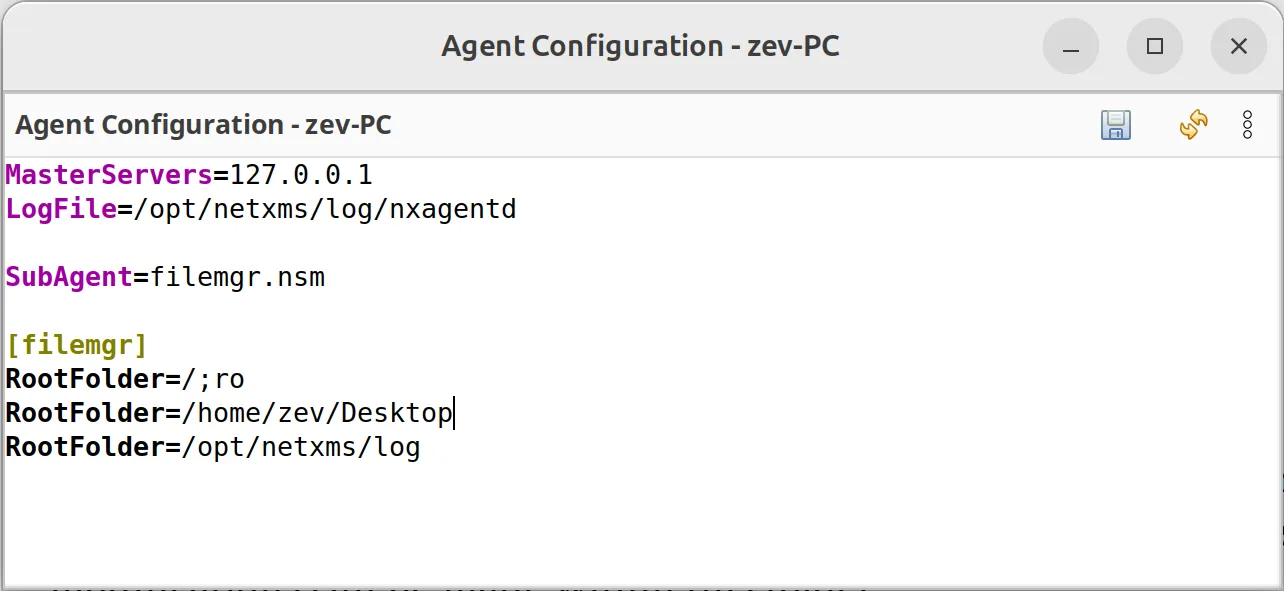
Within this section, multiple root folders can be specified. In our setup, we have the following root folders:
- The system’s main root folder
- My user’s desktop documents
- The NetXMS log files folder
Additionally, some folders may have specific access restrictions. For example, the root folder of the computer has a modifier set to “read-only” (To make the path ”read only”, please add “;ro” after the path definition). This means no modifications can be made within this folder.
Applying Agent Configurations
Once the configuration is set, the agent must be restarted for the changes to take effect. After restarting, the File Manager tab will be available, displaying all the root folders defined in the configuration.

Each folder has its own access level:
- Some folders are read-only
- Others are writable
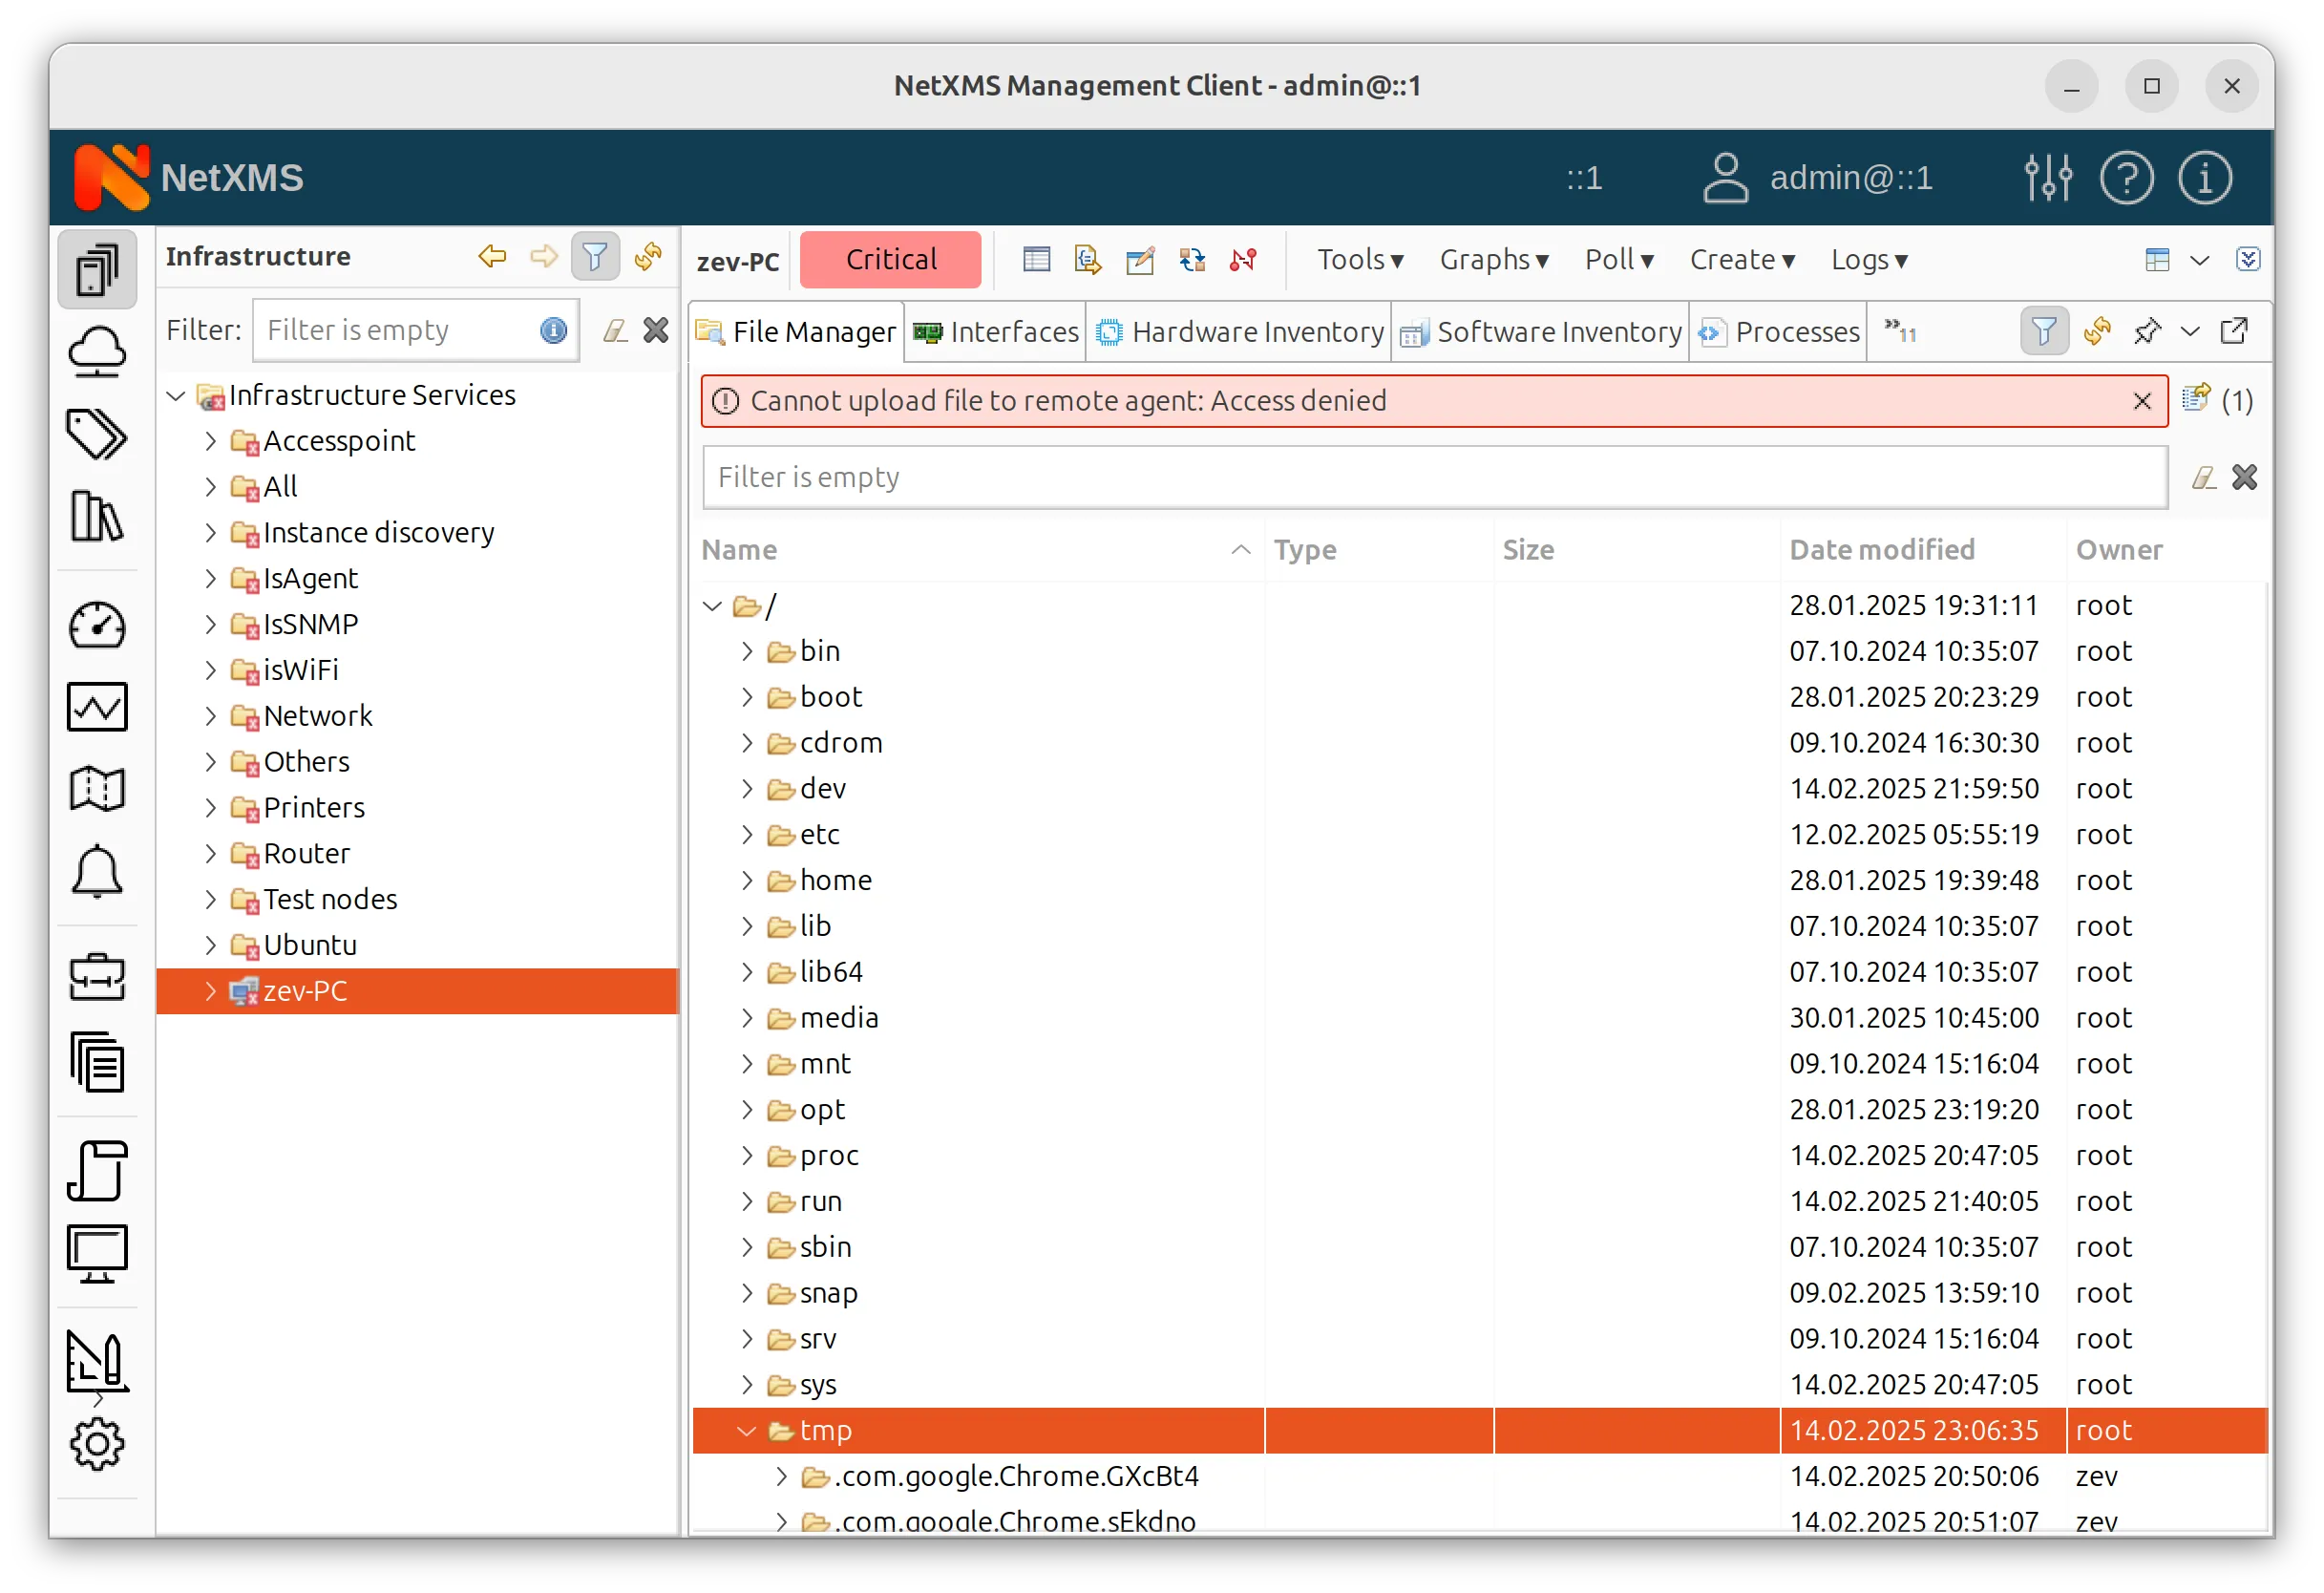
For instance, if we attempt to upload a file to the /tmp folder, which is typically open for all users, the system will still deny access. This is because the agent’s configuration enforces read-only permissions for everything under the root folder.
However, exceptions can be made. In our case, we have allowed full access to the folders under the “read-only” root folder:
- My desktop documents
- The NetXMS logs folder
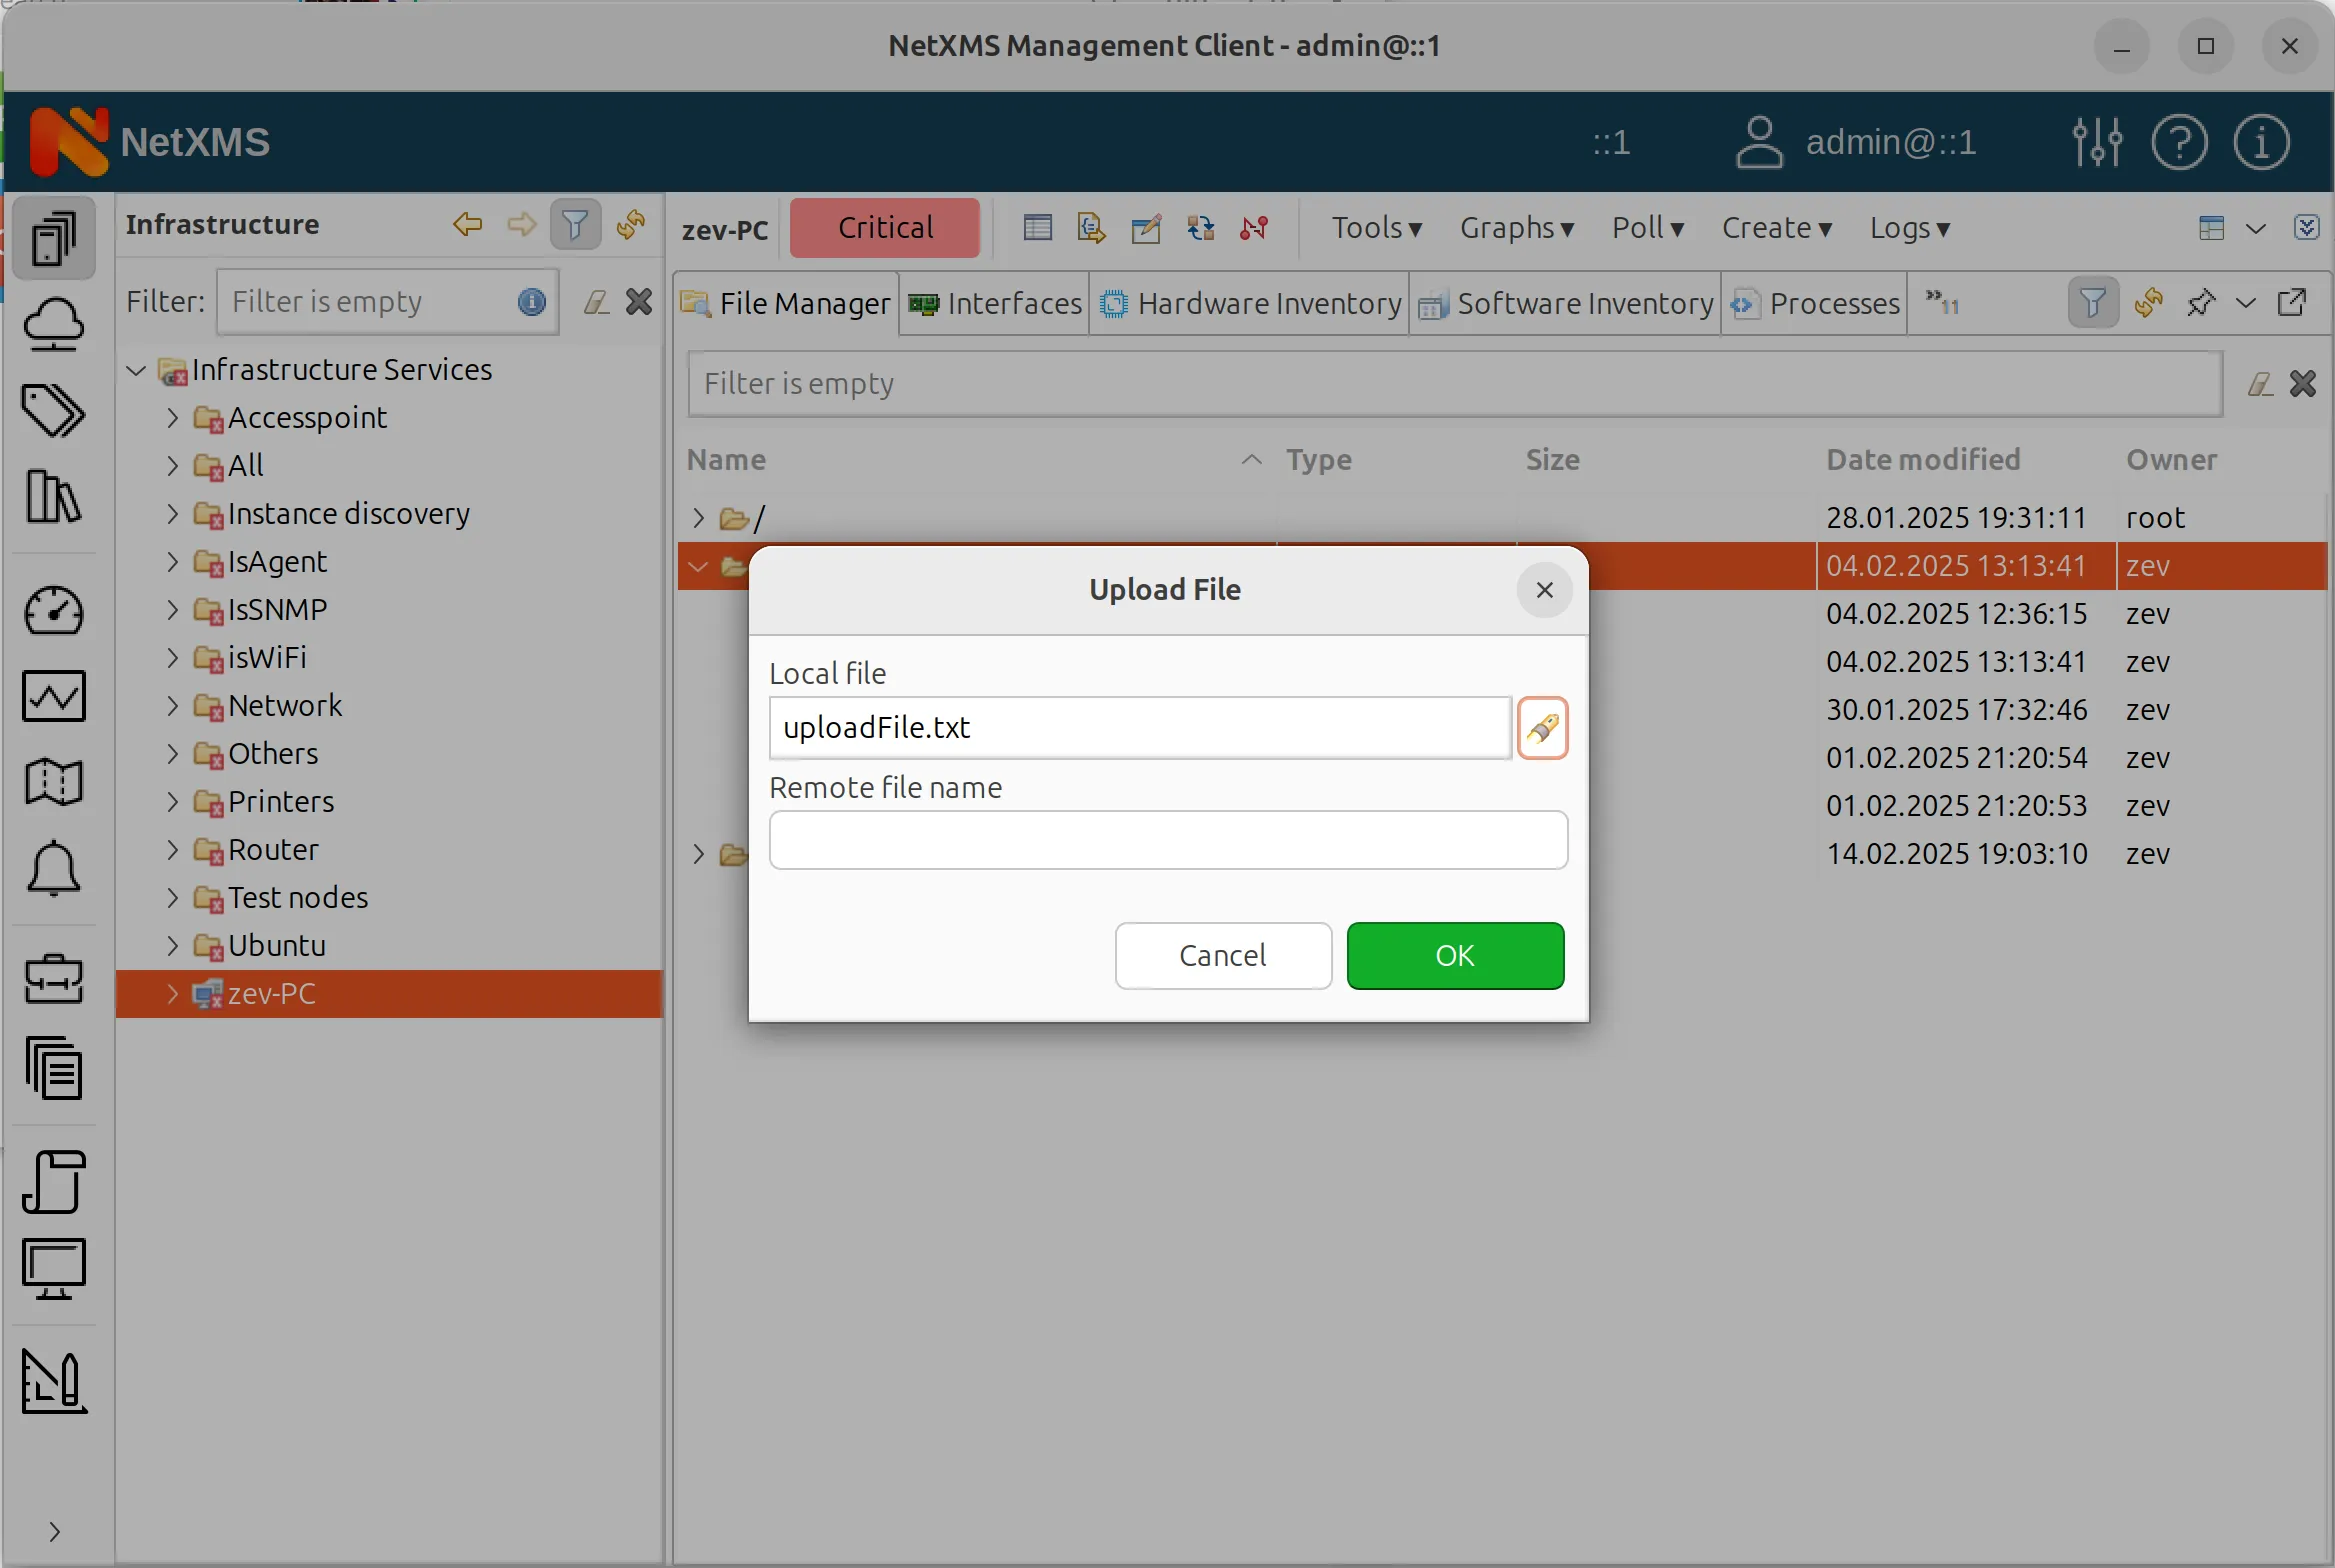
So, if we upload a file to one of these folders, the operation succeeds — because they are exceptions from the “read-only” folder. We can also rename the file or move it to another folder in the tree. Just drag and drop the file into the desired folder.
This setup ensures strict file access control while allowing necessary operations in designated folders.
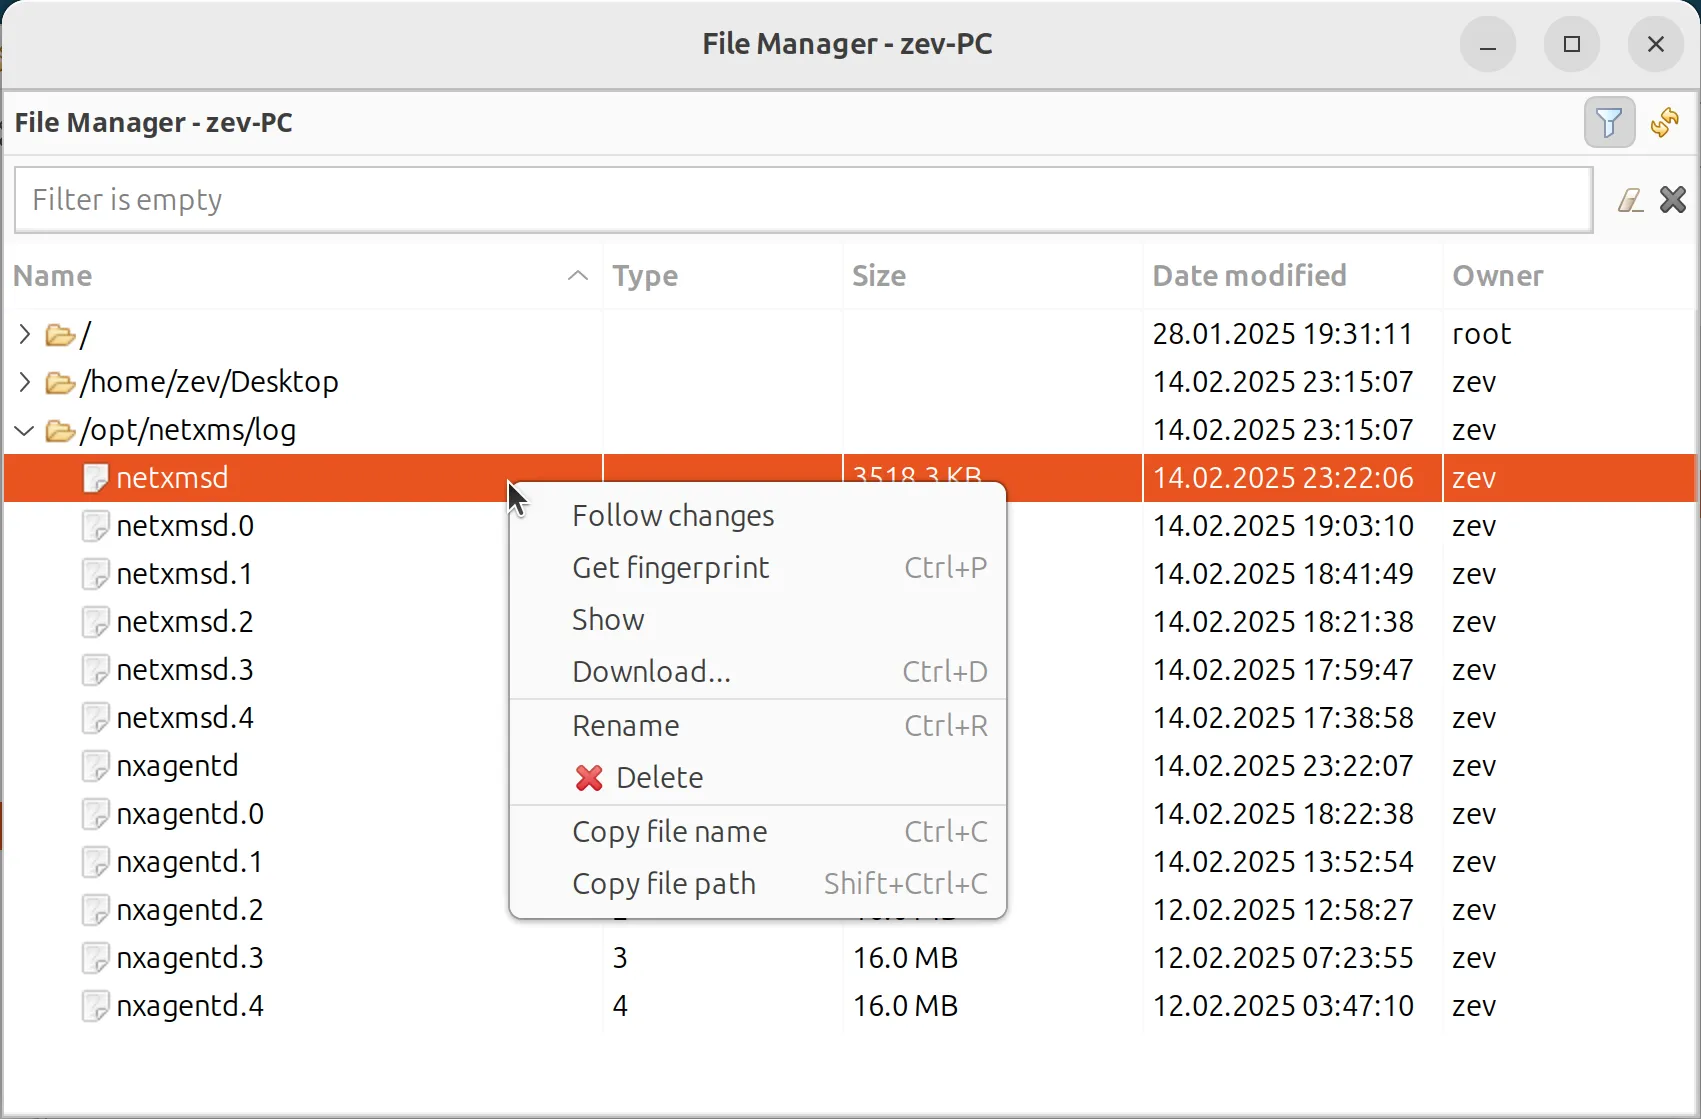
File Operations and Debugging in NetXMS File Manager
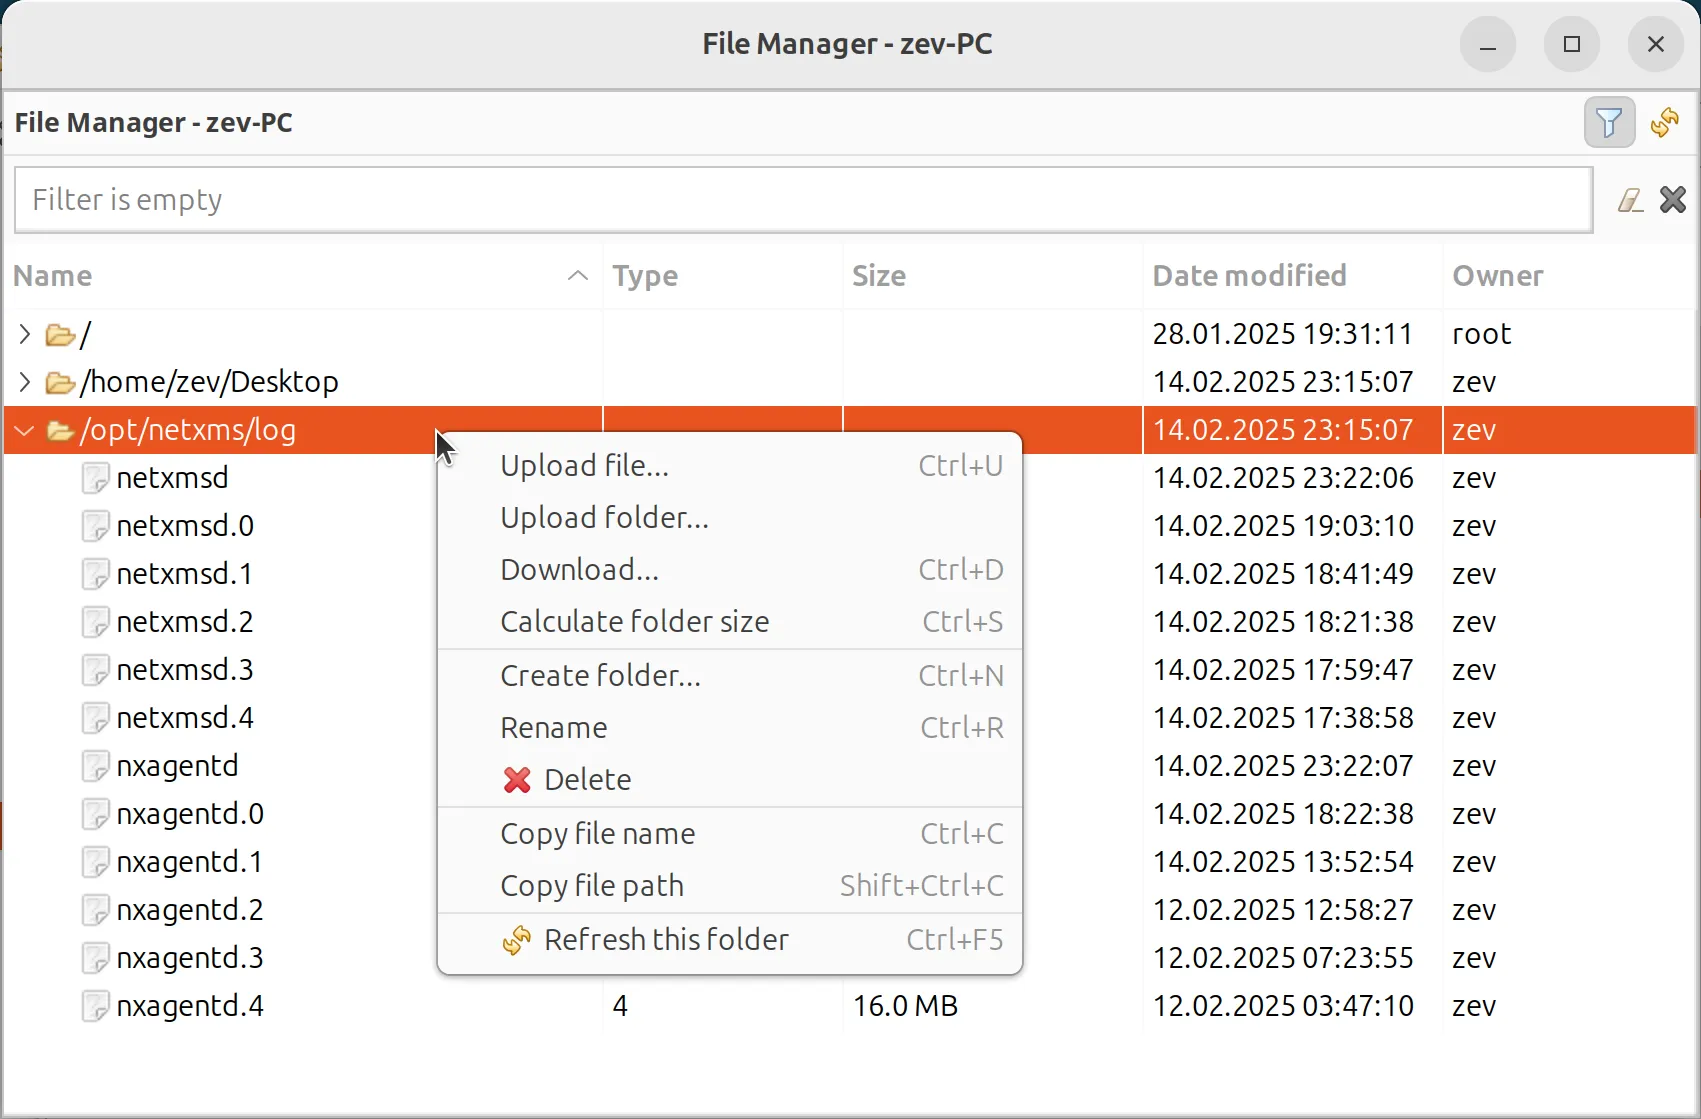
With the File Manager in NetXMS, you can perform various file operations, provided you have the necessary access permissions. These operations include:
- Uploading files
- Uploading a folder
- Calculate folder size
- Renaming files
- Moving files
- Getting file fingerprints
- Copying file names and paths
- Deleting filesing folder or file from a node to a local computer
- Show a file’s content in text editor
- Open a file in a text editor and track (“follow” in NetXMS UI) changes in it
Debugging with the File Manager
One of the key debugging features we use is accessing and monitoring the agent log file. There are multiple ways to do this:
-
Downloading the Full Log
- You can download the entire log file for review.
-
Opening the Log in NetXMS (“Show”)
- This option displays the file directly in NetXMS.
-
Tracking Log Changes in Real-Time (“Follow changes” in the NetXMS UI)
- Last fiew lines of the file will be shown directly in NetXMS text editor and file tracking will commence.
- The log updates dynamically, meaning new entries will appear as they are added.
- This functionality is similar to the tail -F command in Linux command line, that continuously follows updates in real-time.
- This is useful for monitoring ongoing system activities, or debuggind problems with network service monitoring or web service monitoring.
For example, if an unexpected web service return code is recieved, we can use this feature to investigate the issue. If debugging is required, we can try to adjust the debug level in the agent configuration file, then restart the agent, and monitor the log file for relevant changes.
Agent Actions
Another important feature of the agent is the ability to execute predefined actions remotely. These actions include:
- Execute remote command (binary execution or shell command)
- Executing remote command with output shown in NetXMS UI
To enable this functionality, the desired actions must be defined in the agent configuration file.
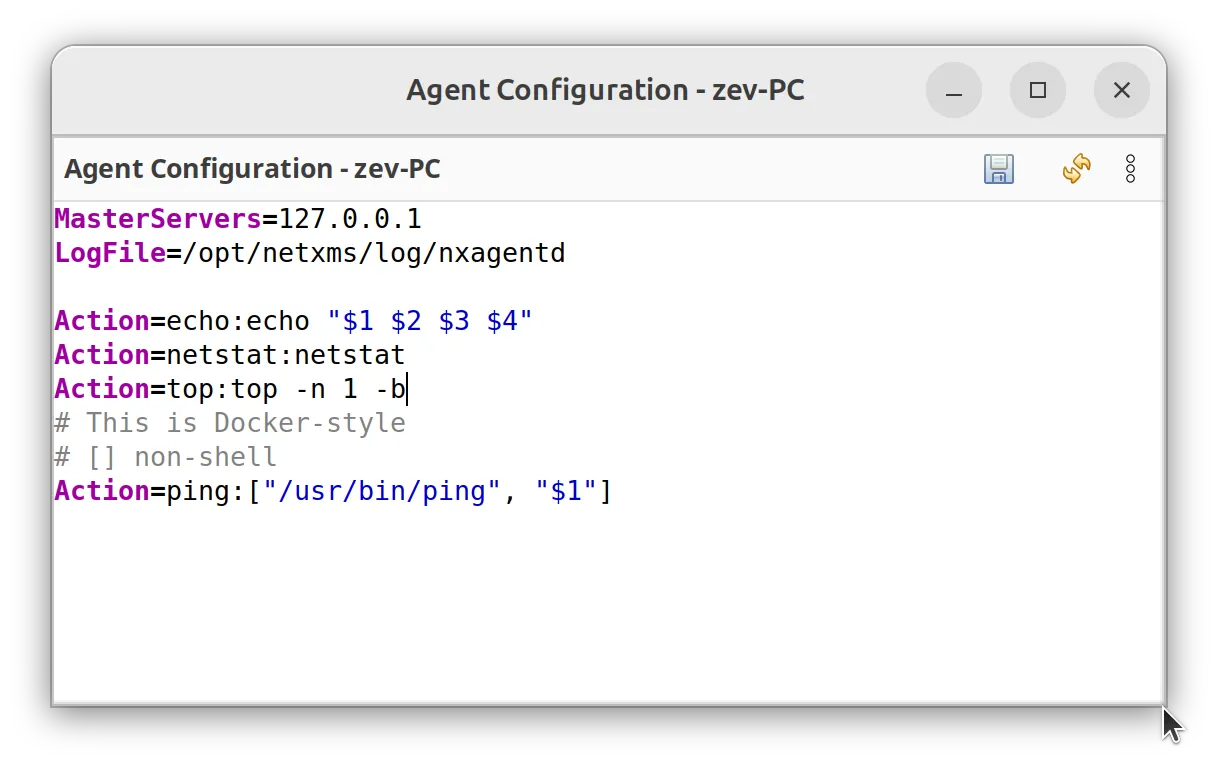
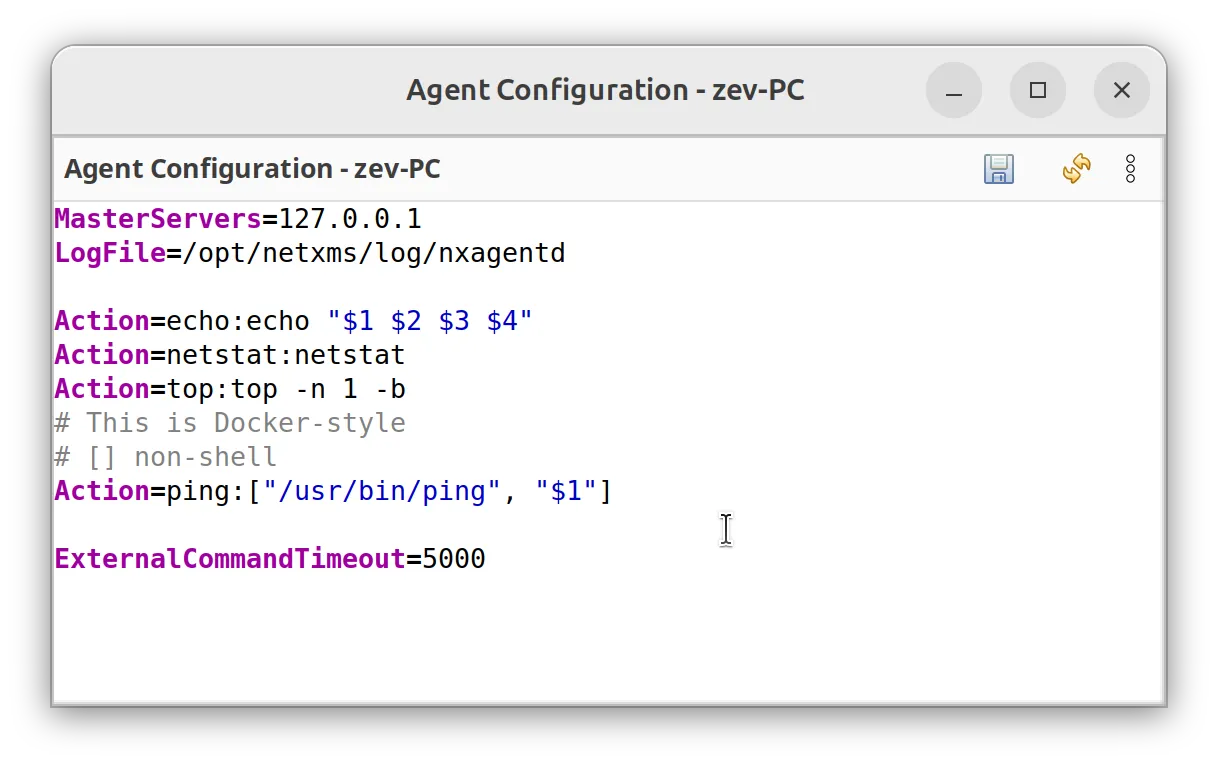
Defining Actions on the Agent Side
In NetXMS, actions allow remote execution of predefined commands on an agent. Here, we have multiple configured actions, including:
- netstat
- top
- ping
Each action follows a specific definition format:
<Action Name>:<Command>- The action name is how it will appear in the NetXMS server.
- The command is the actual operation executed on the agent.
Some actions can take parameters, which are referenced using $1, $2, $3, etc.
Special Execution Modes
There are several execution modes you can choose from, depending on your specific setup and goals.
Standard Execution (Shell-Execute Mode)
Commands are executed within a shell environment. Parameters can be passed dynamically, but this can pose a security risk due to potential command injection.
Docker-Style Execution (More Secure)
The first parameter is always the binary to executable. All subsequent parameters are strictly passed as arguments, preventing unintended commands from being run. This ensures safer execution, preventing unintended commands from being run.
If security is a concern in your specific setup, we highly resommend using Docker-style execution.
Executing Actions from the Server Side
Once actions are defined on the agent, they can be triggered from the NetXMS server. One way to do this is network management.
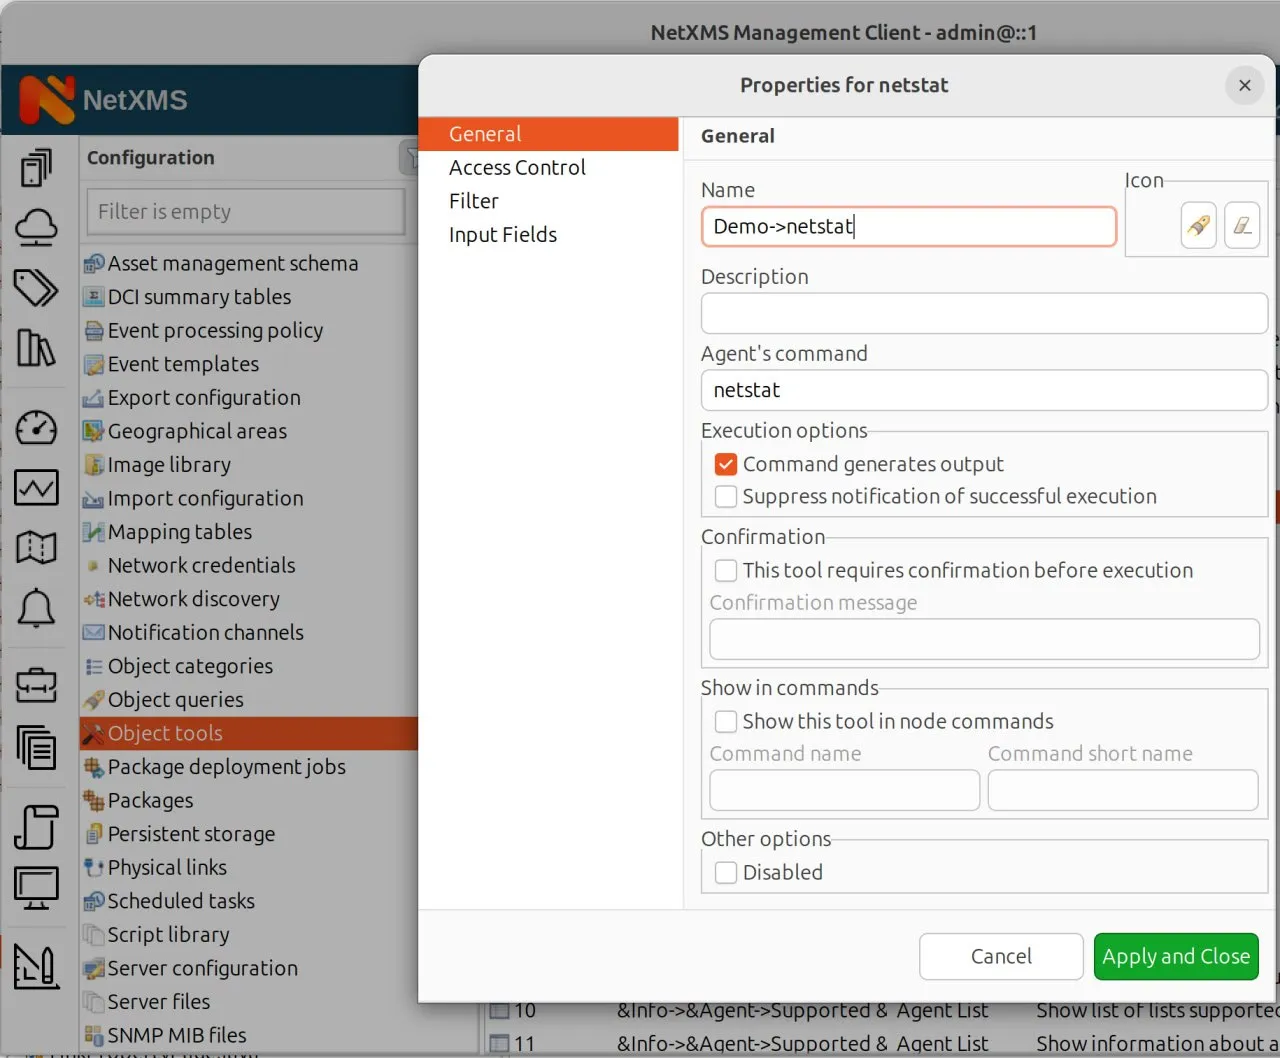
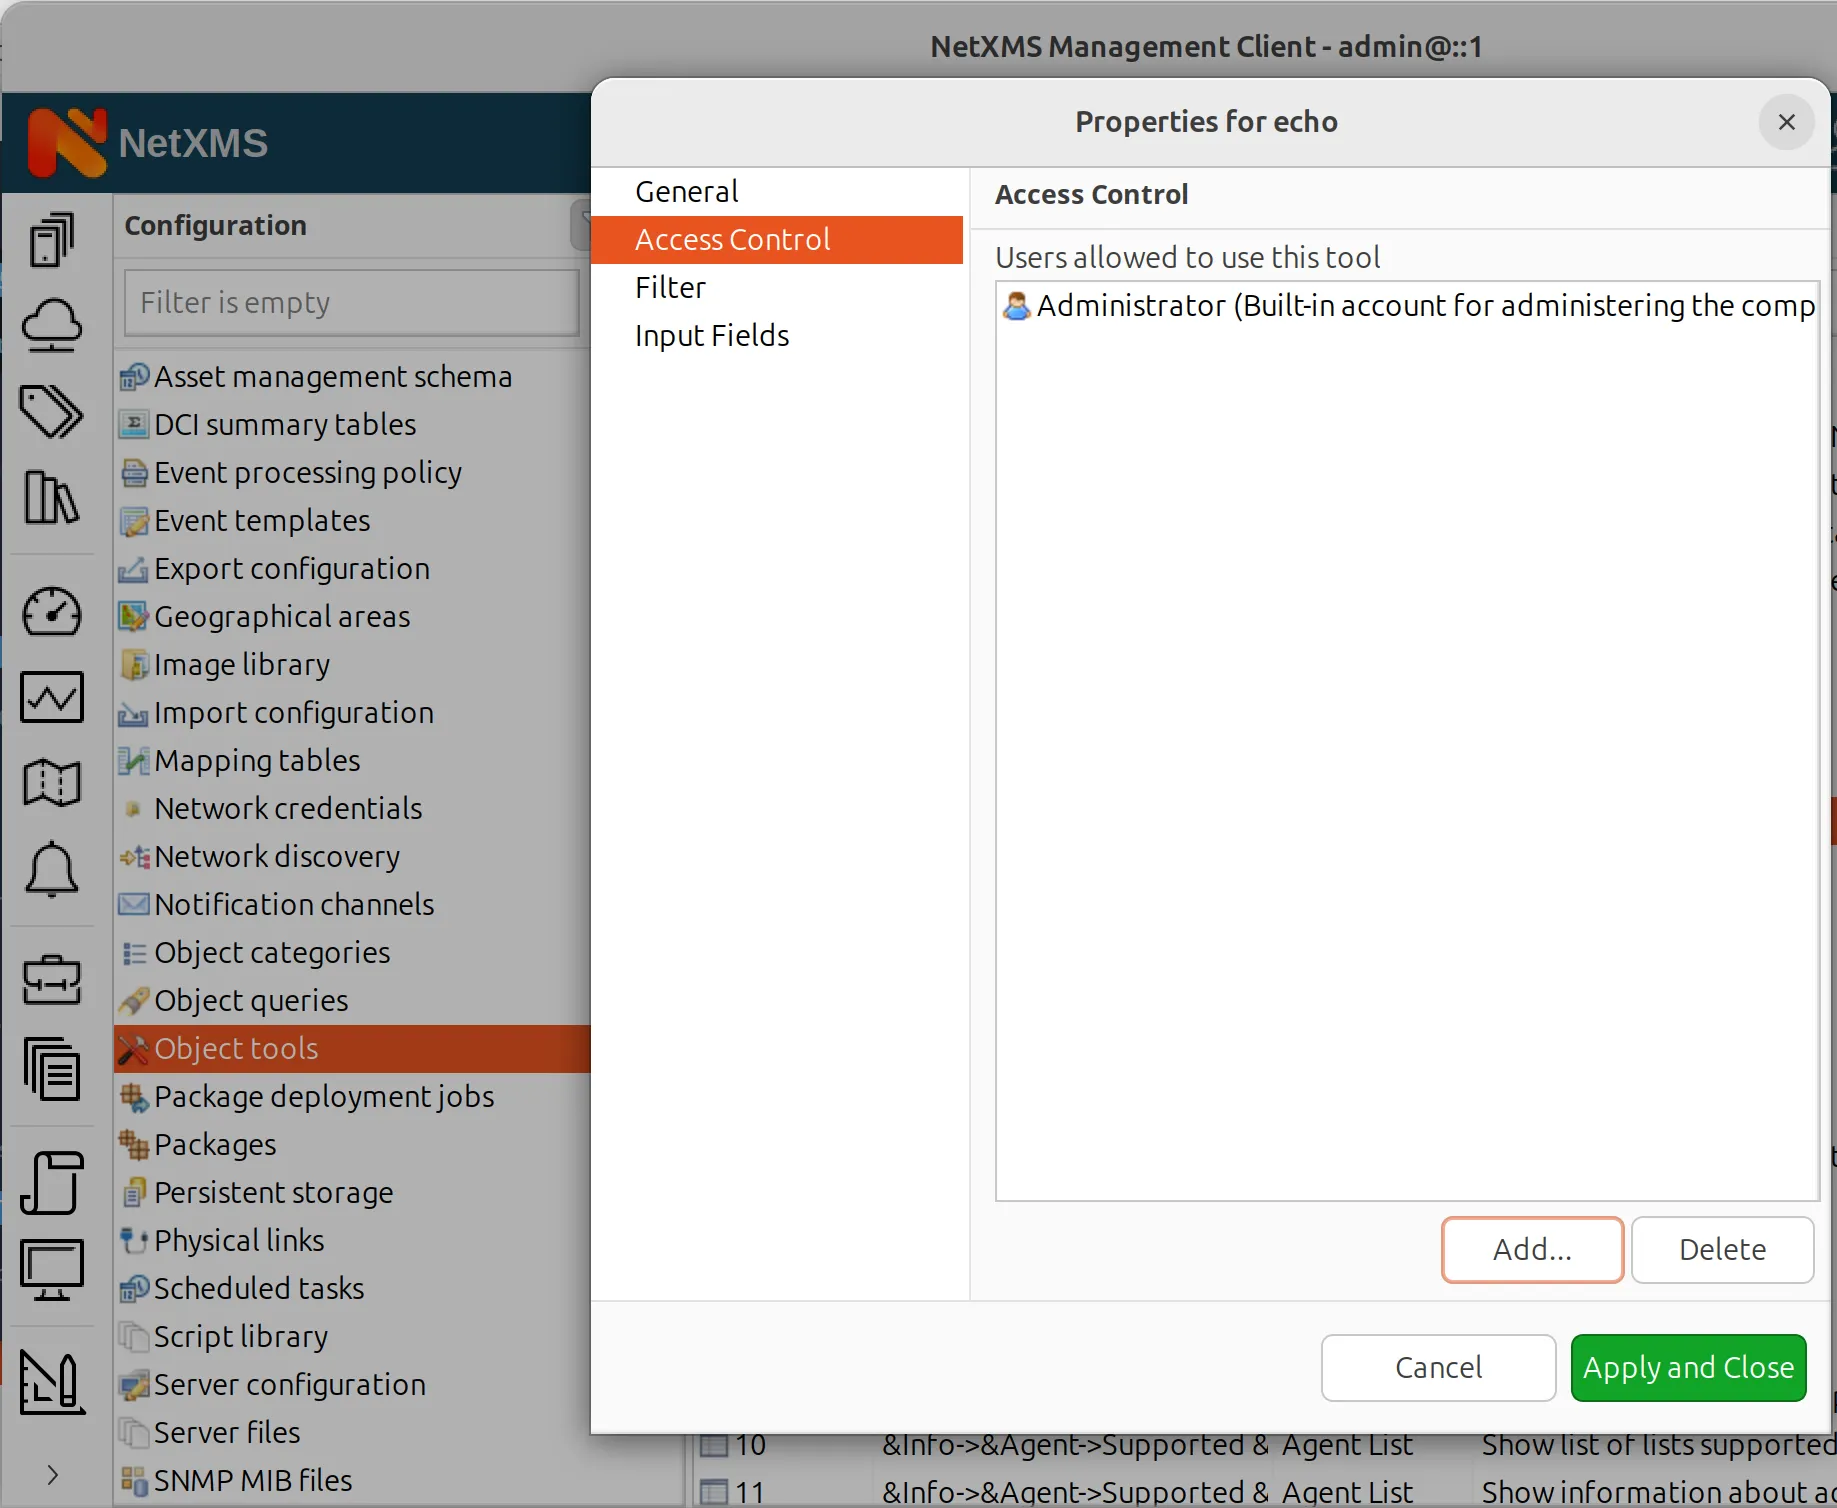
Configuring Object Tools
To access actions via object tools:
- Navigate to Configuration → Object Tools.
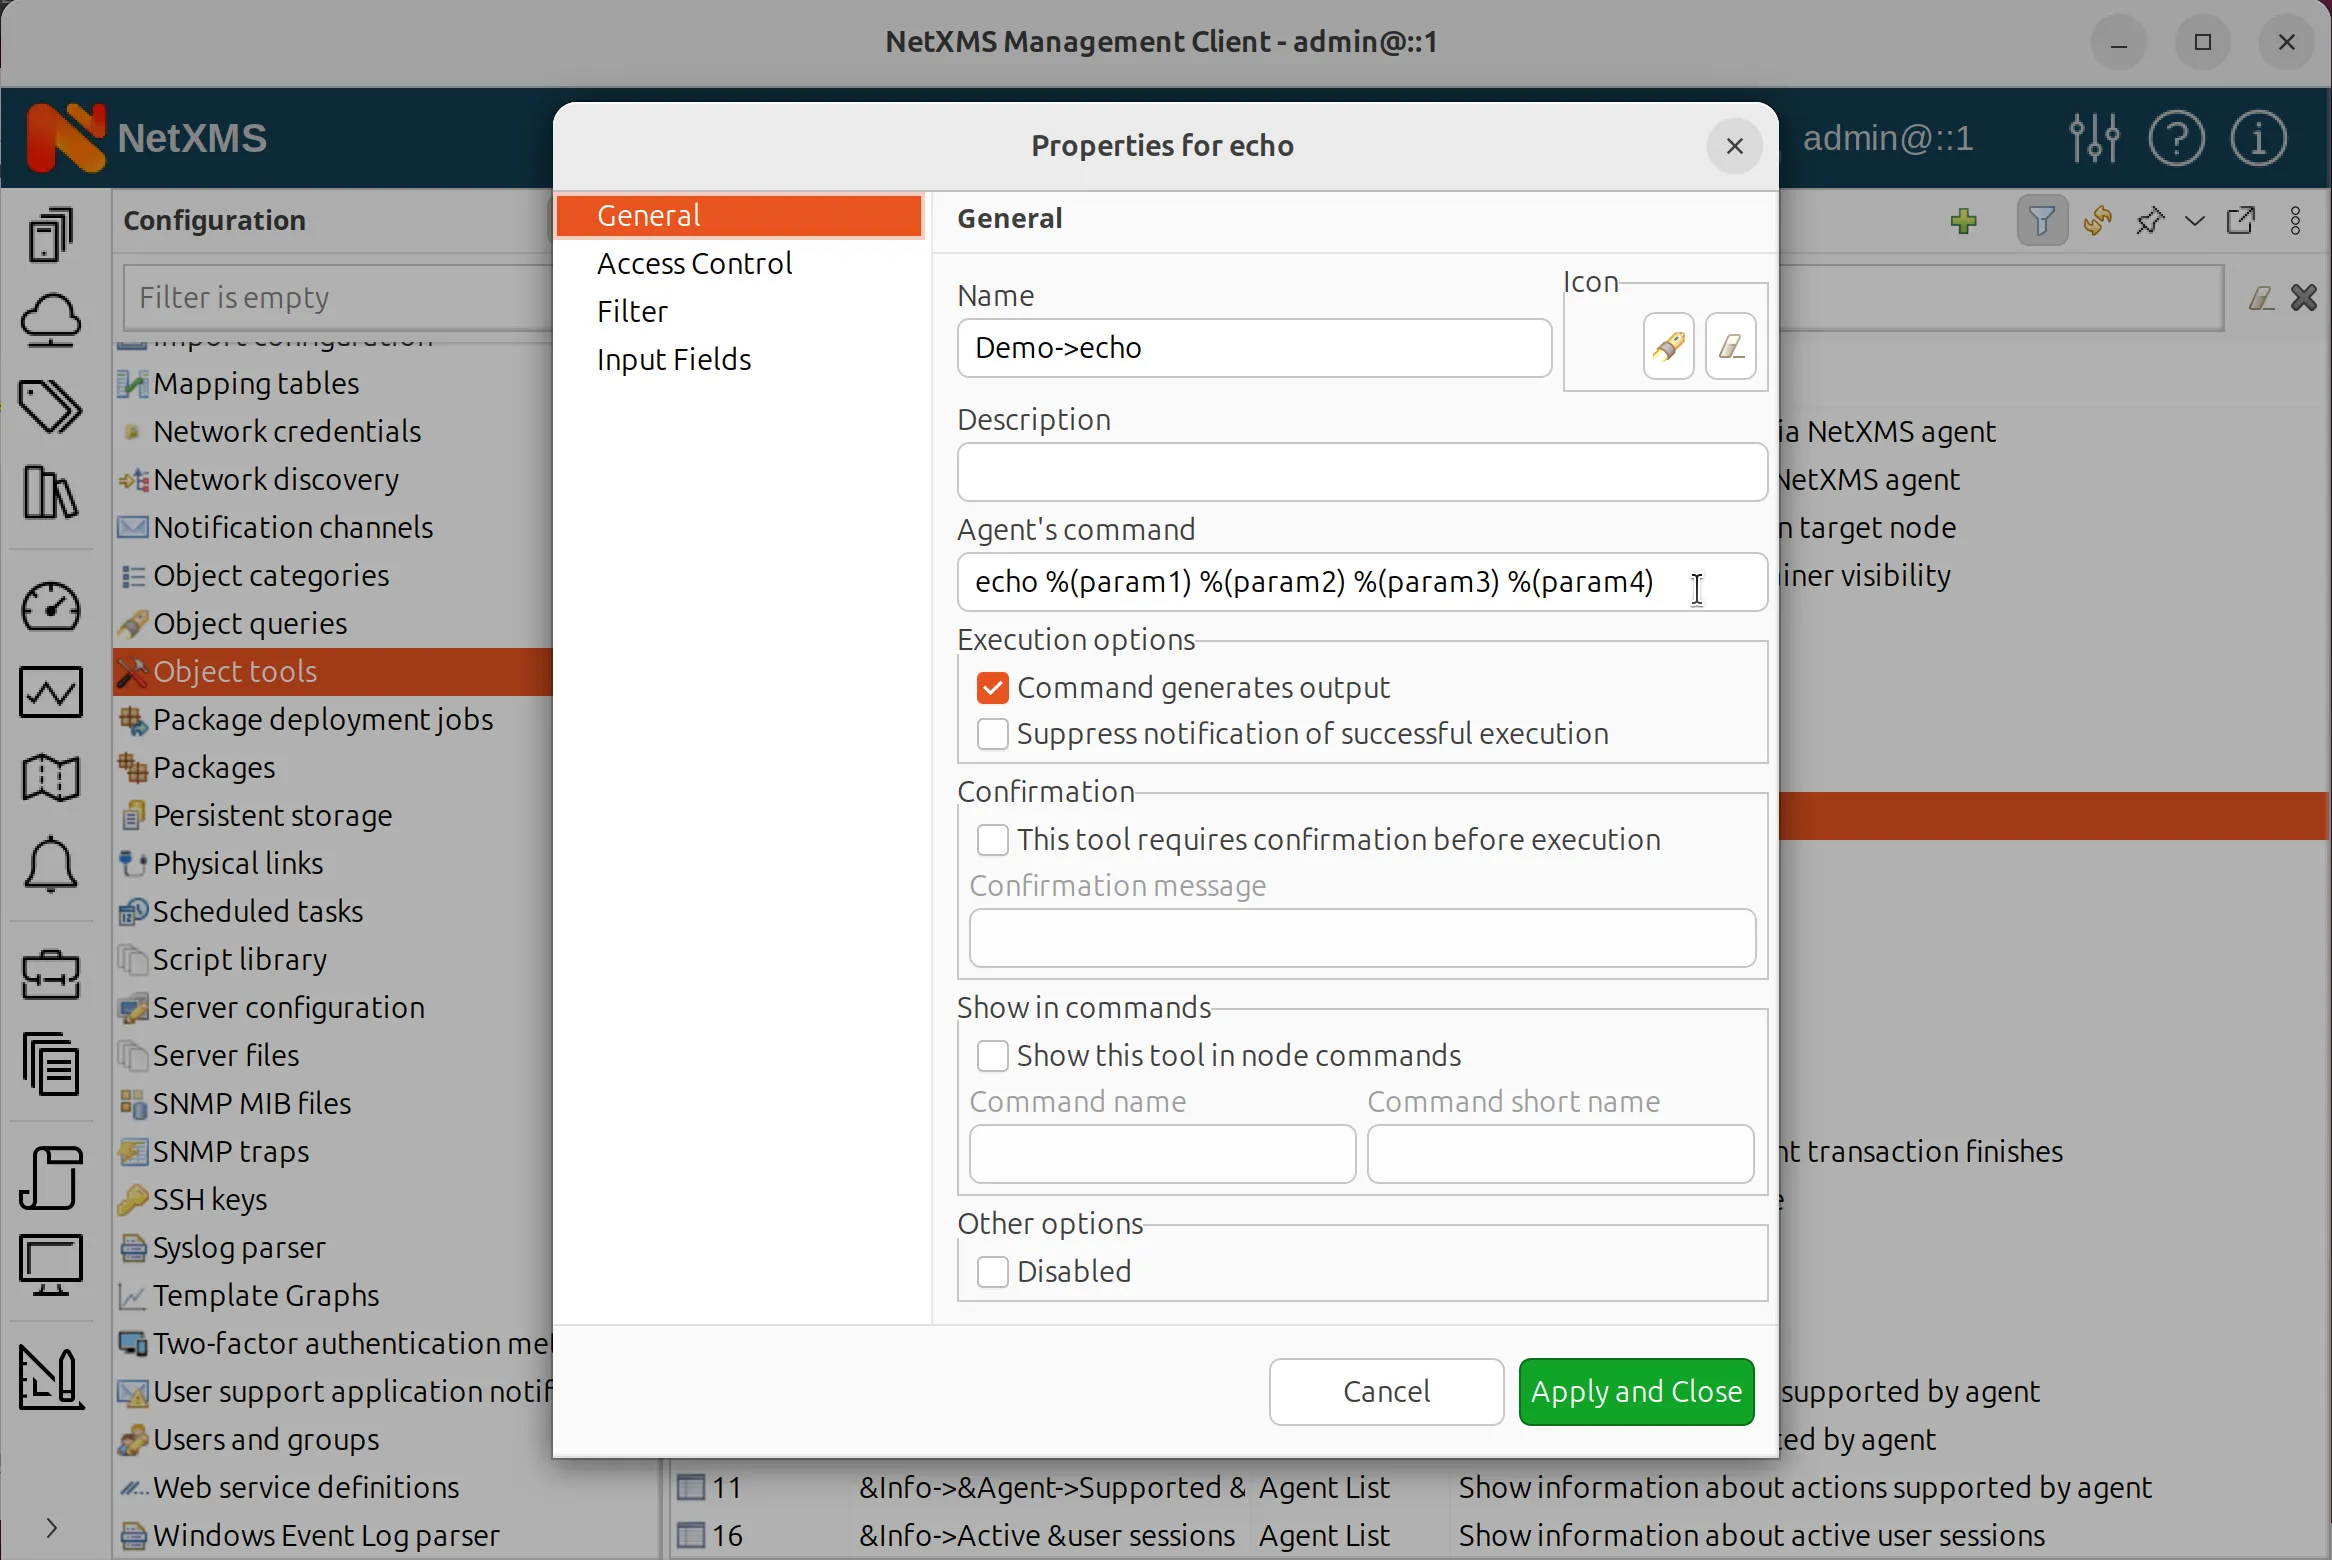
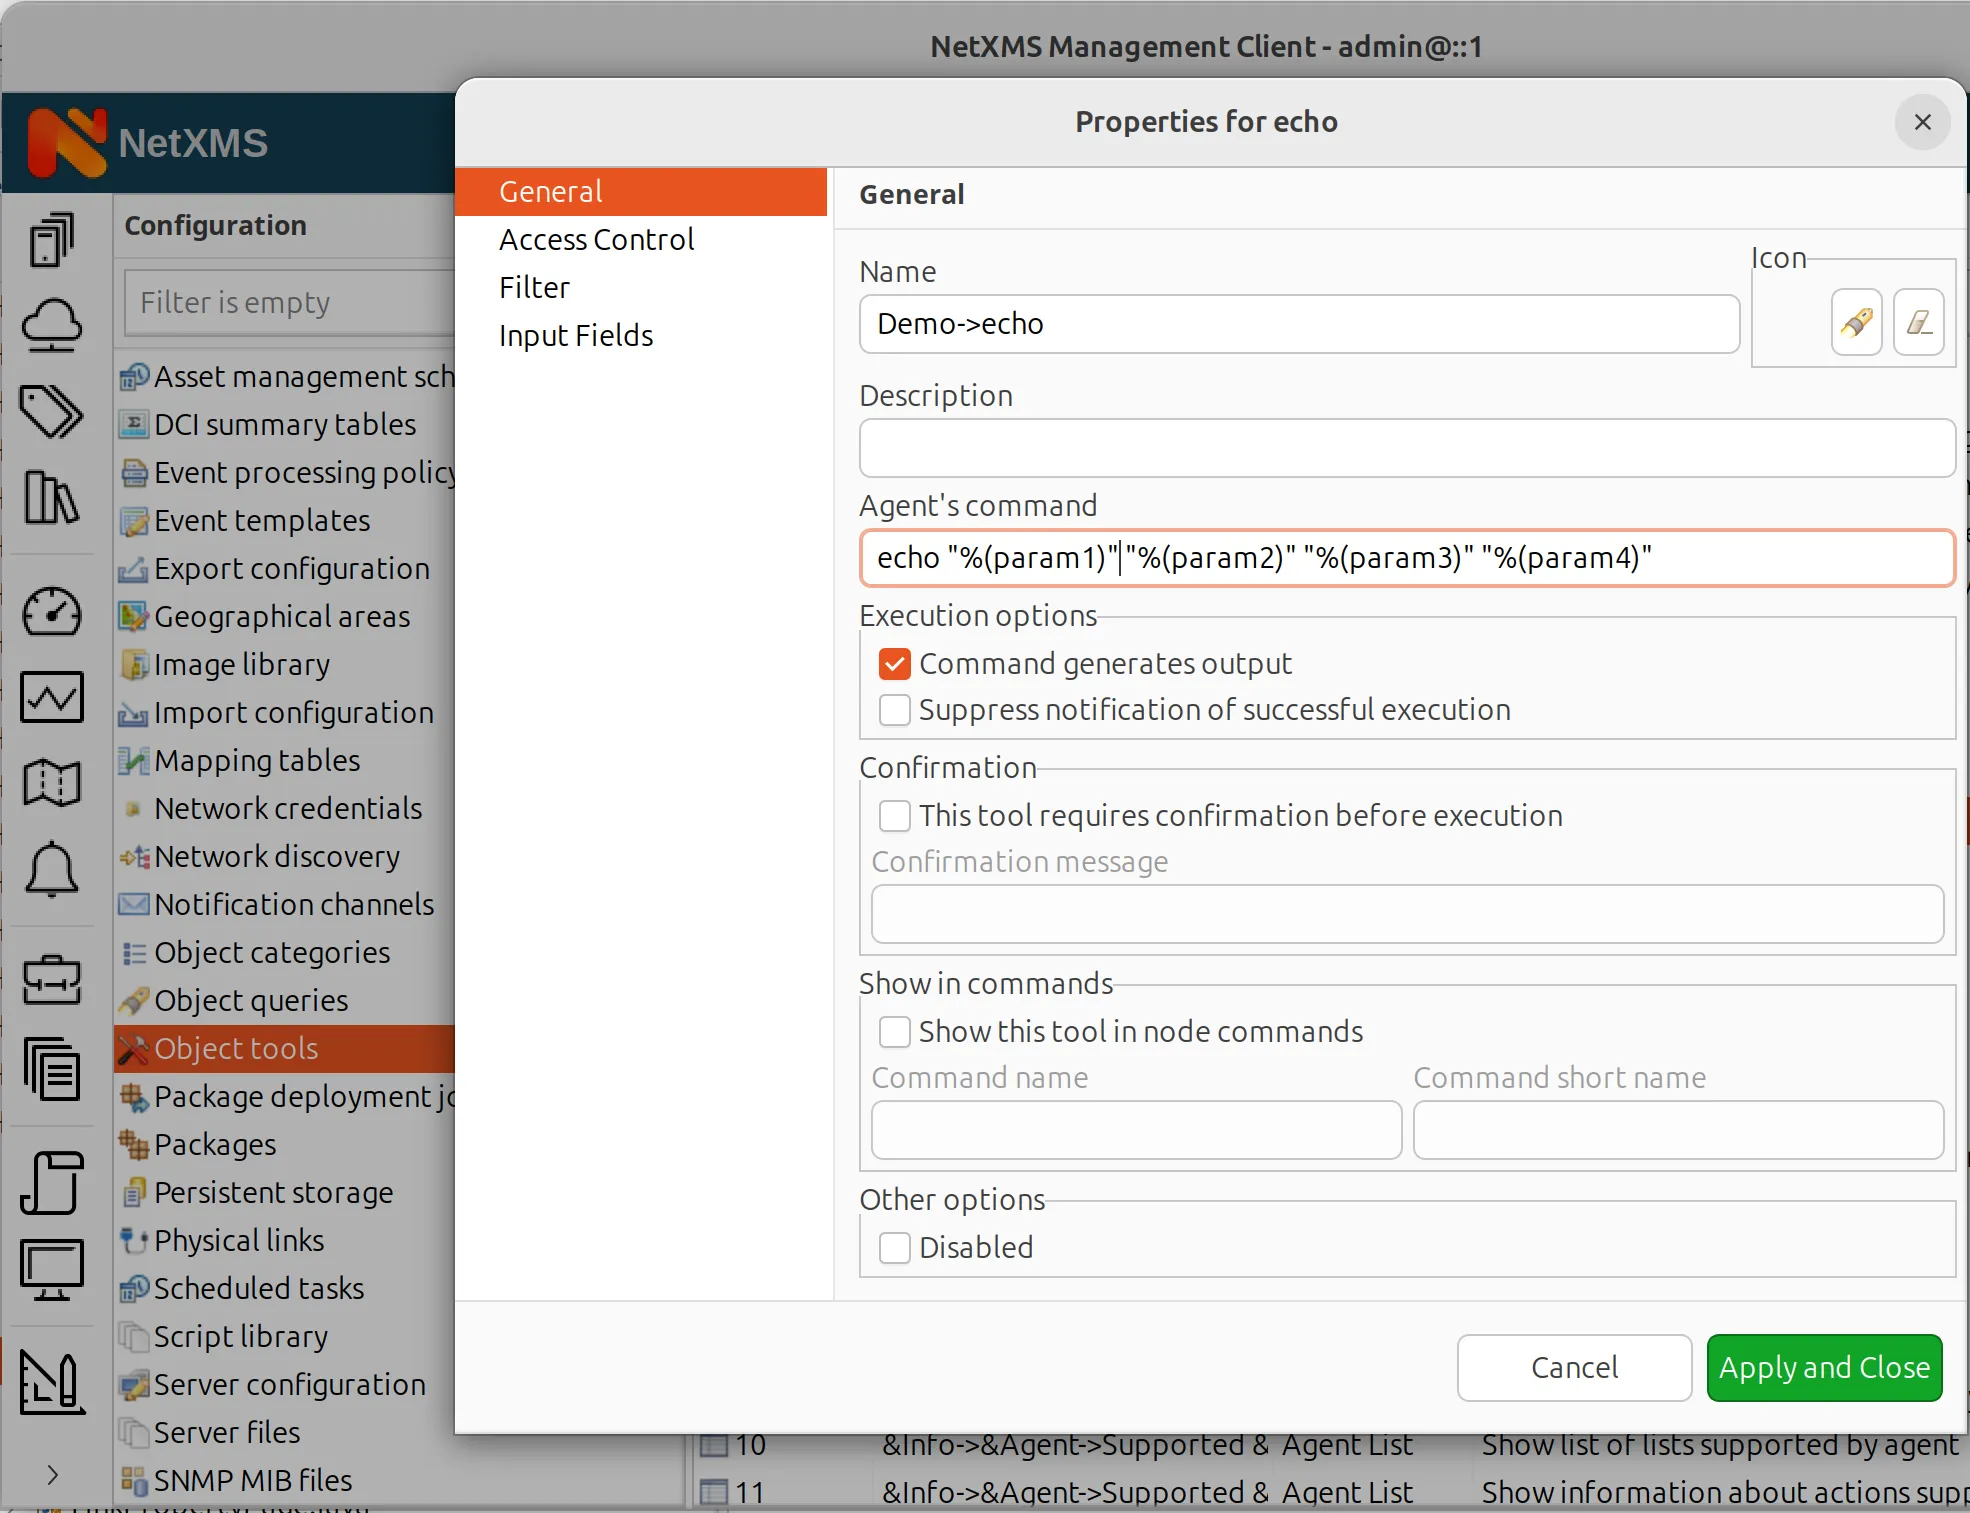
- Define a new tool with the following fields:
- Description: Object tool description.
- Name: The name displayed in the UI with full path in menu to the object tool.
- Agent’s Command: The corresponding action name with parameters if applicable.
- Output Generation: Defines whether the command generates output.
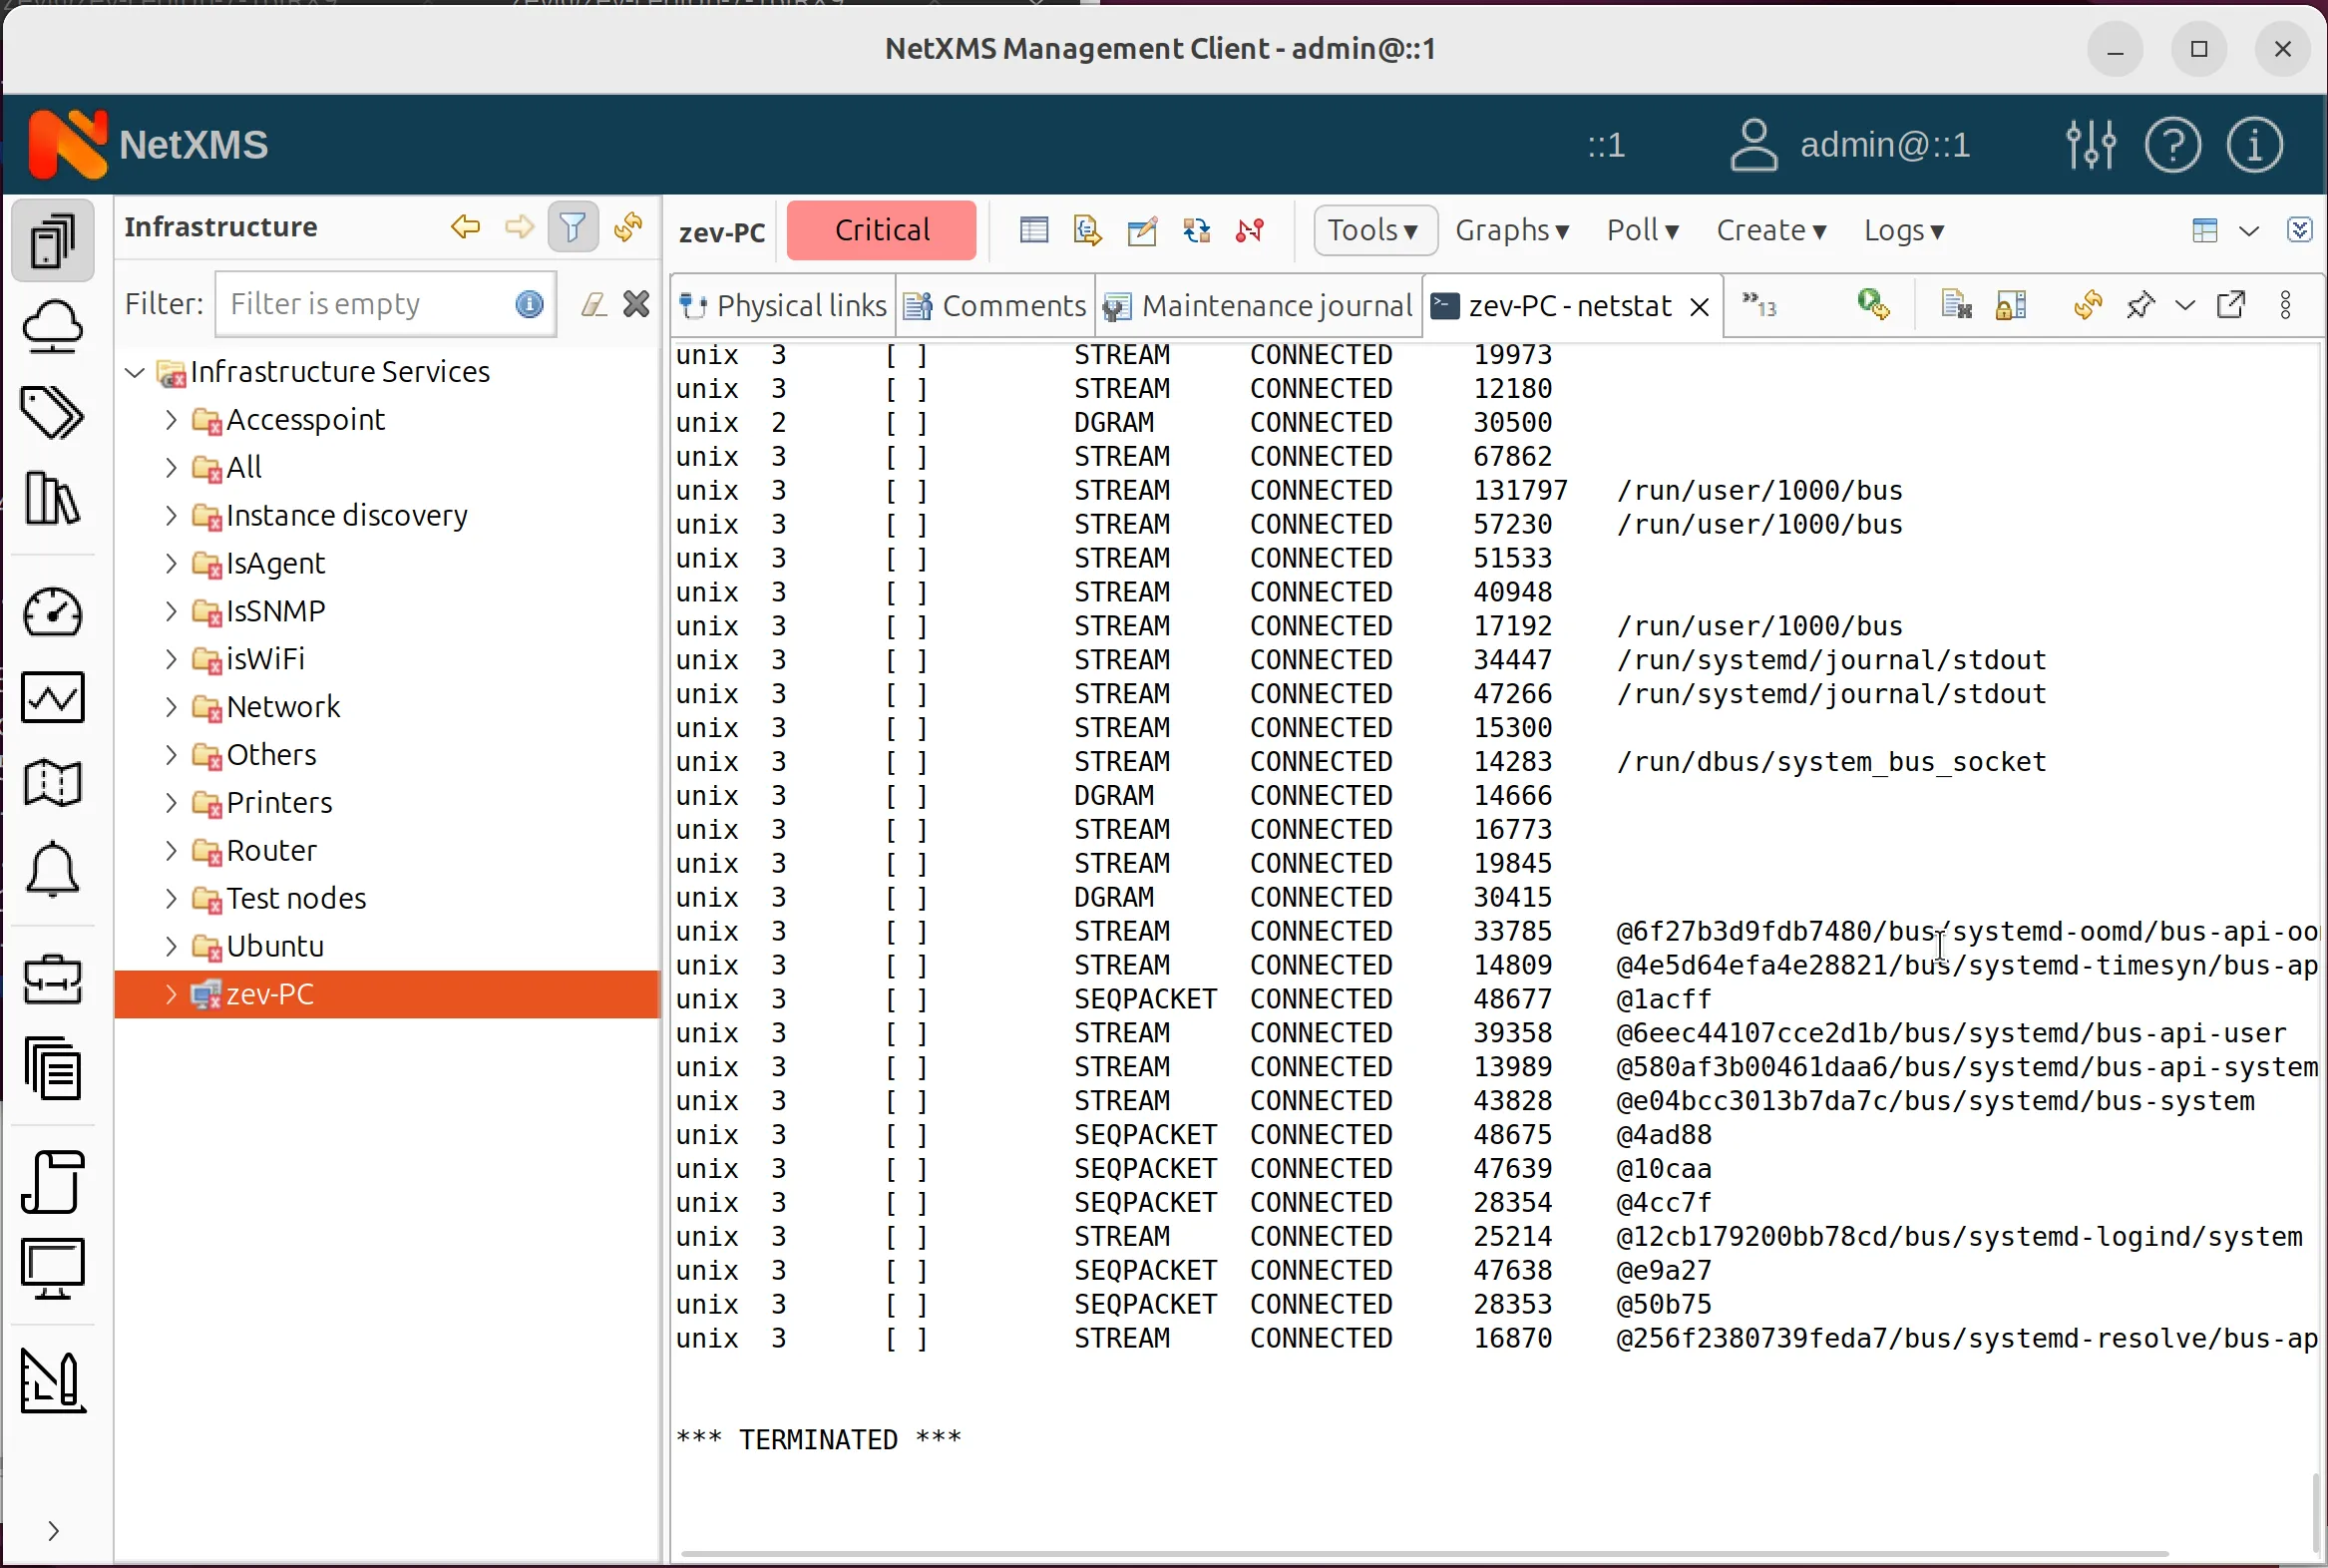
Running Object Tools
After Object Tool was configured it will apear in object menu under “Tools” (with the right-click on the node object). It can aslo be accessed in above menu under “Tools” — just select the required object in the tree.
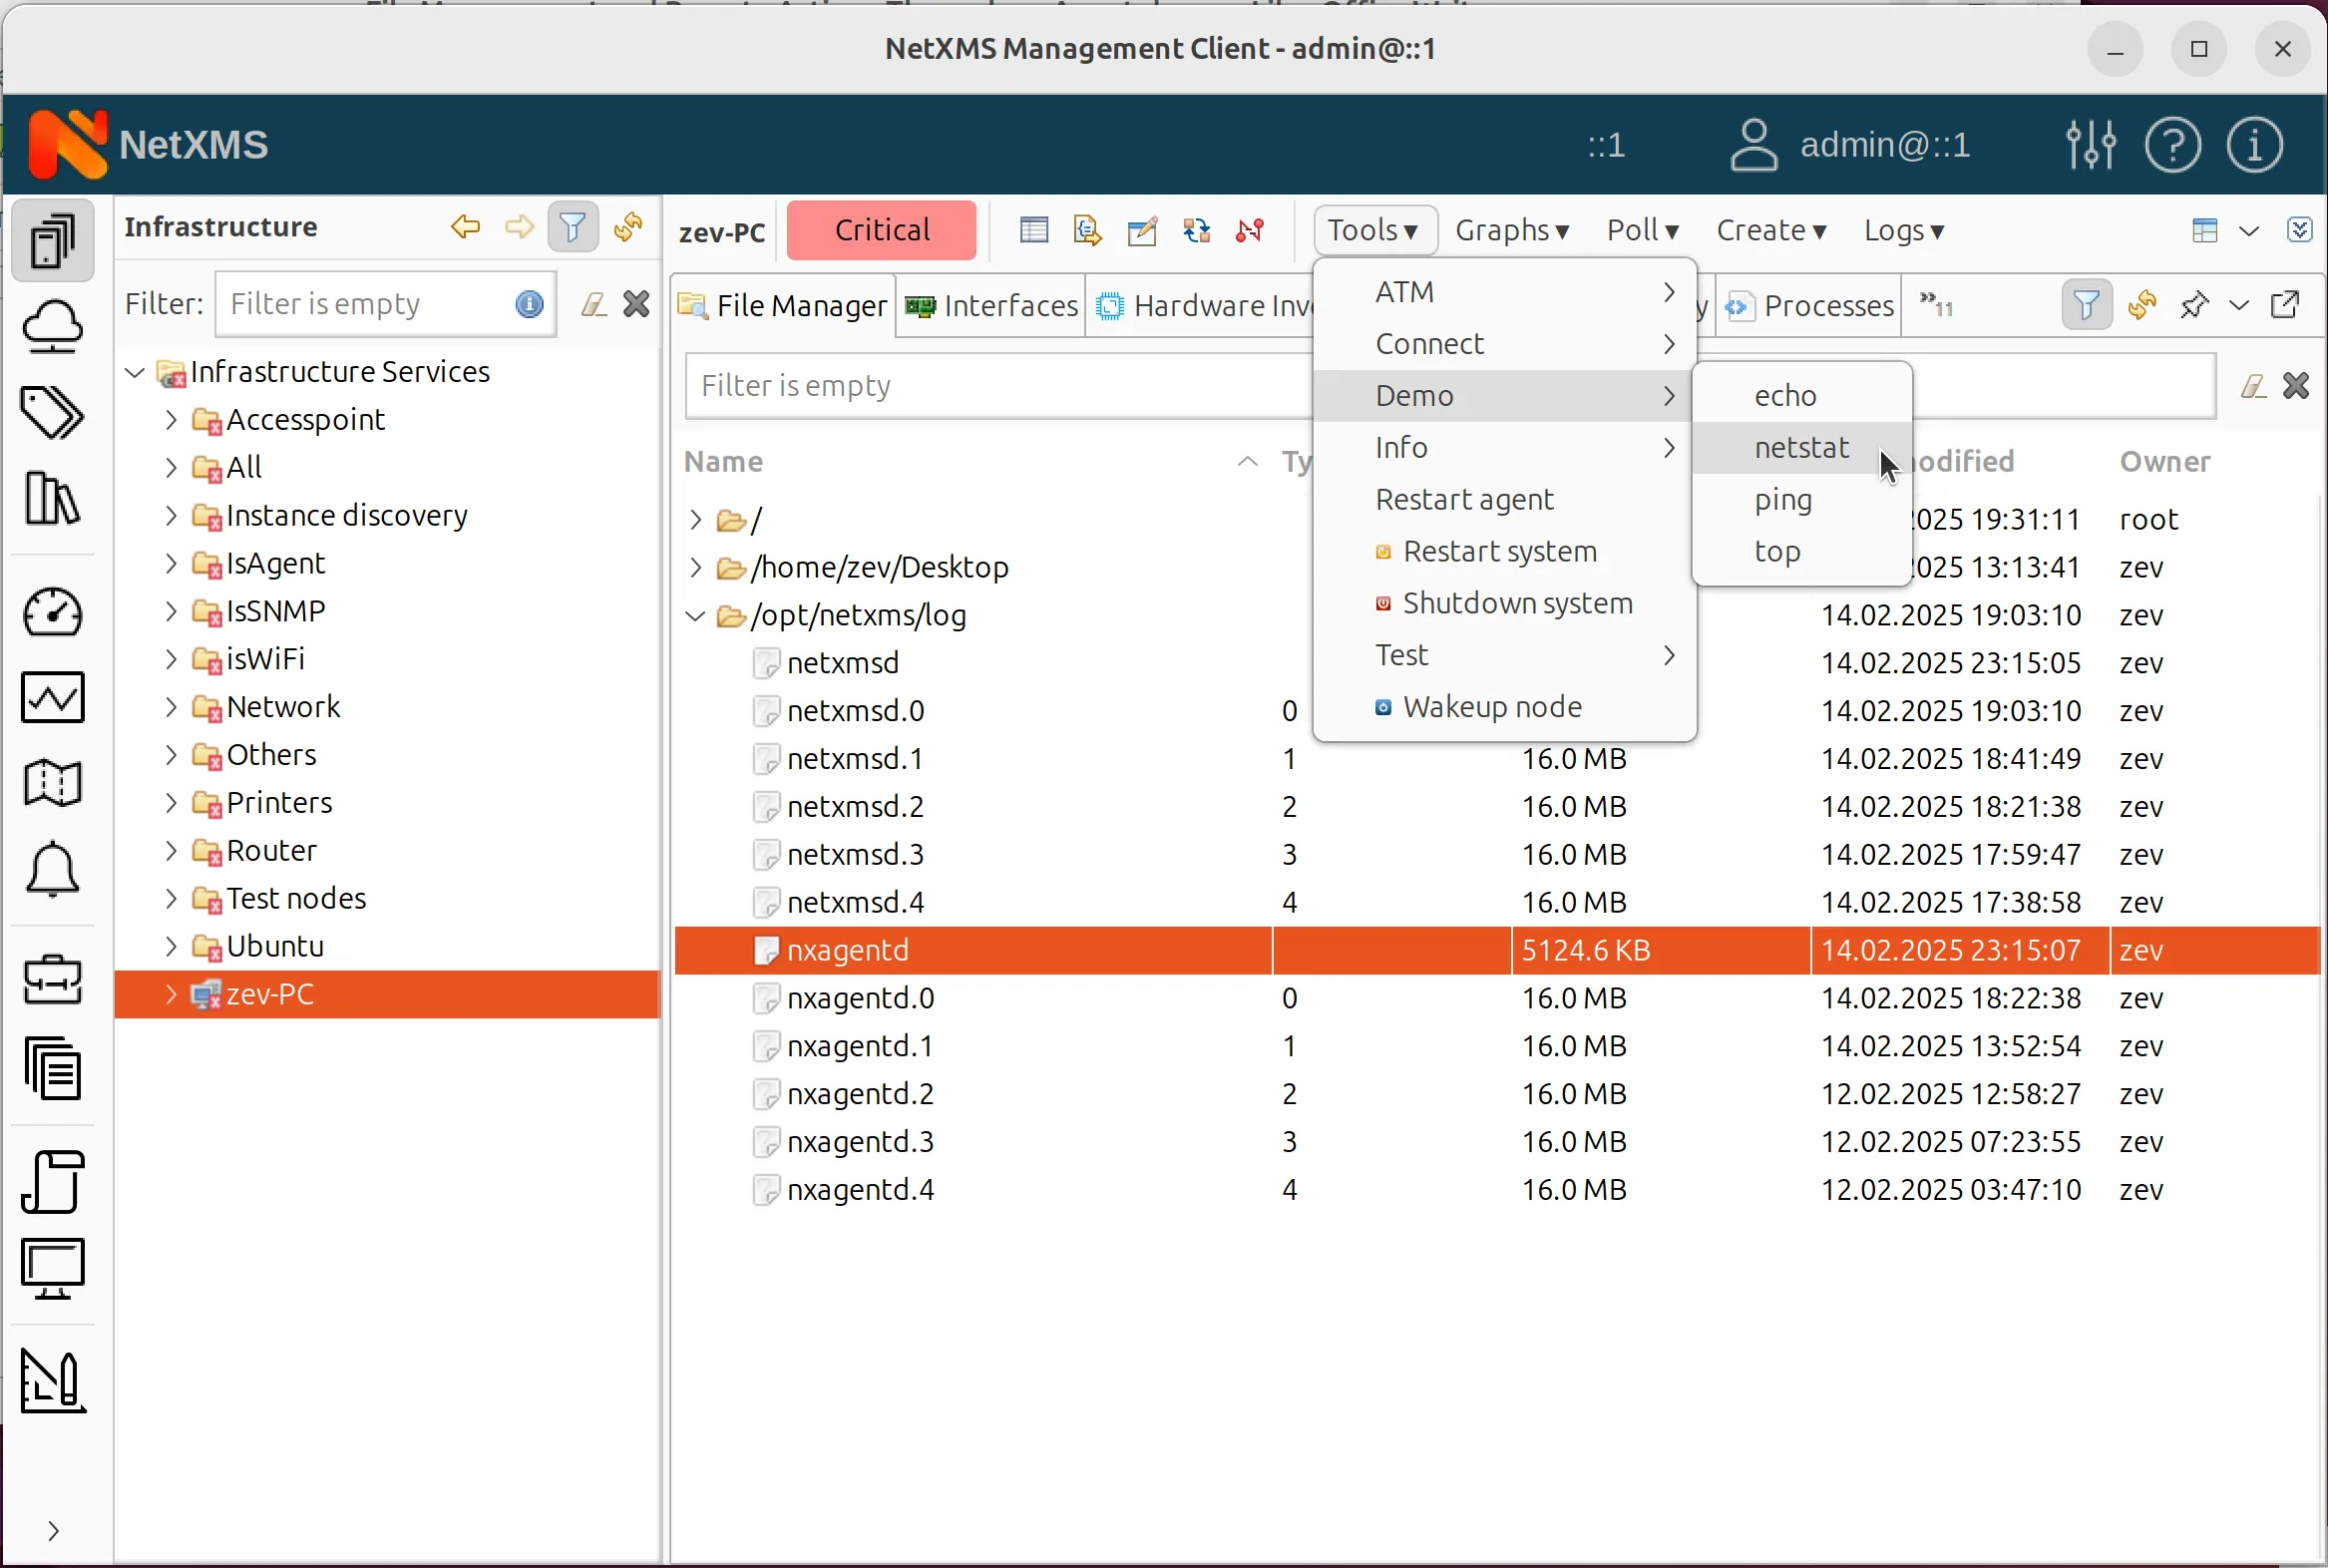
Let’s execute netstat
Handling Execution Timeouts
Yes, actions have a timeout limit. If an action exceeds the allowed time, NetXMS terminates it.
This timeout can be adjusted in the agent configuration under ExternalCommandTimeout (default: 5000ms or 5 seconds).
Increasing this value allows longer-running commands to complete.
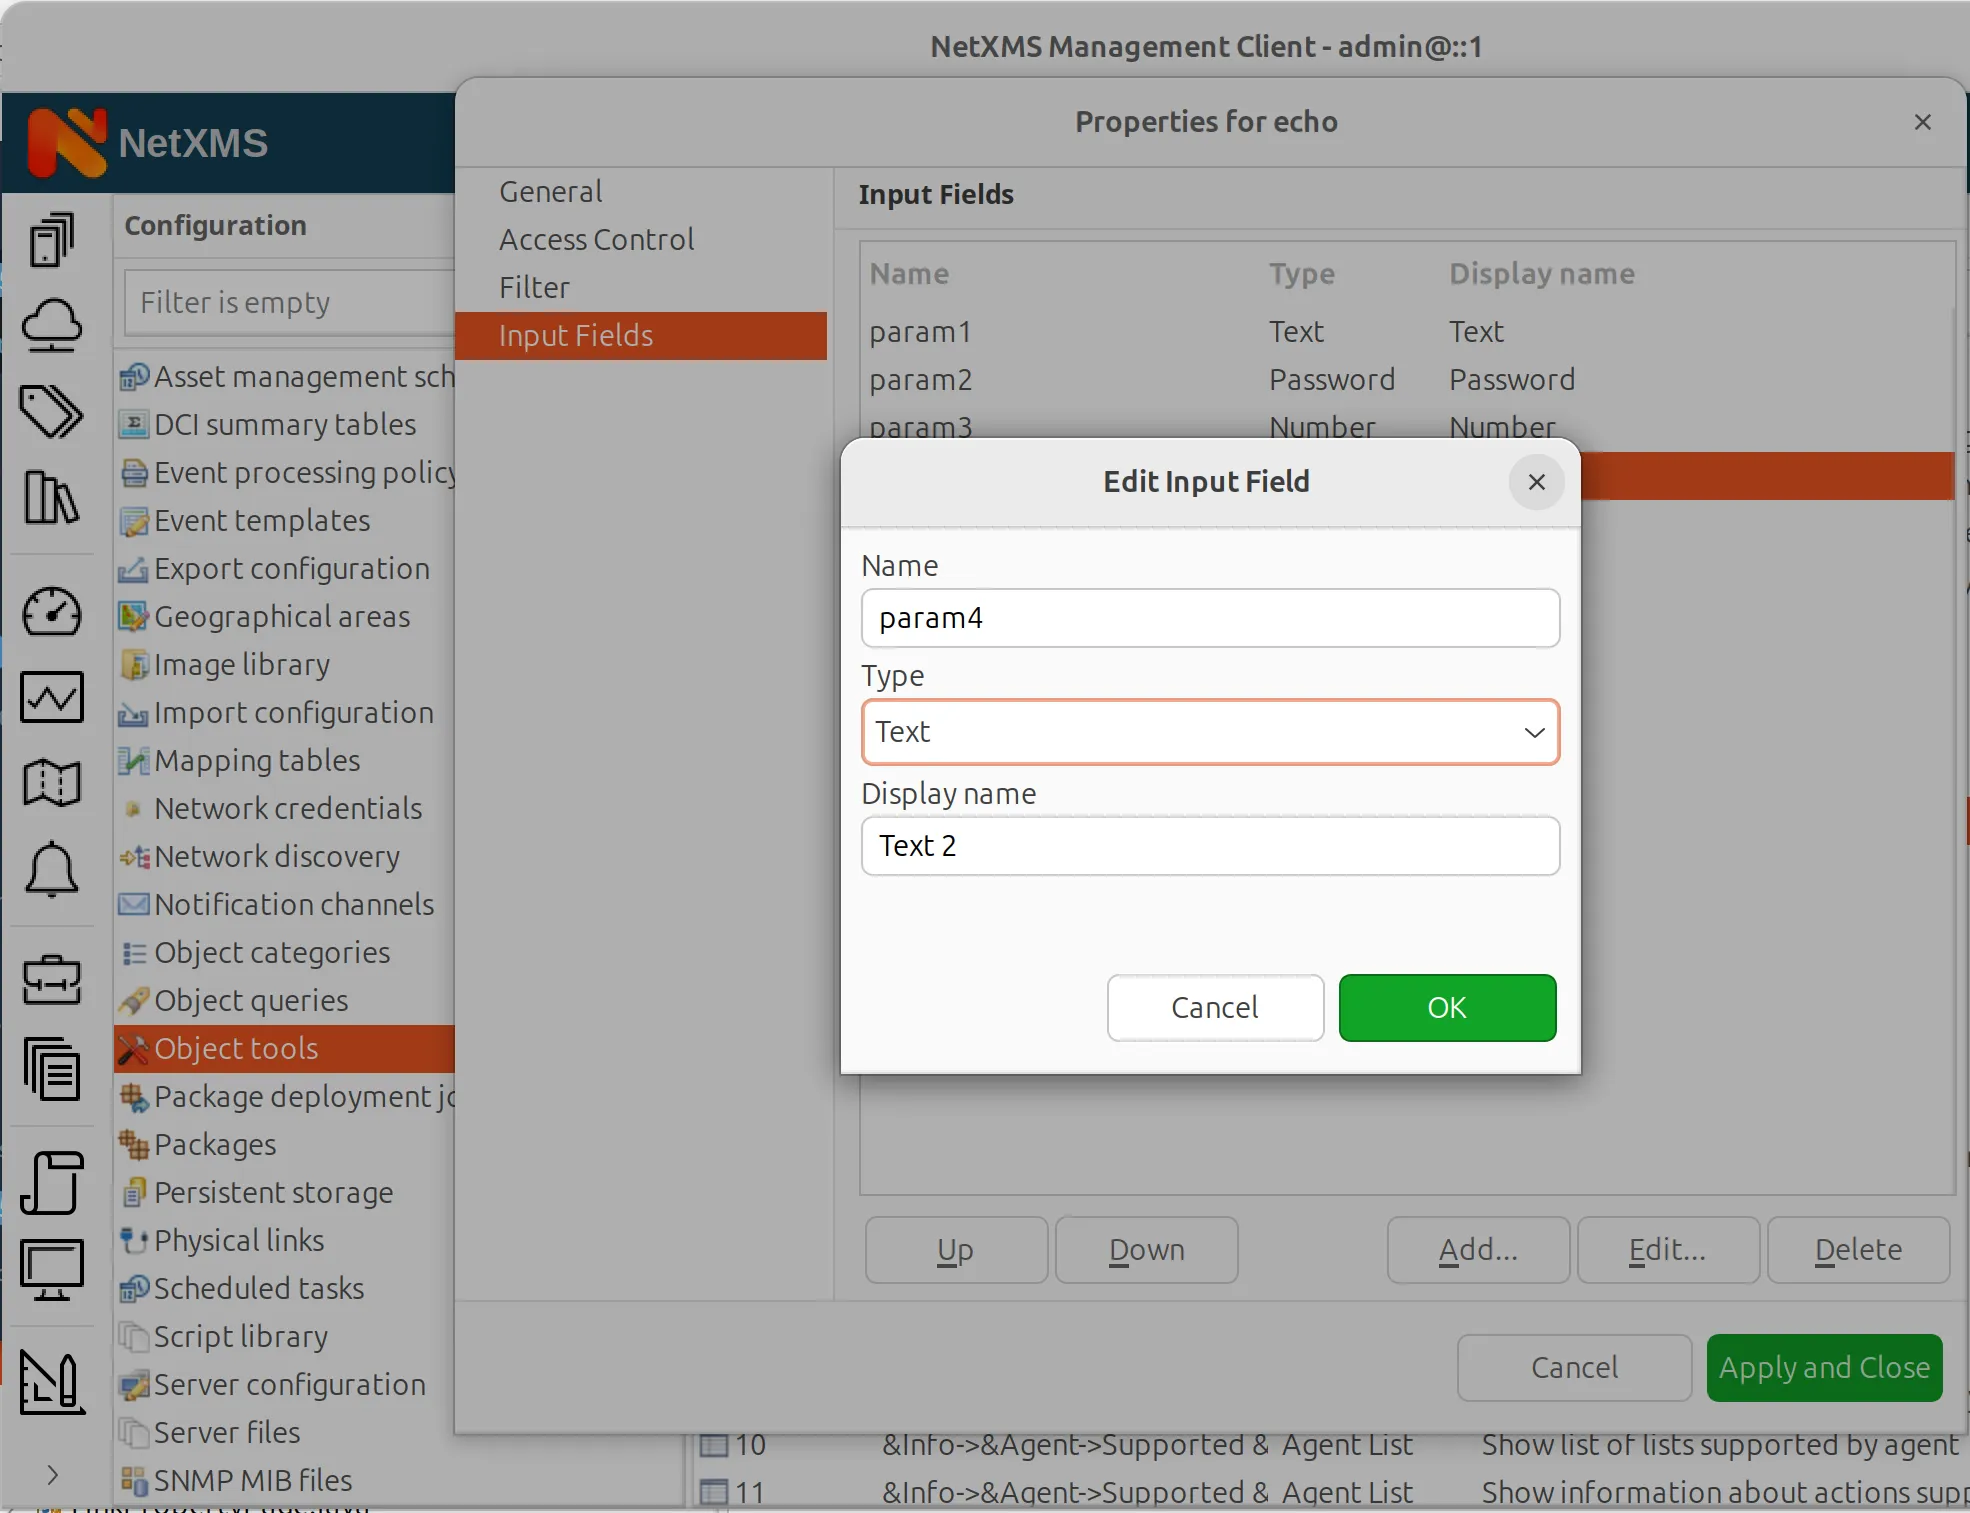
Advanced Input Handling: Echo Command
Let’s explore Object Tool configuration with parameters that can be input by a user. We created an echo command to showcase different input field types.
In the input fields property page, we create four fields, each containing:
-
Name — that will be used in general property page to place input field as a parameter
This is how parametrised Agent’s command will look like in General page: echo %(param1) %(param2) %(param3) %(param4)
Here, “param1”, “param2”, “param3”, and “param4” are Names.
-
Type — the type of a field for data entry
The input field types are:
- Text field – free form text
- Password field – shows stars when entered and is masked in logs
- Number field – filed that accepts only numver value
-
Display name — the name that will be displayed to user on object tool execution.

When input fields are defined, let’s add them as parameters to the Agent’s command. Parameters are defined in “Agent’s command” field and are space- separated from each other.
When Object Tool is executed, dialogue window with the required input fields will appear in NetXMS UI.
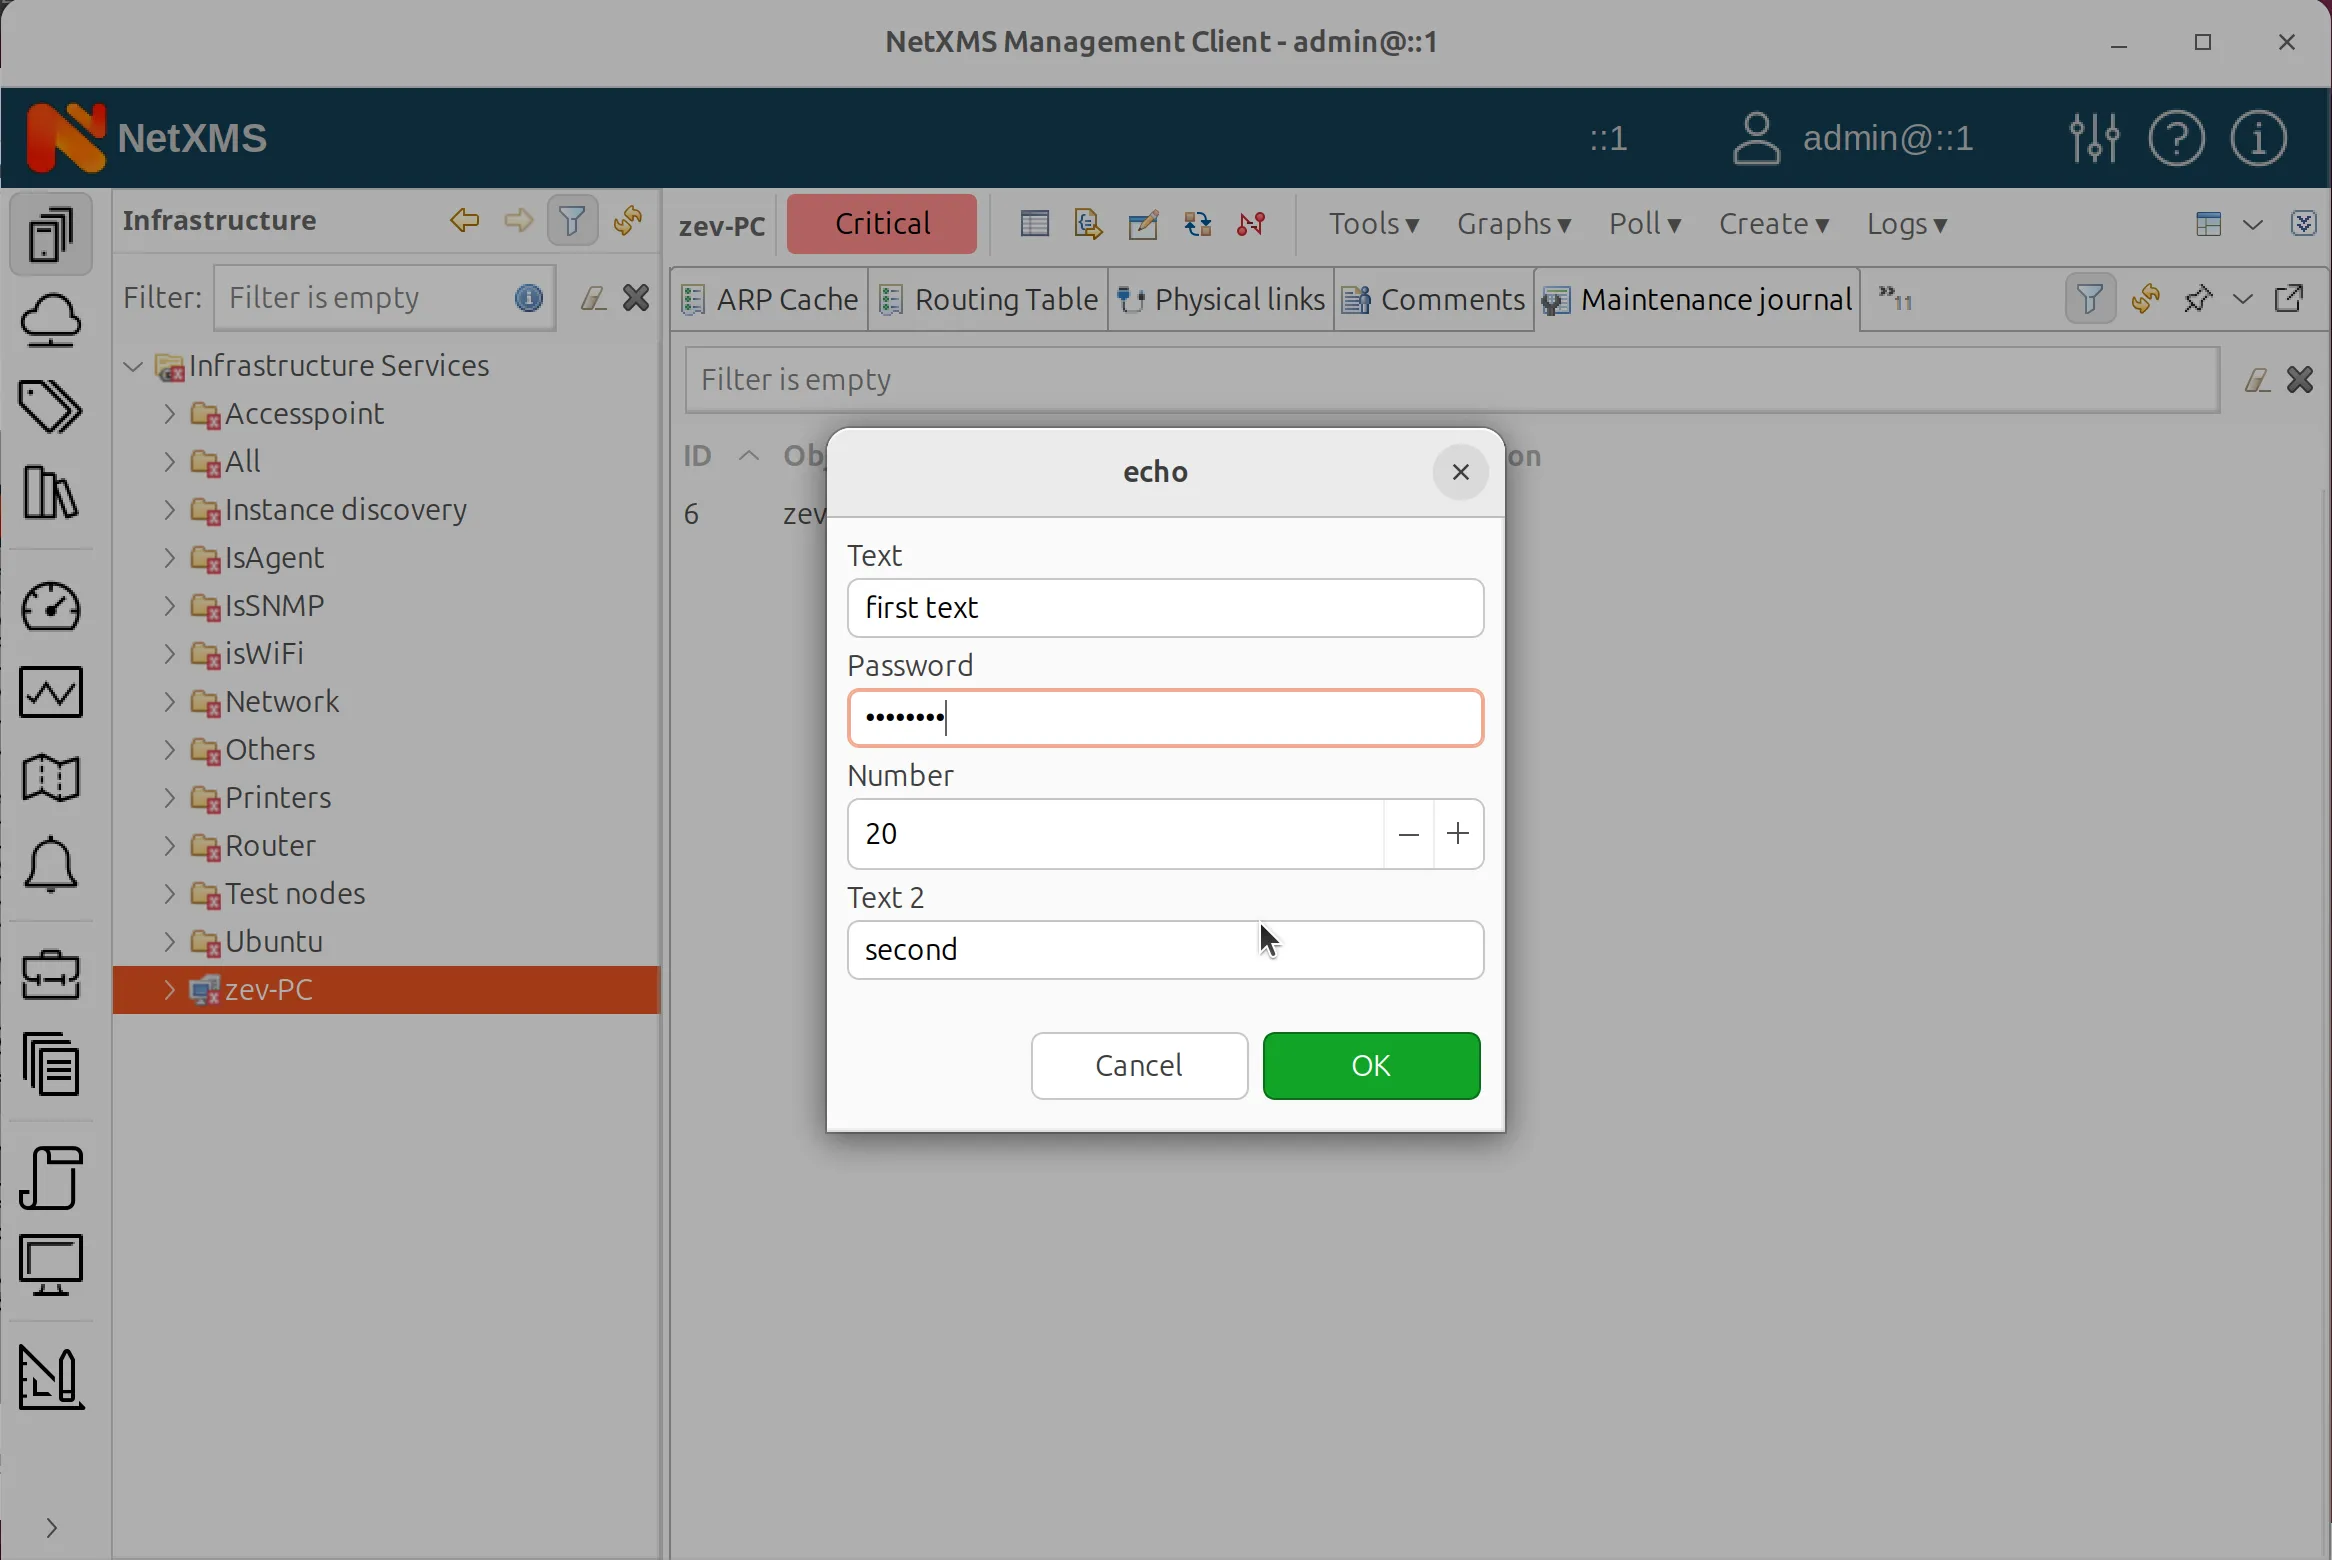
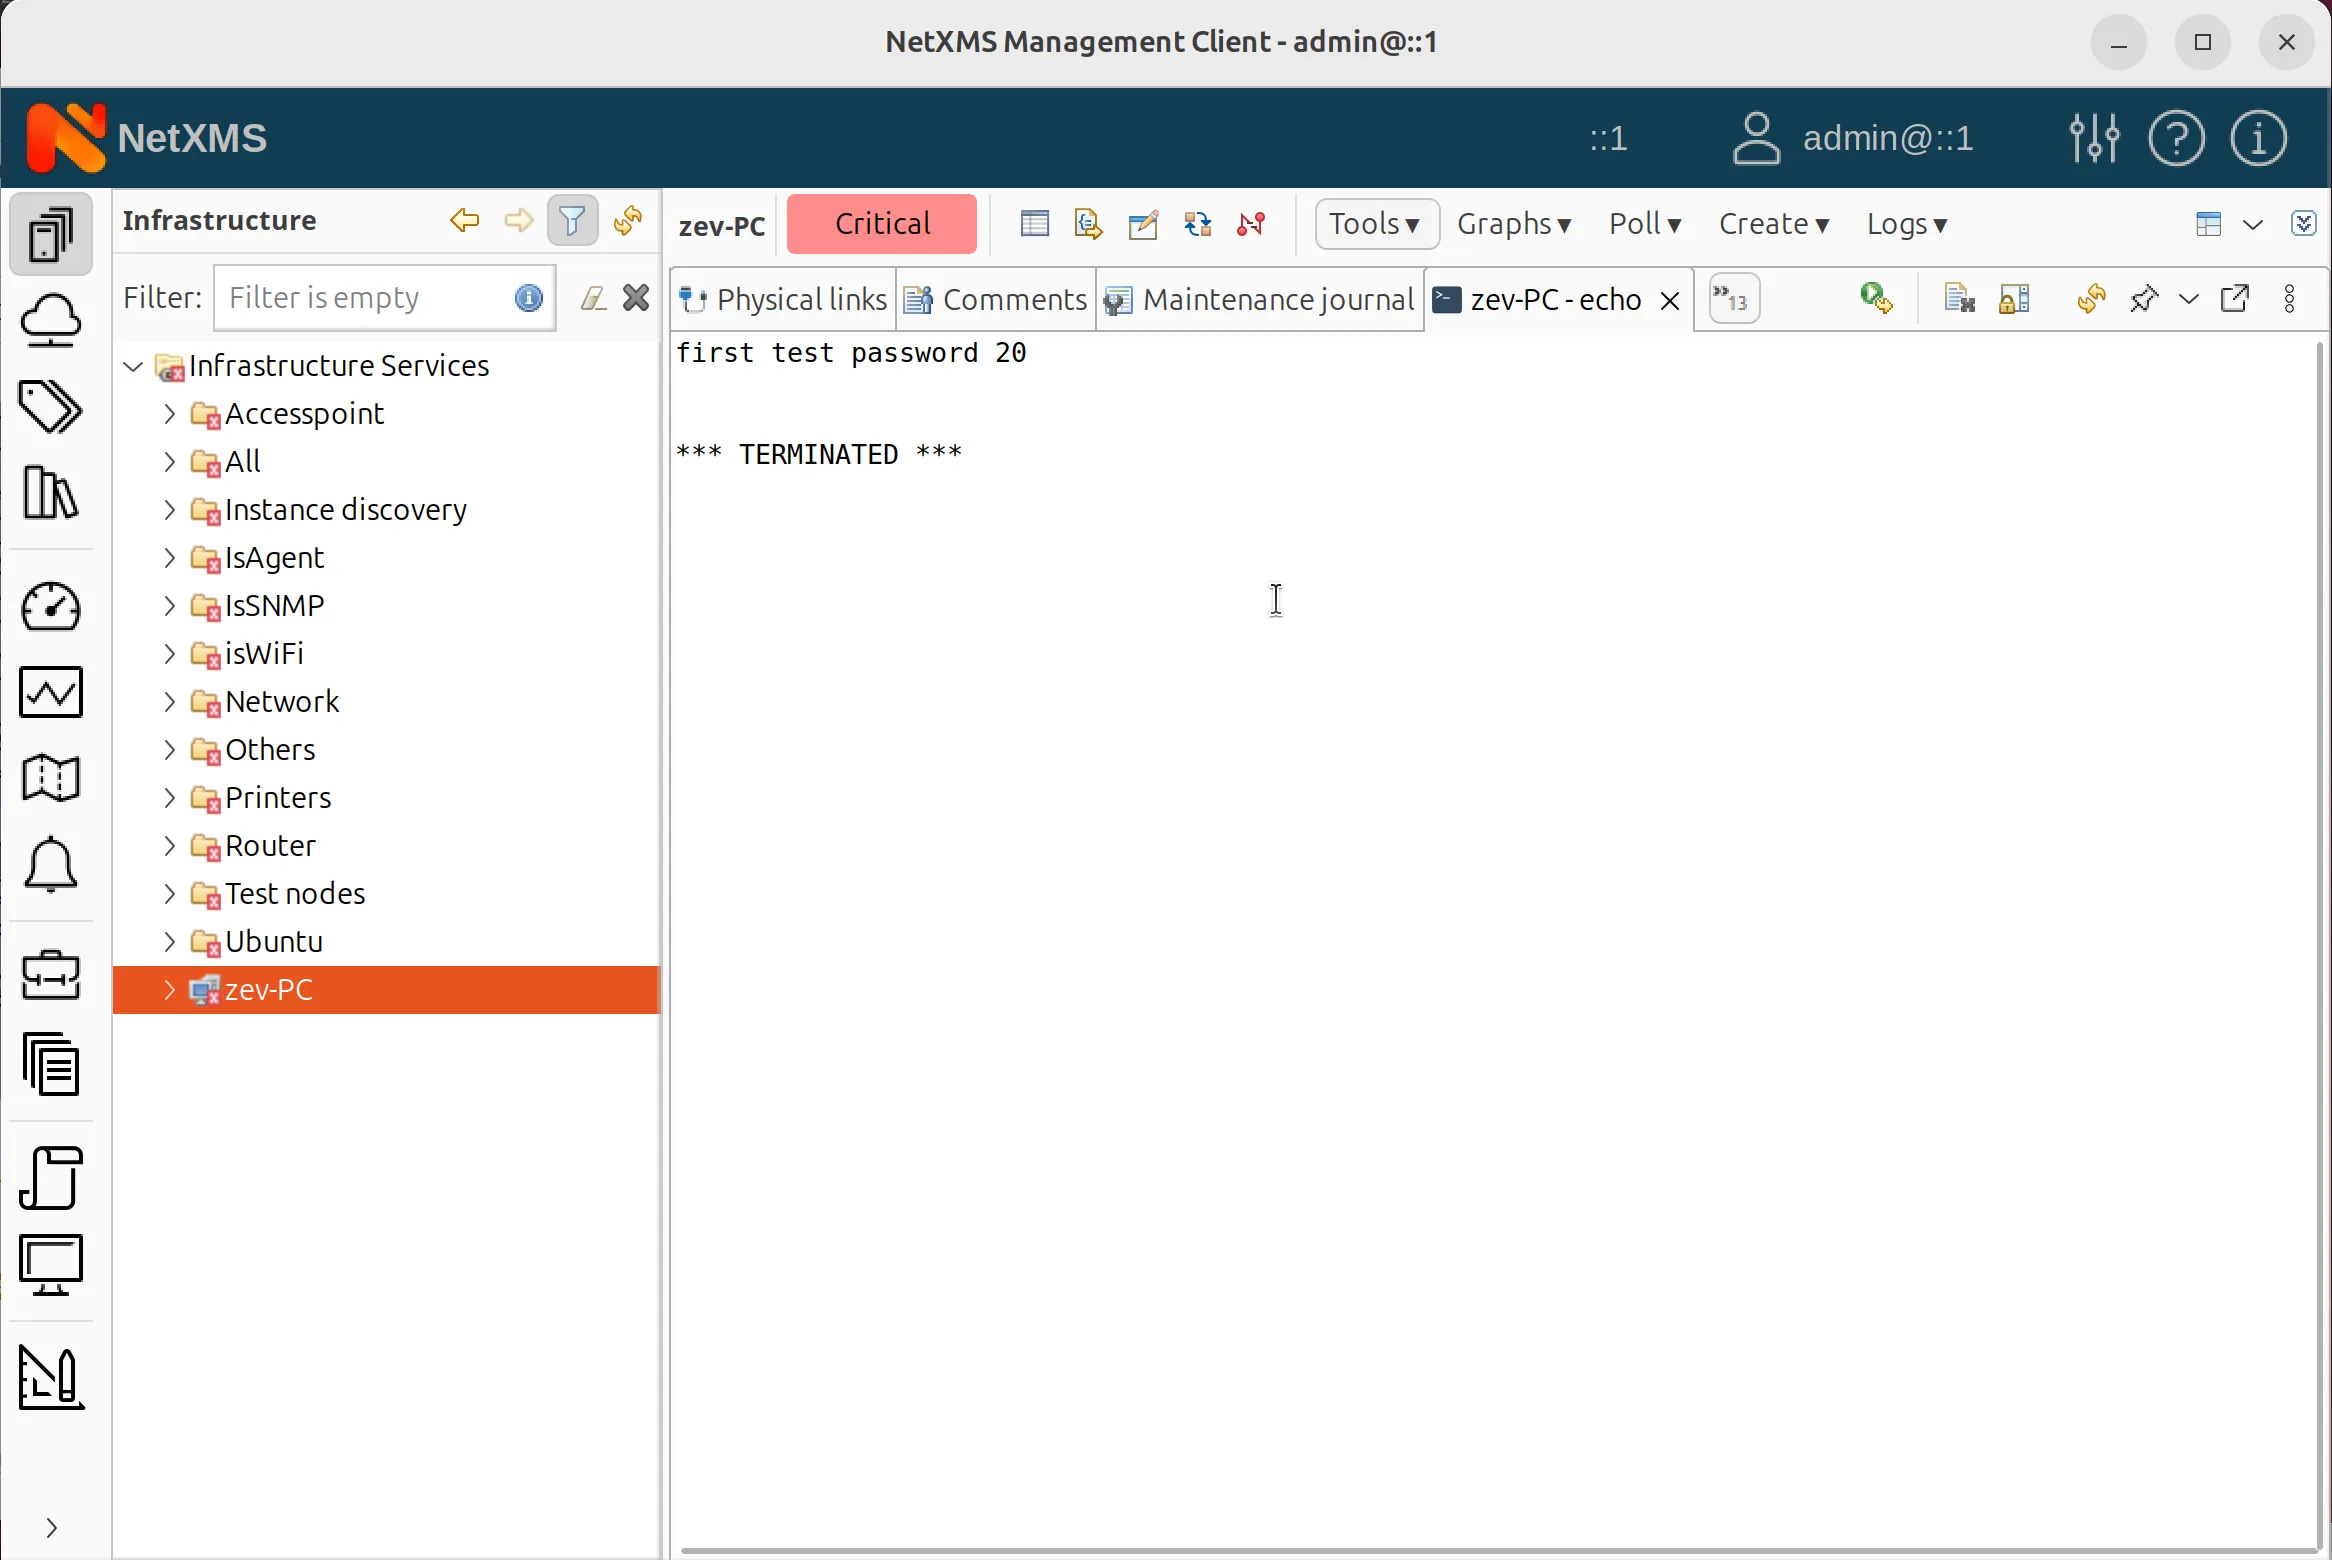
When executing the echo command, the provided by a user text is sent as a parameter. However, an issue may arise when the input contains spaces. In this example fist input filed was interpreted by the command as two separate parameters, because in the Text parameter field there were two words with space in between (“first text”).
Handling Spaces in Input
If a parameter includes spaces, the agent may interpret it as multiple separate parameters, leading to missing parts of the input. For example:
Input: Hello World
Expected: "Hello World" (as one parameter)
Actual: "Hello" (first parameter), "World" (second parameter, possibly omitted)
To ensure the input is treated as a single parameter, it should be enclosed in quotation marks. When this is done, all parts of the input are correctly passed to the agent.
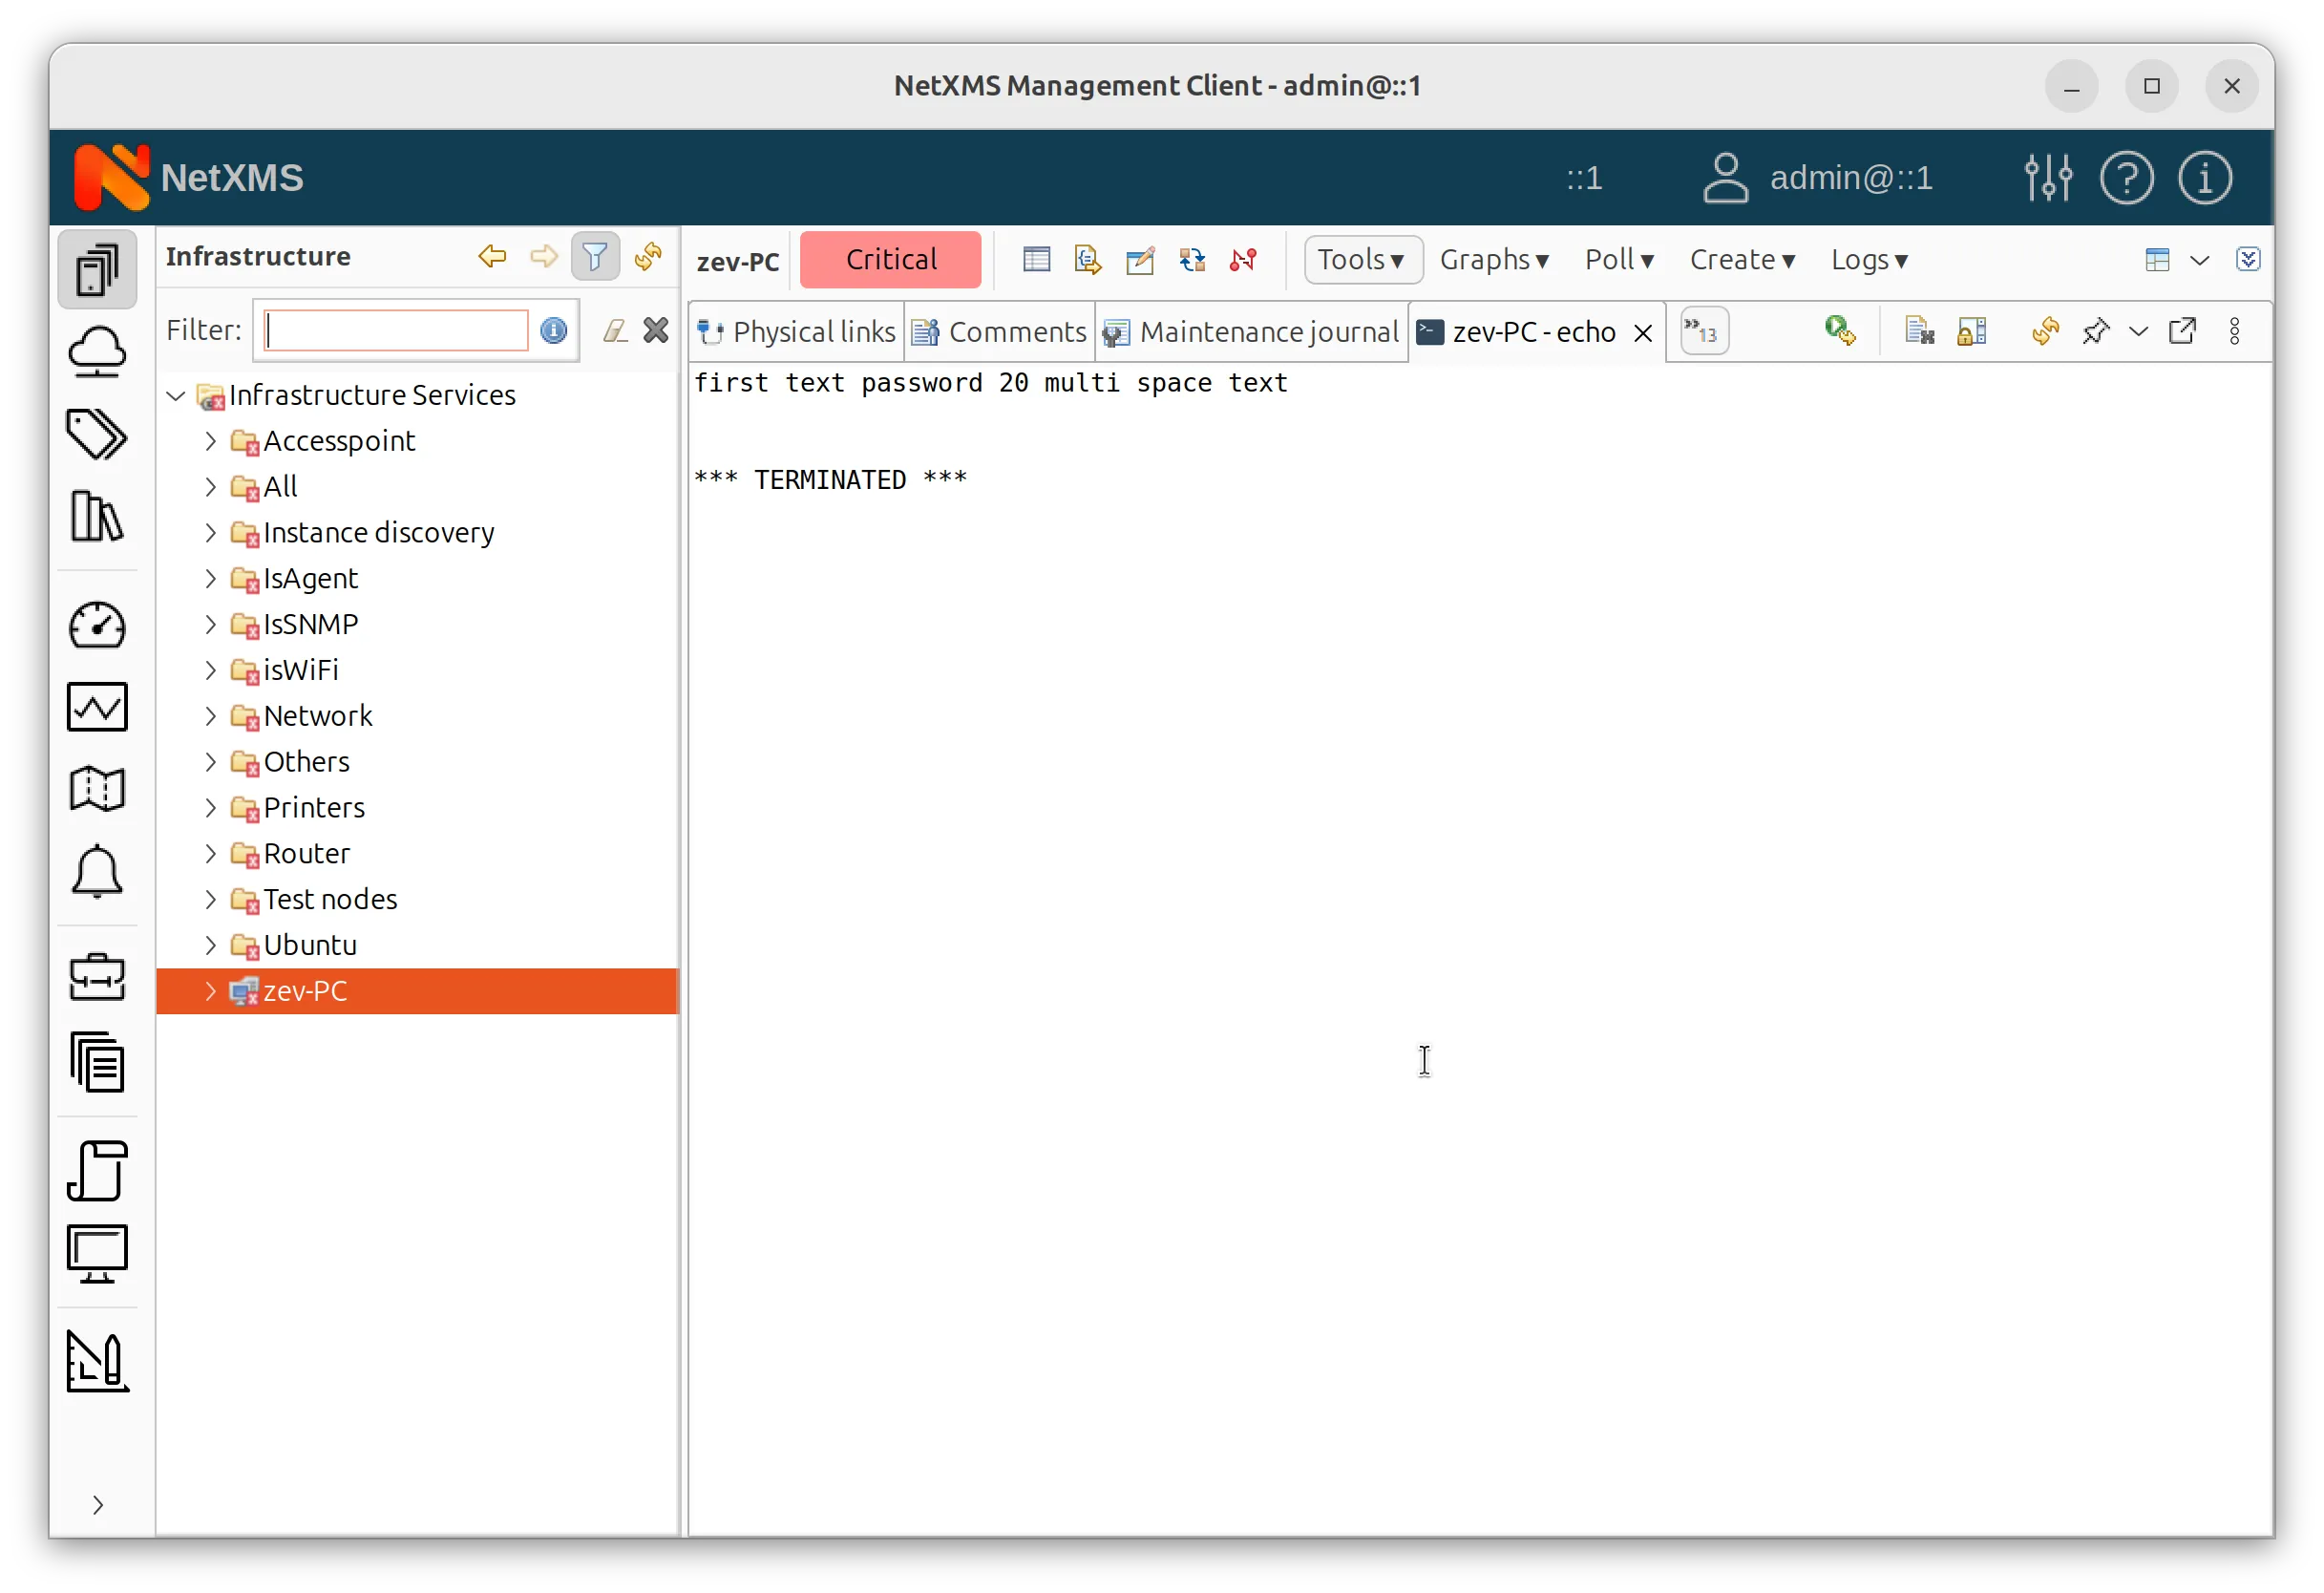
So, when executed, the system processes the given inputs and returns the expected output. This allows for flexible action execution based on user-defined parameters.
In this way, actions allow remote execution of commands on an agent. They can be configured securely using Docker-style execution if needed.
Then, NetXMS Object Tools provide a user-friendly way to trigger these actions. Execution timeouts can be adjusted based on requirements. And input fields can be customized to enhance user interaction.
By properly configuring actions and Object Tools, you can remotely investigate system problems and give access to predefined commands to users with access rights limitaitons.
Read more about the remote functionality and how it’s used to simplify network management in our next blog article.