
Continuing the NetXMS remote functionality overview from the previous article, we proceed with looking into screenshots and remote access.
Capturing Screenshots with NetXMS
NetXMS provides a screenshot feature that allows capturing the display of remote machines. This functionality is available if session agents or user agents are installed on Windows machines.
Screenshots in NetXMS work on Windows machines with session/user agents (adding Linux screenshot support is in our road map). Moreover, you can target specific sessions or run in screencast mode.
How to Take a Screenshot
Taking a screenshot is extremely easy:
-
Right-click on the target node and select Take Screenshot.
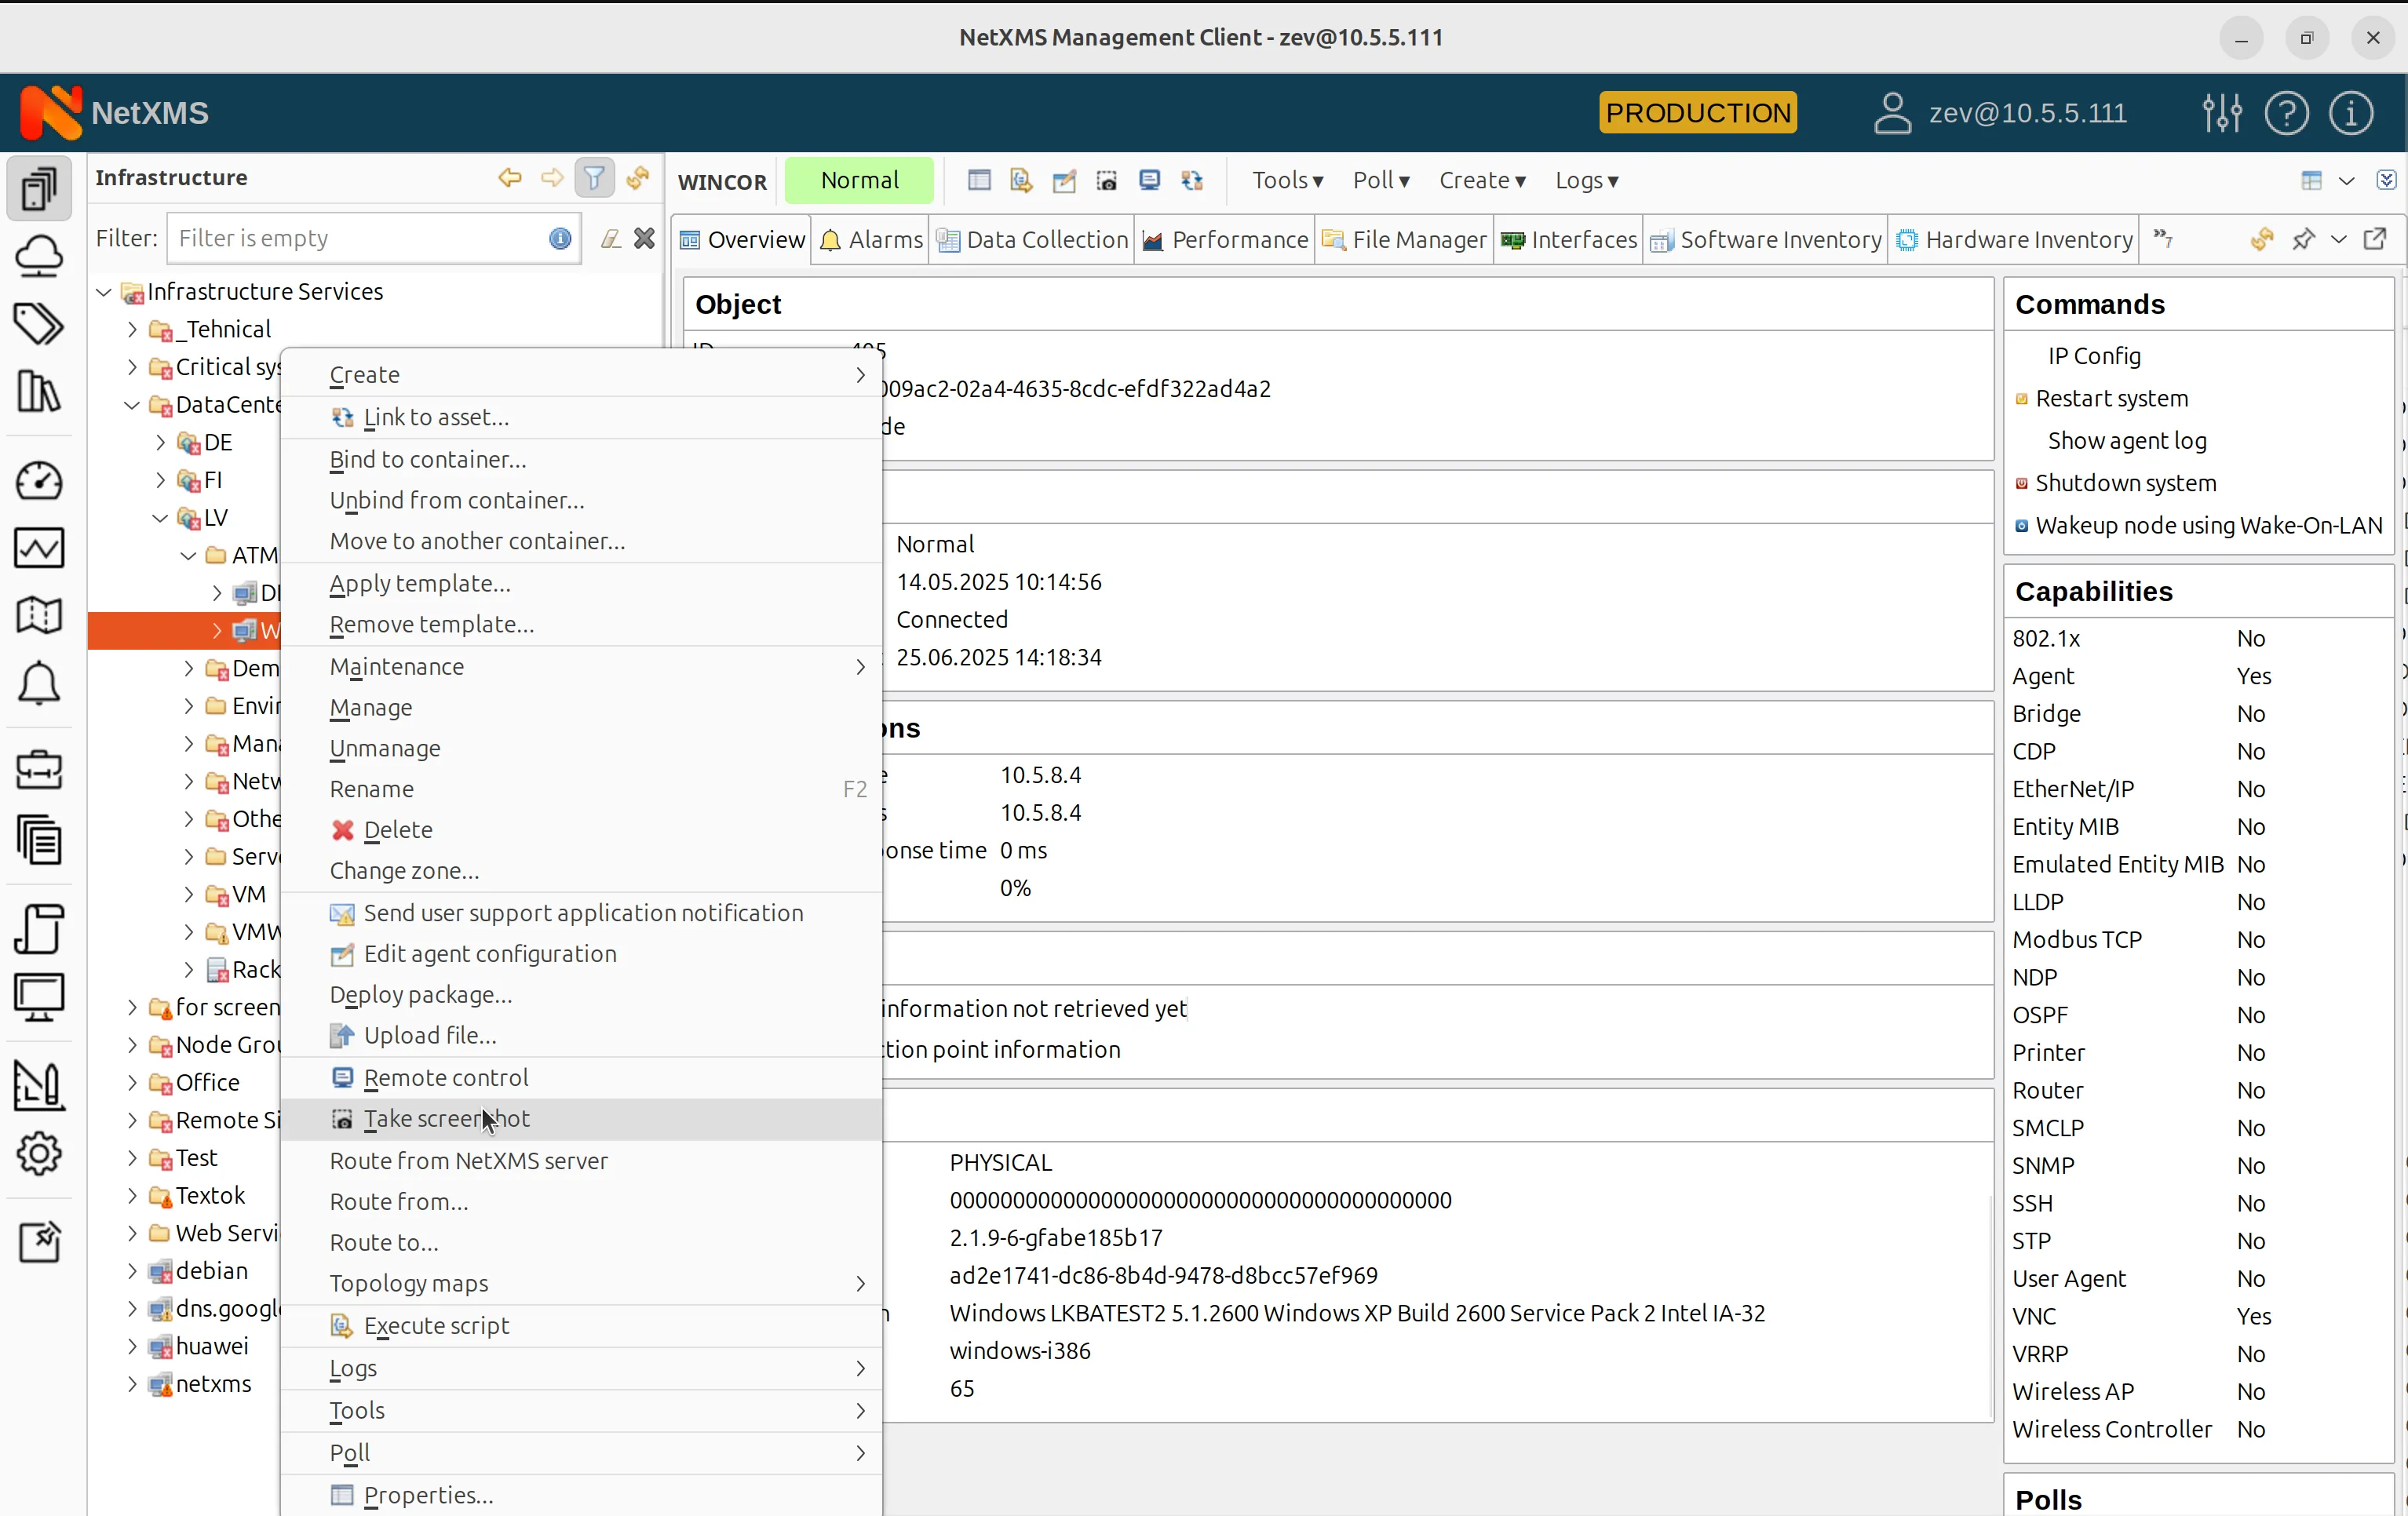
Take Screenshot option in the NetXMS context menu -
Alternatively, use the option in the upper control menu.
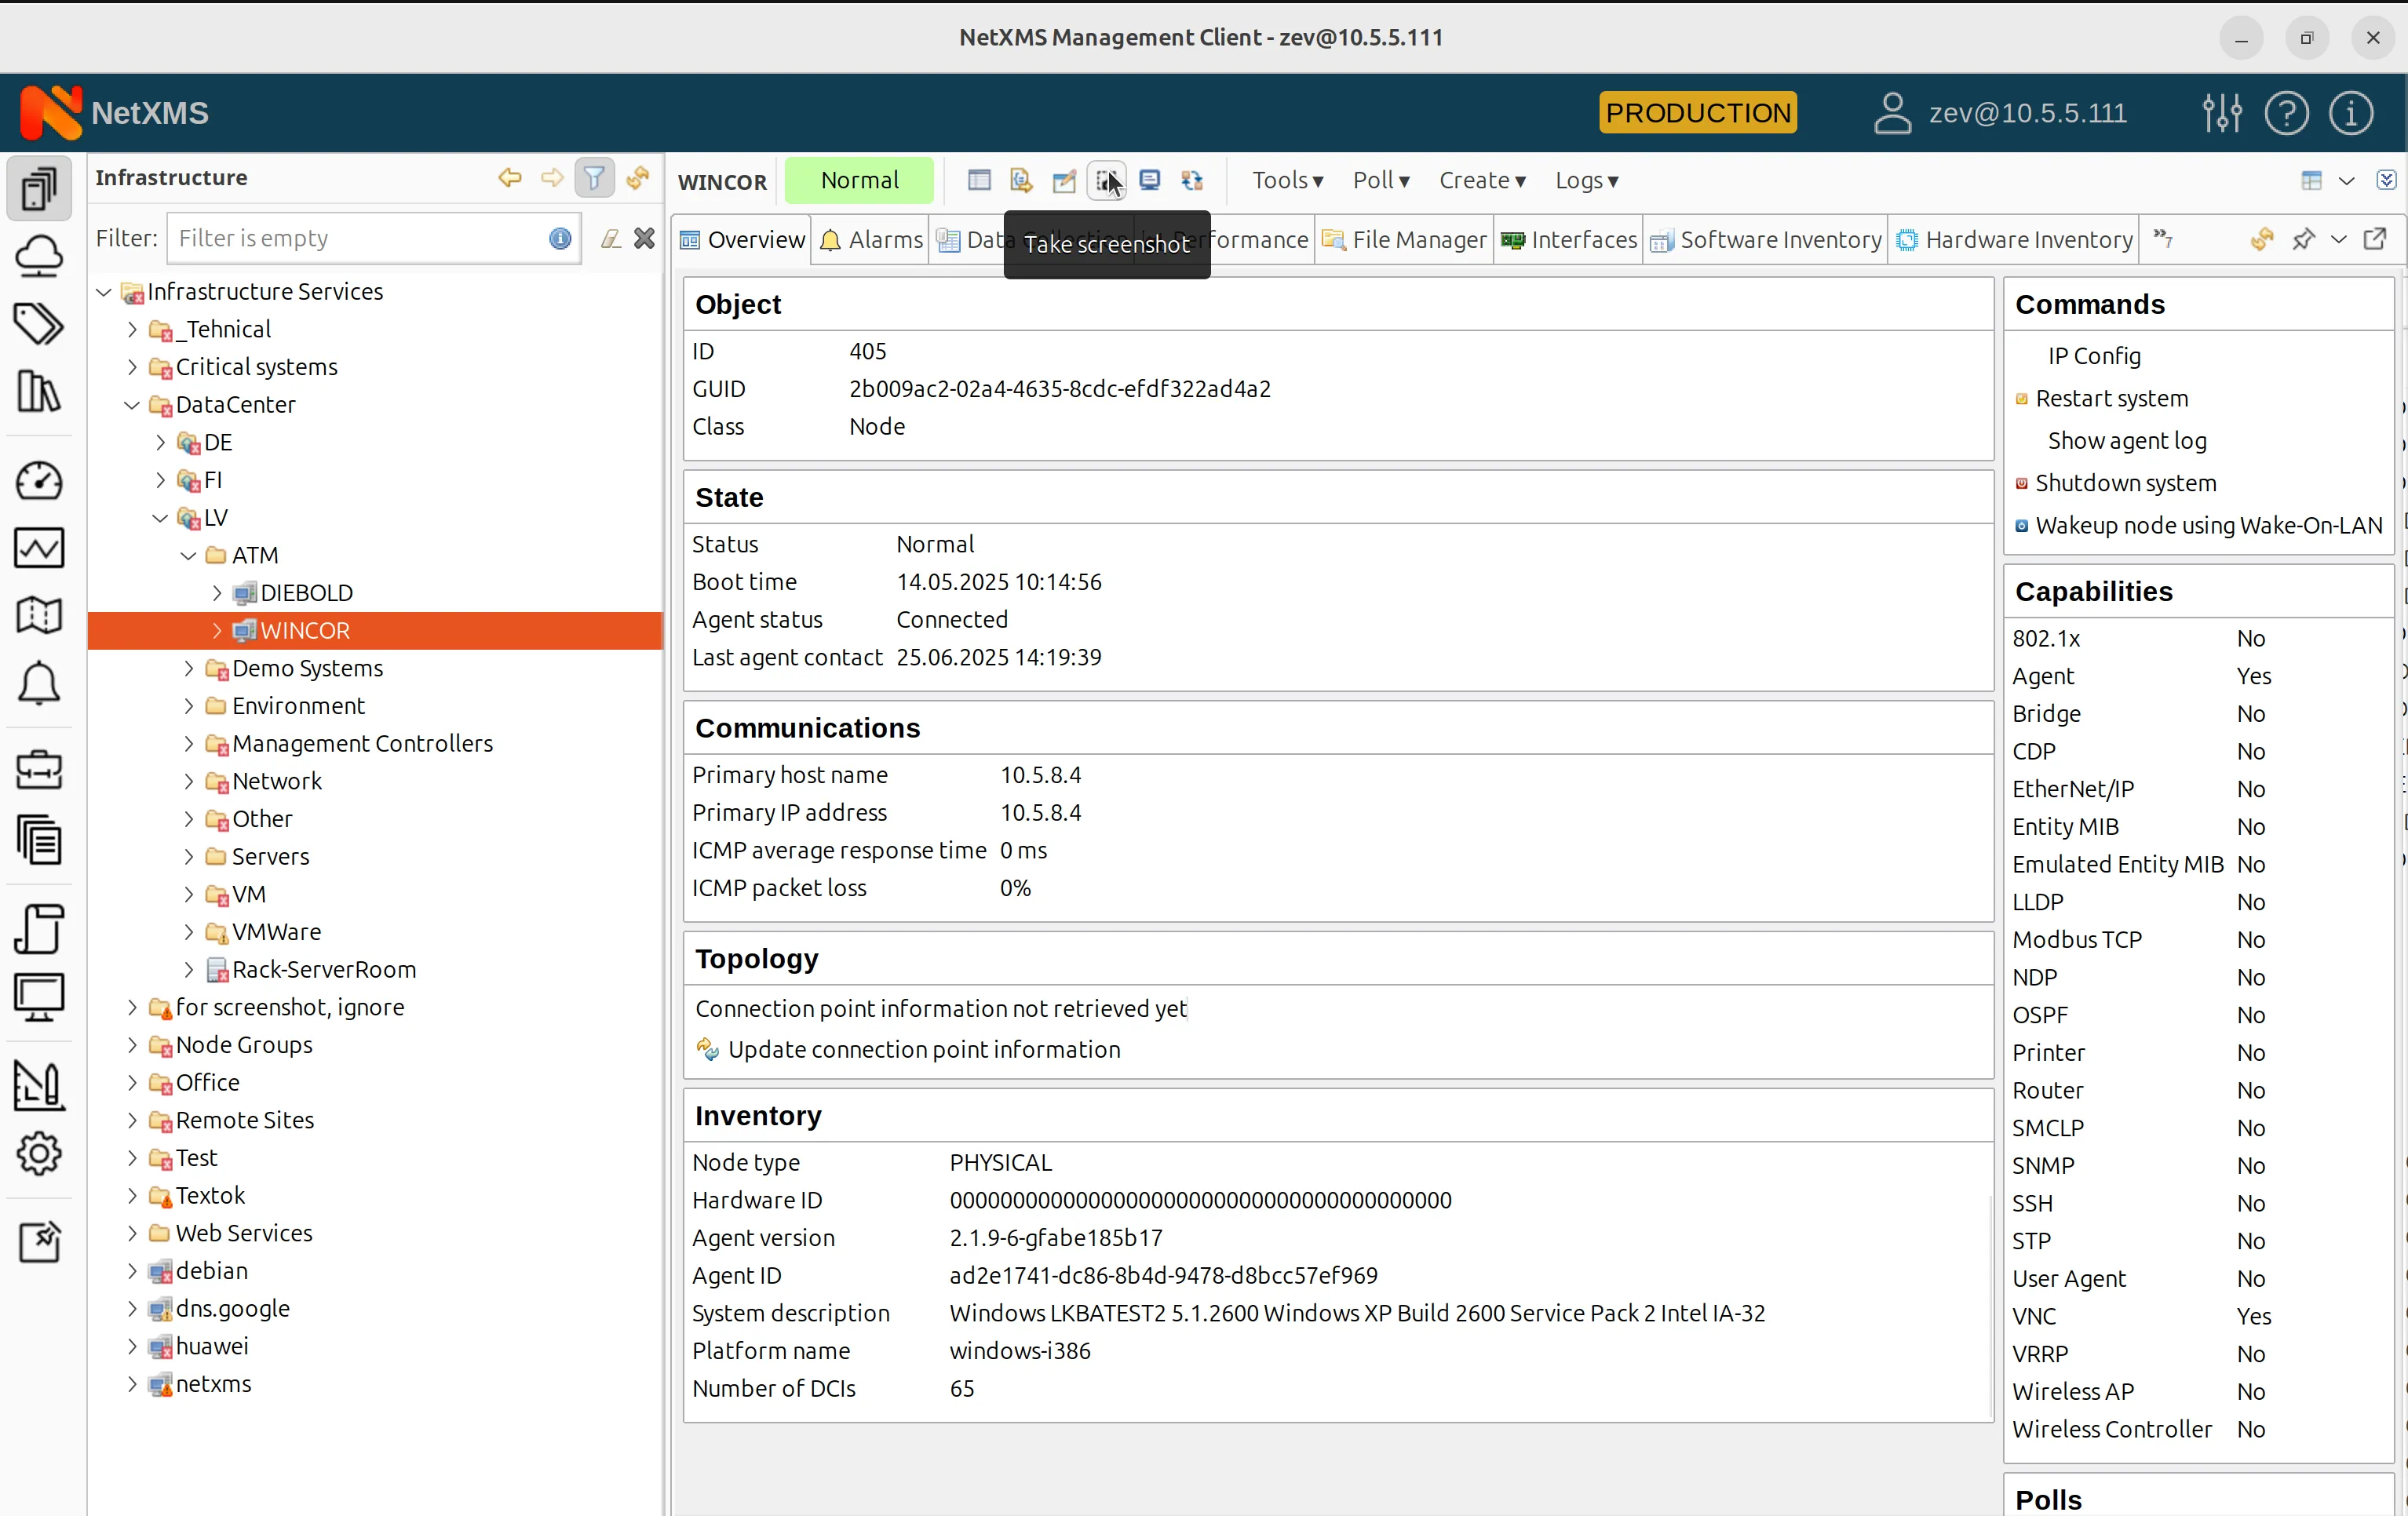
Take Screenshot option in the NetXMS upper control menu -
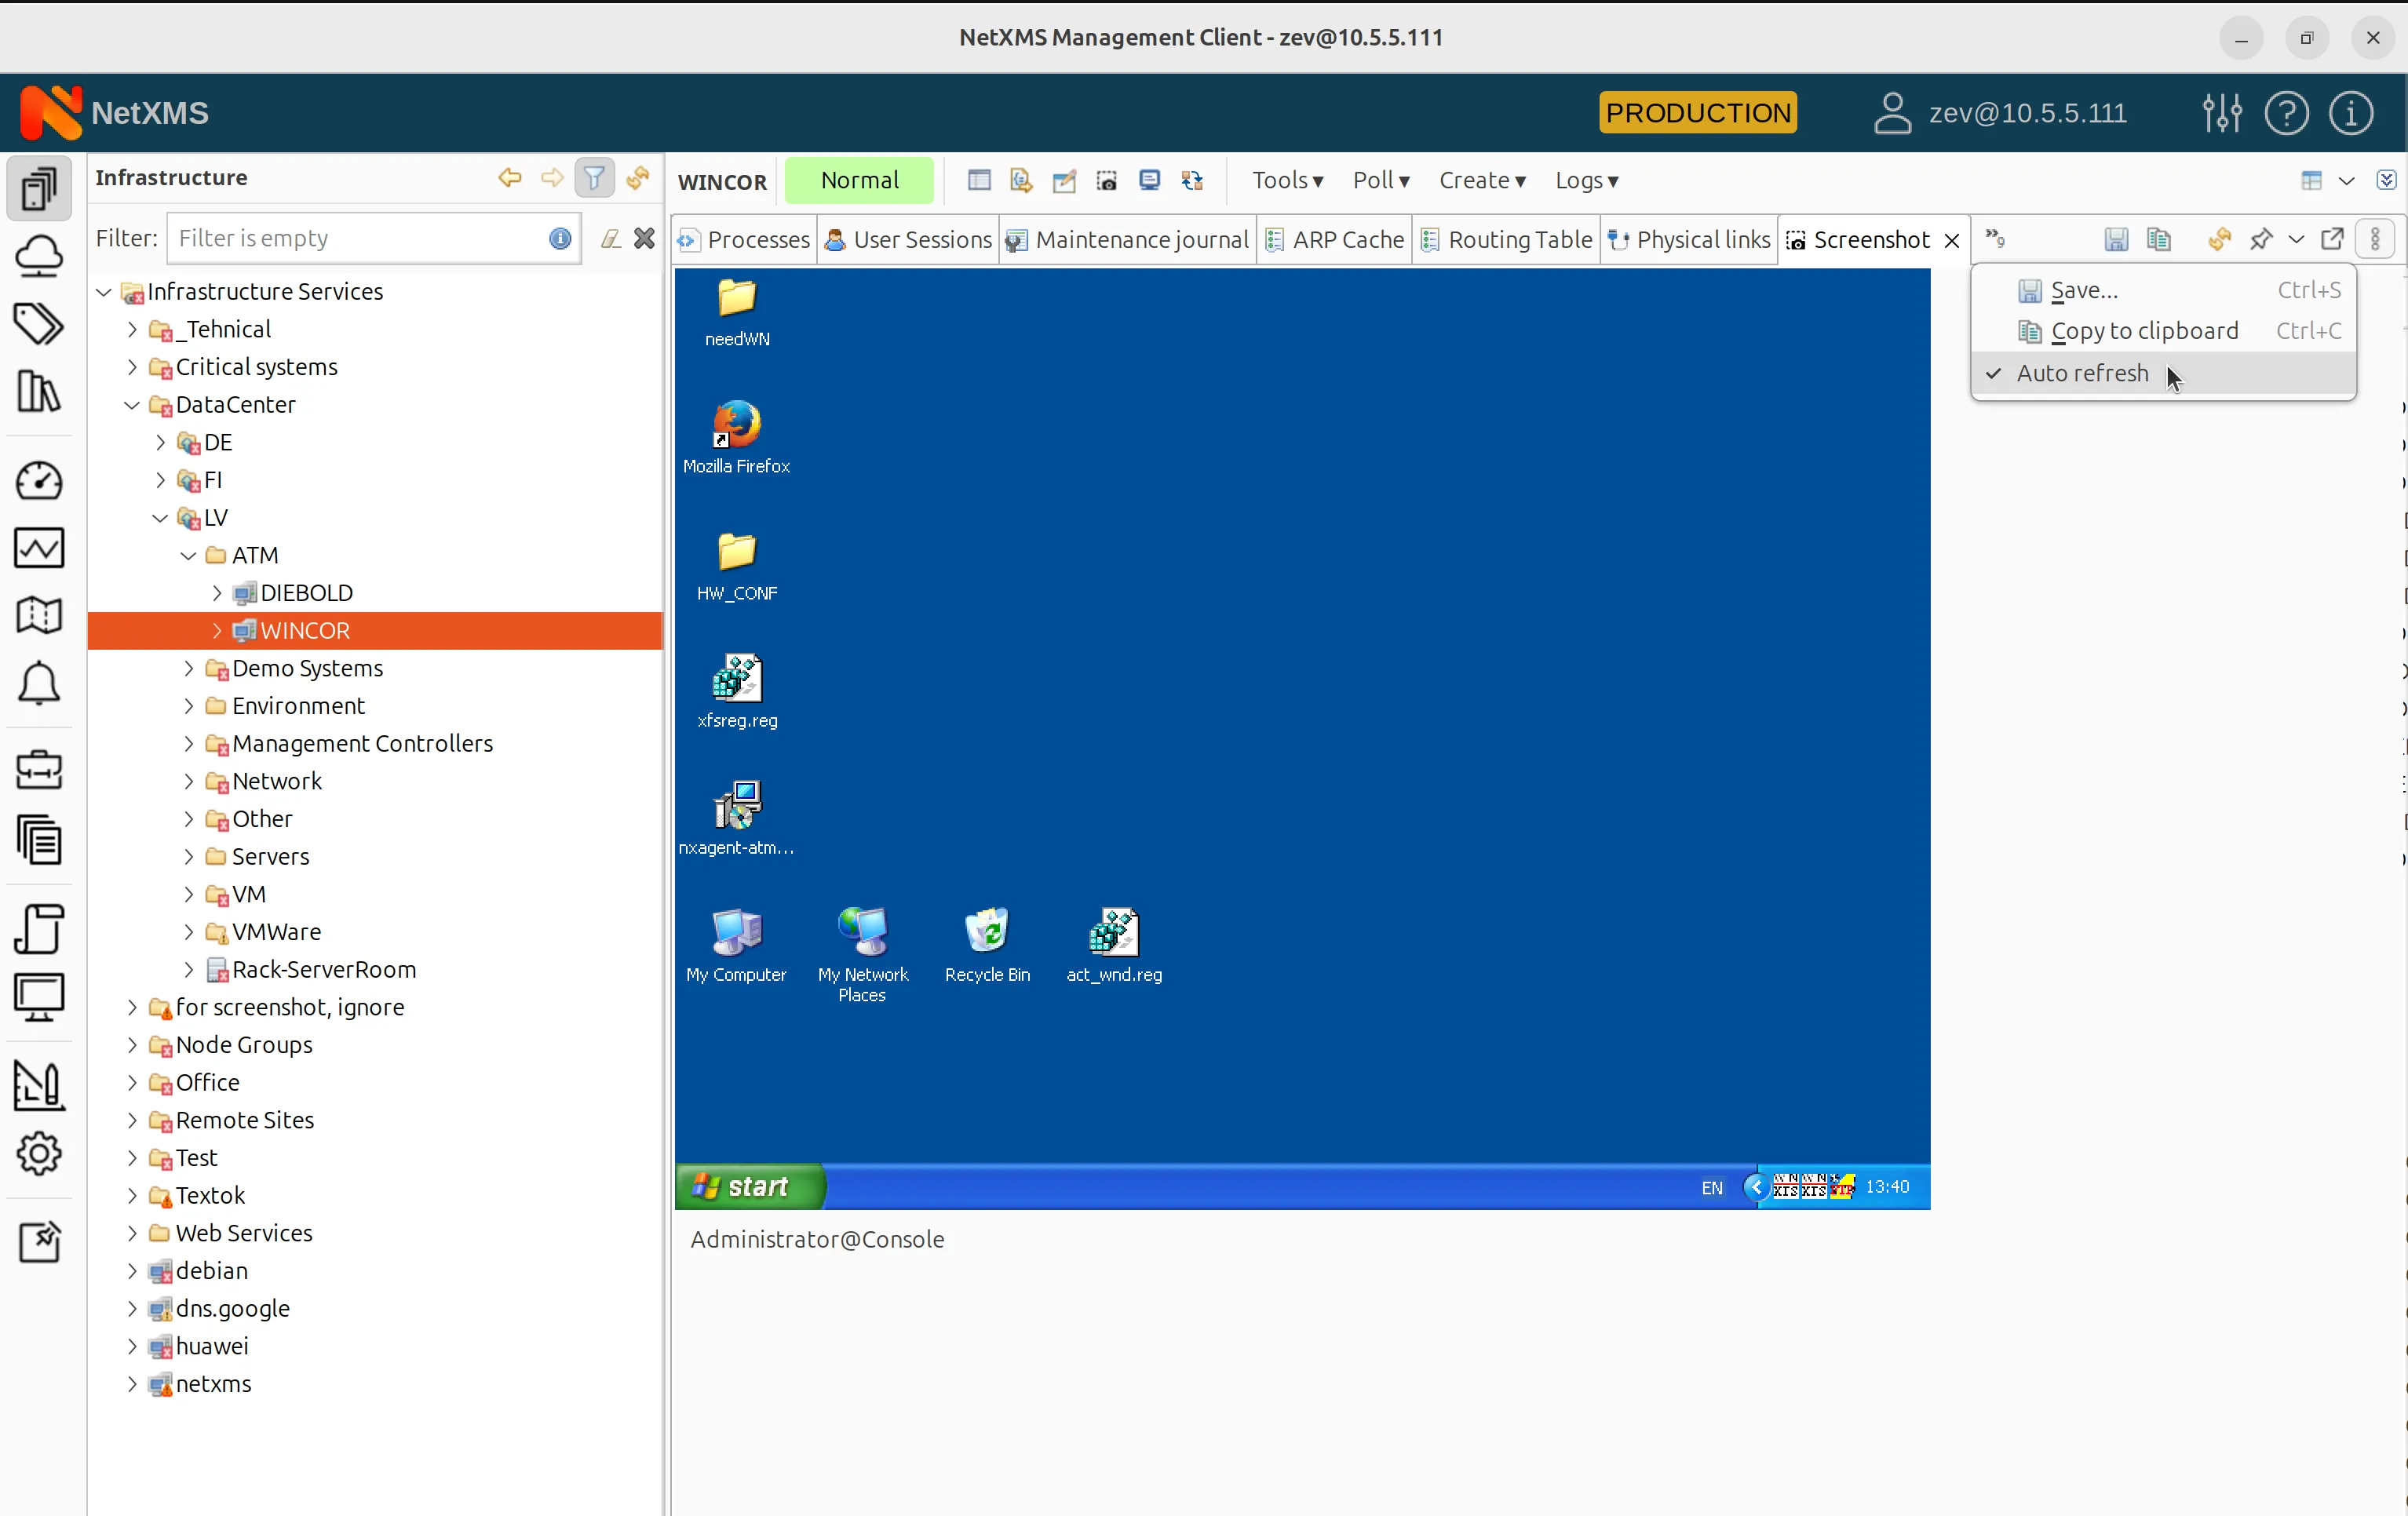
The screenshot is captured from the active physical console session by default.
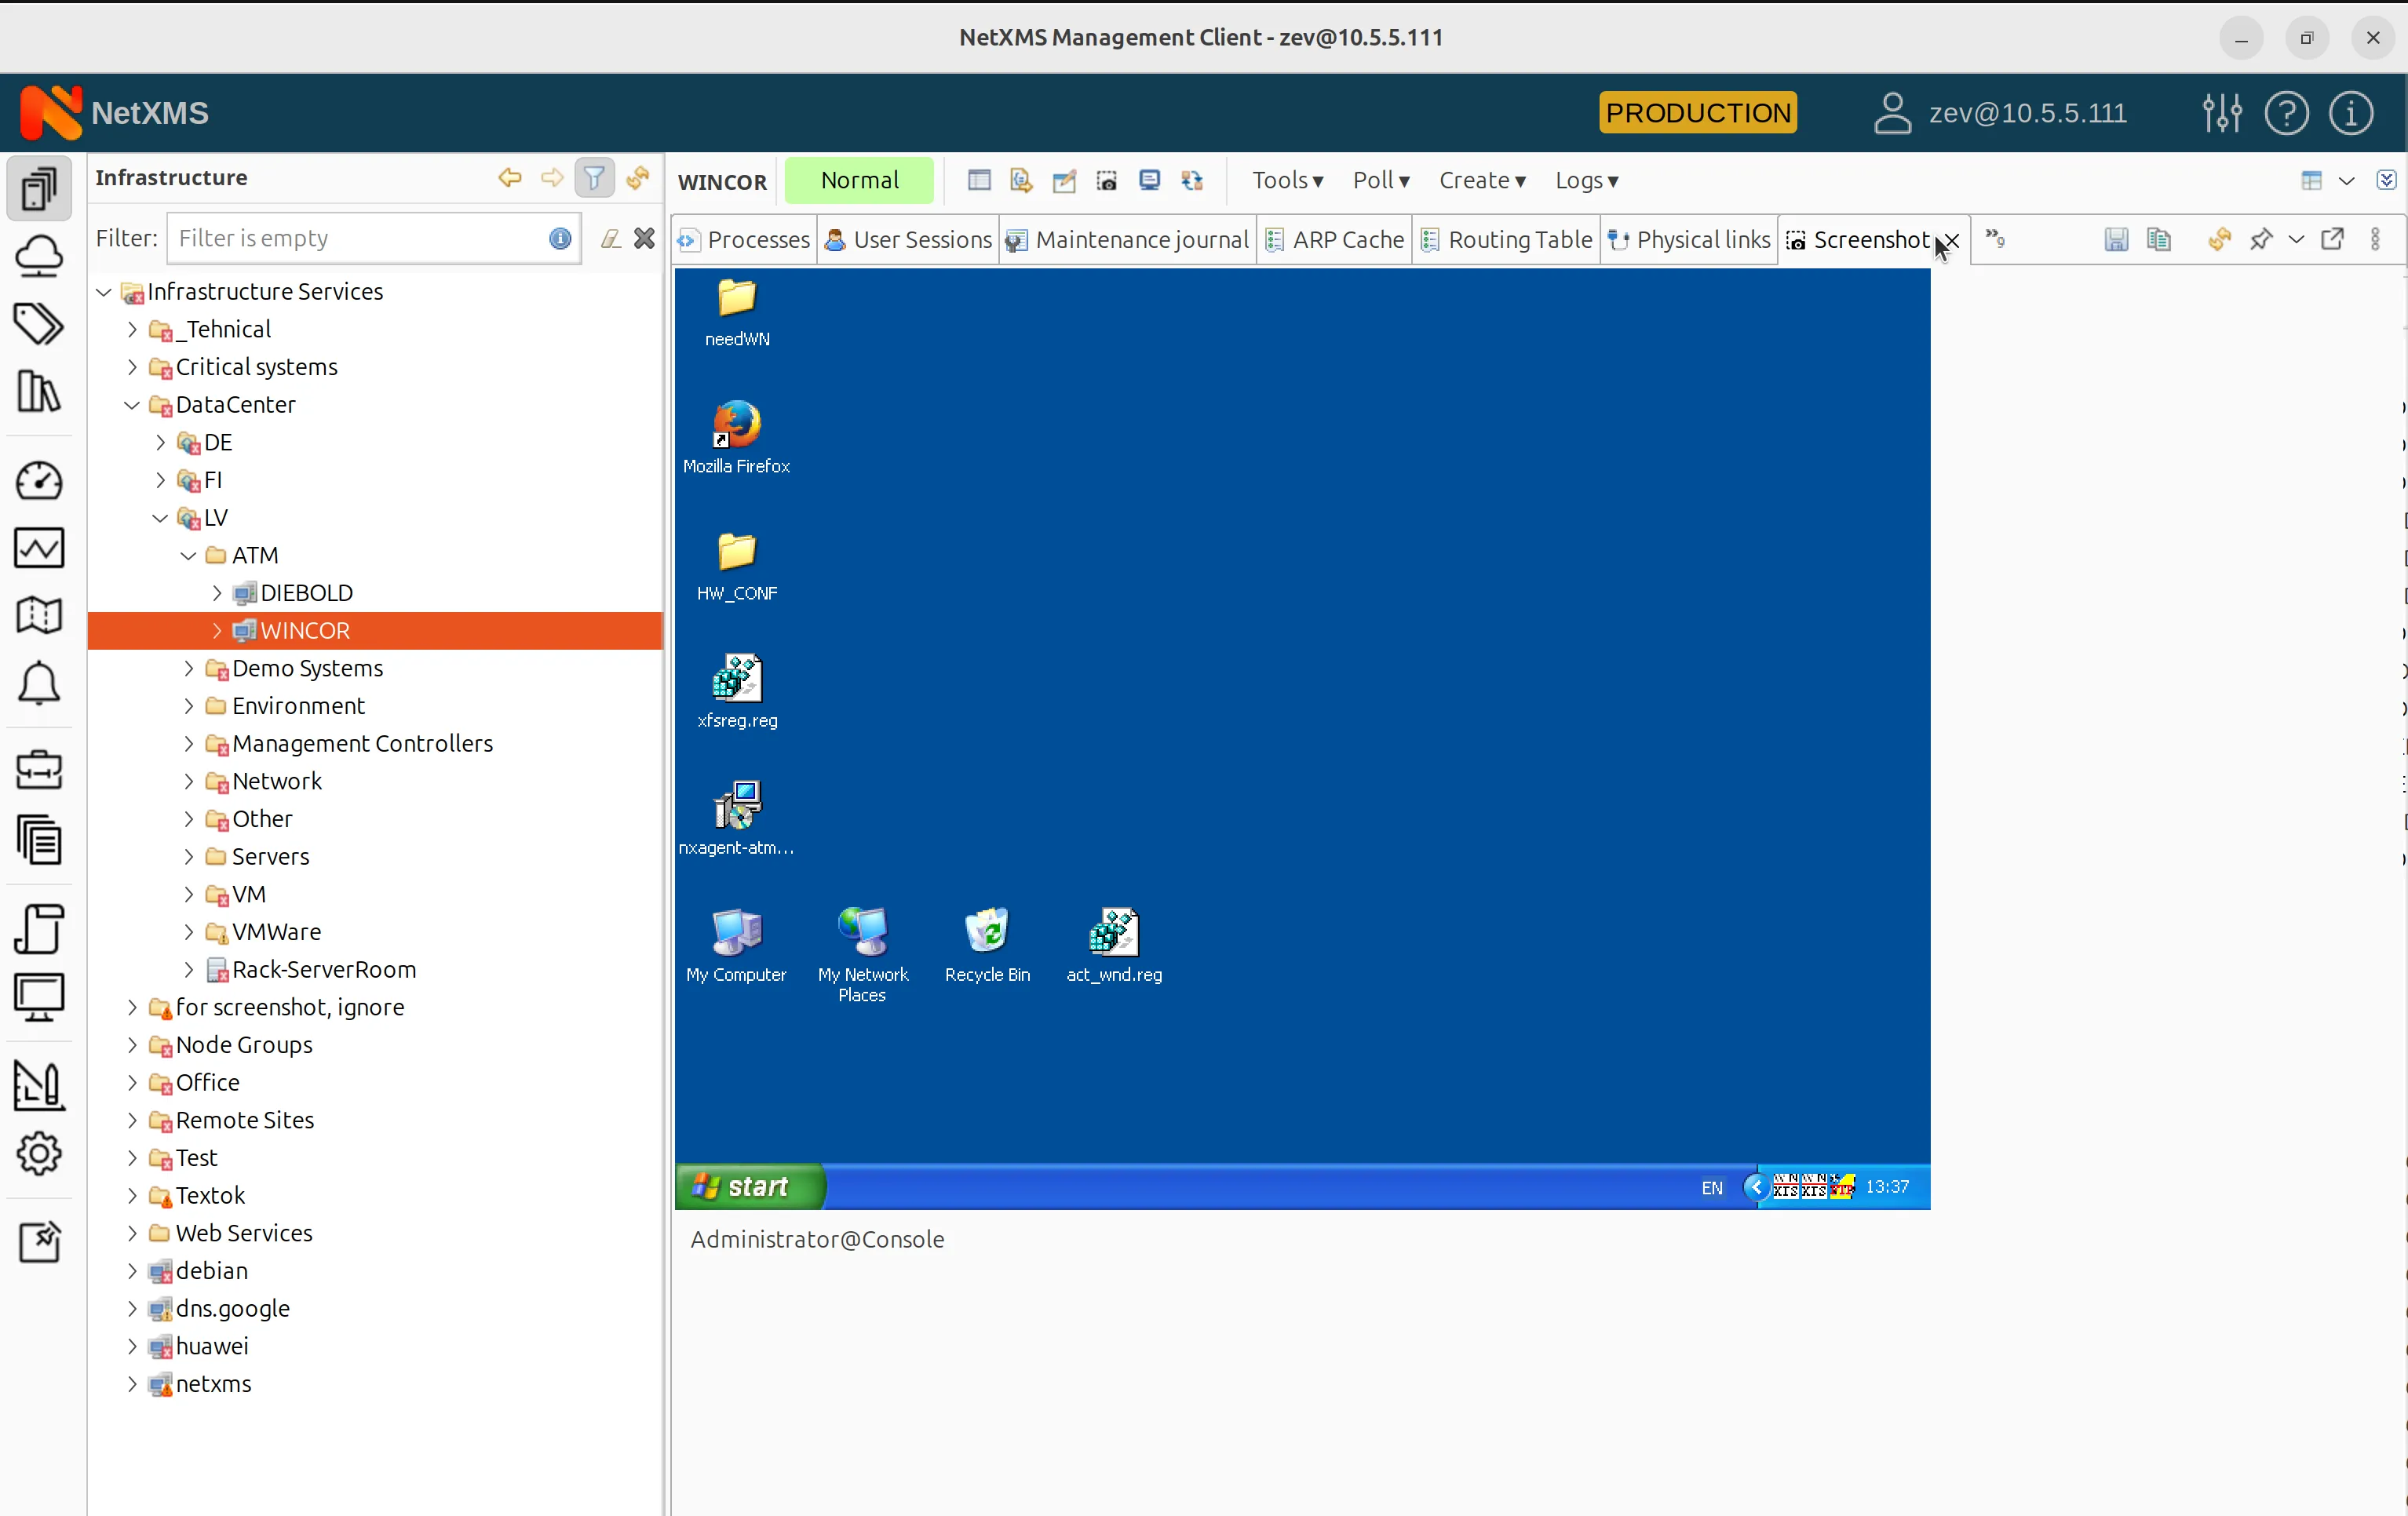
Screenshot captured from the active physical console session
Additional Options
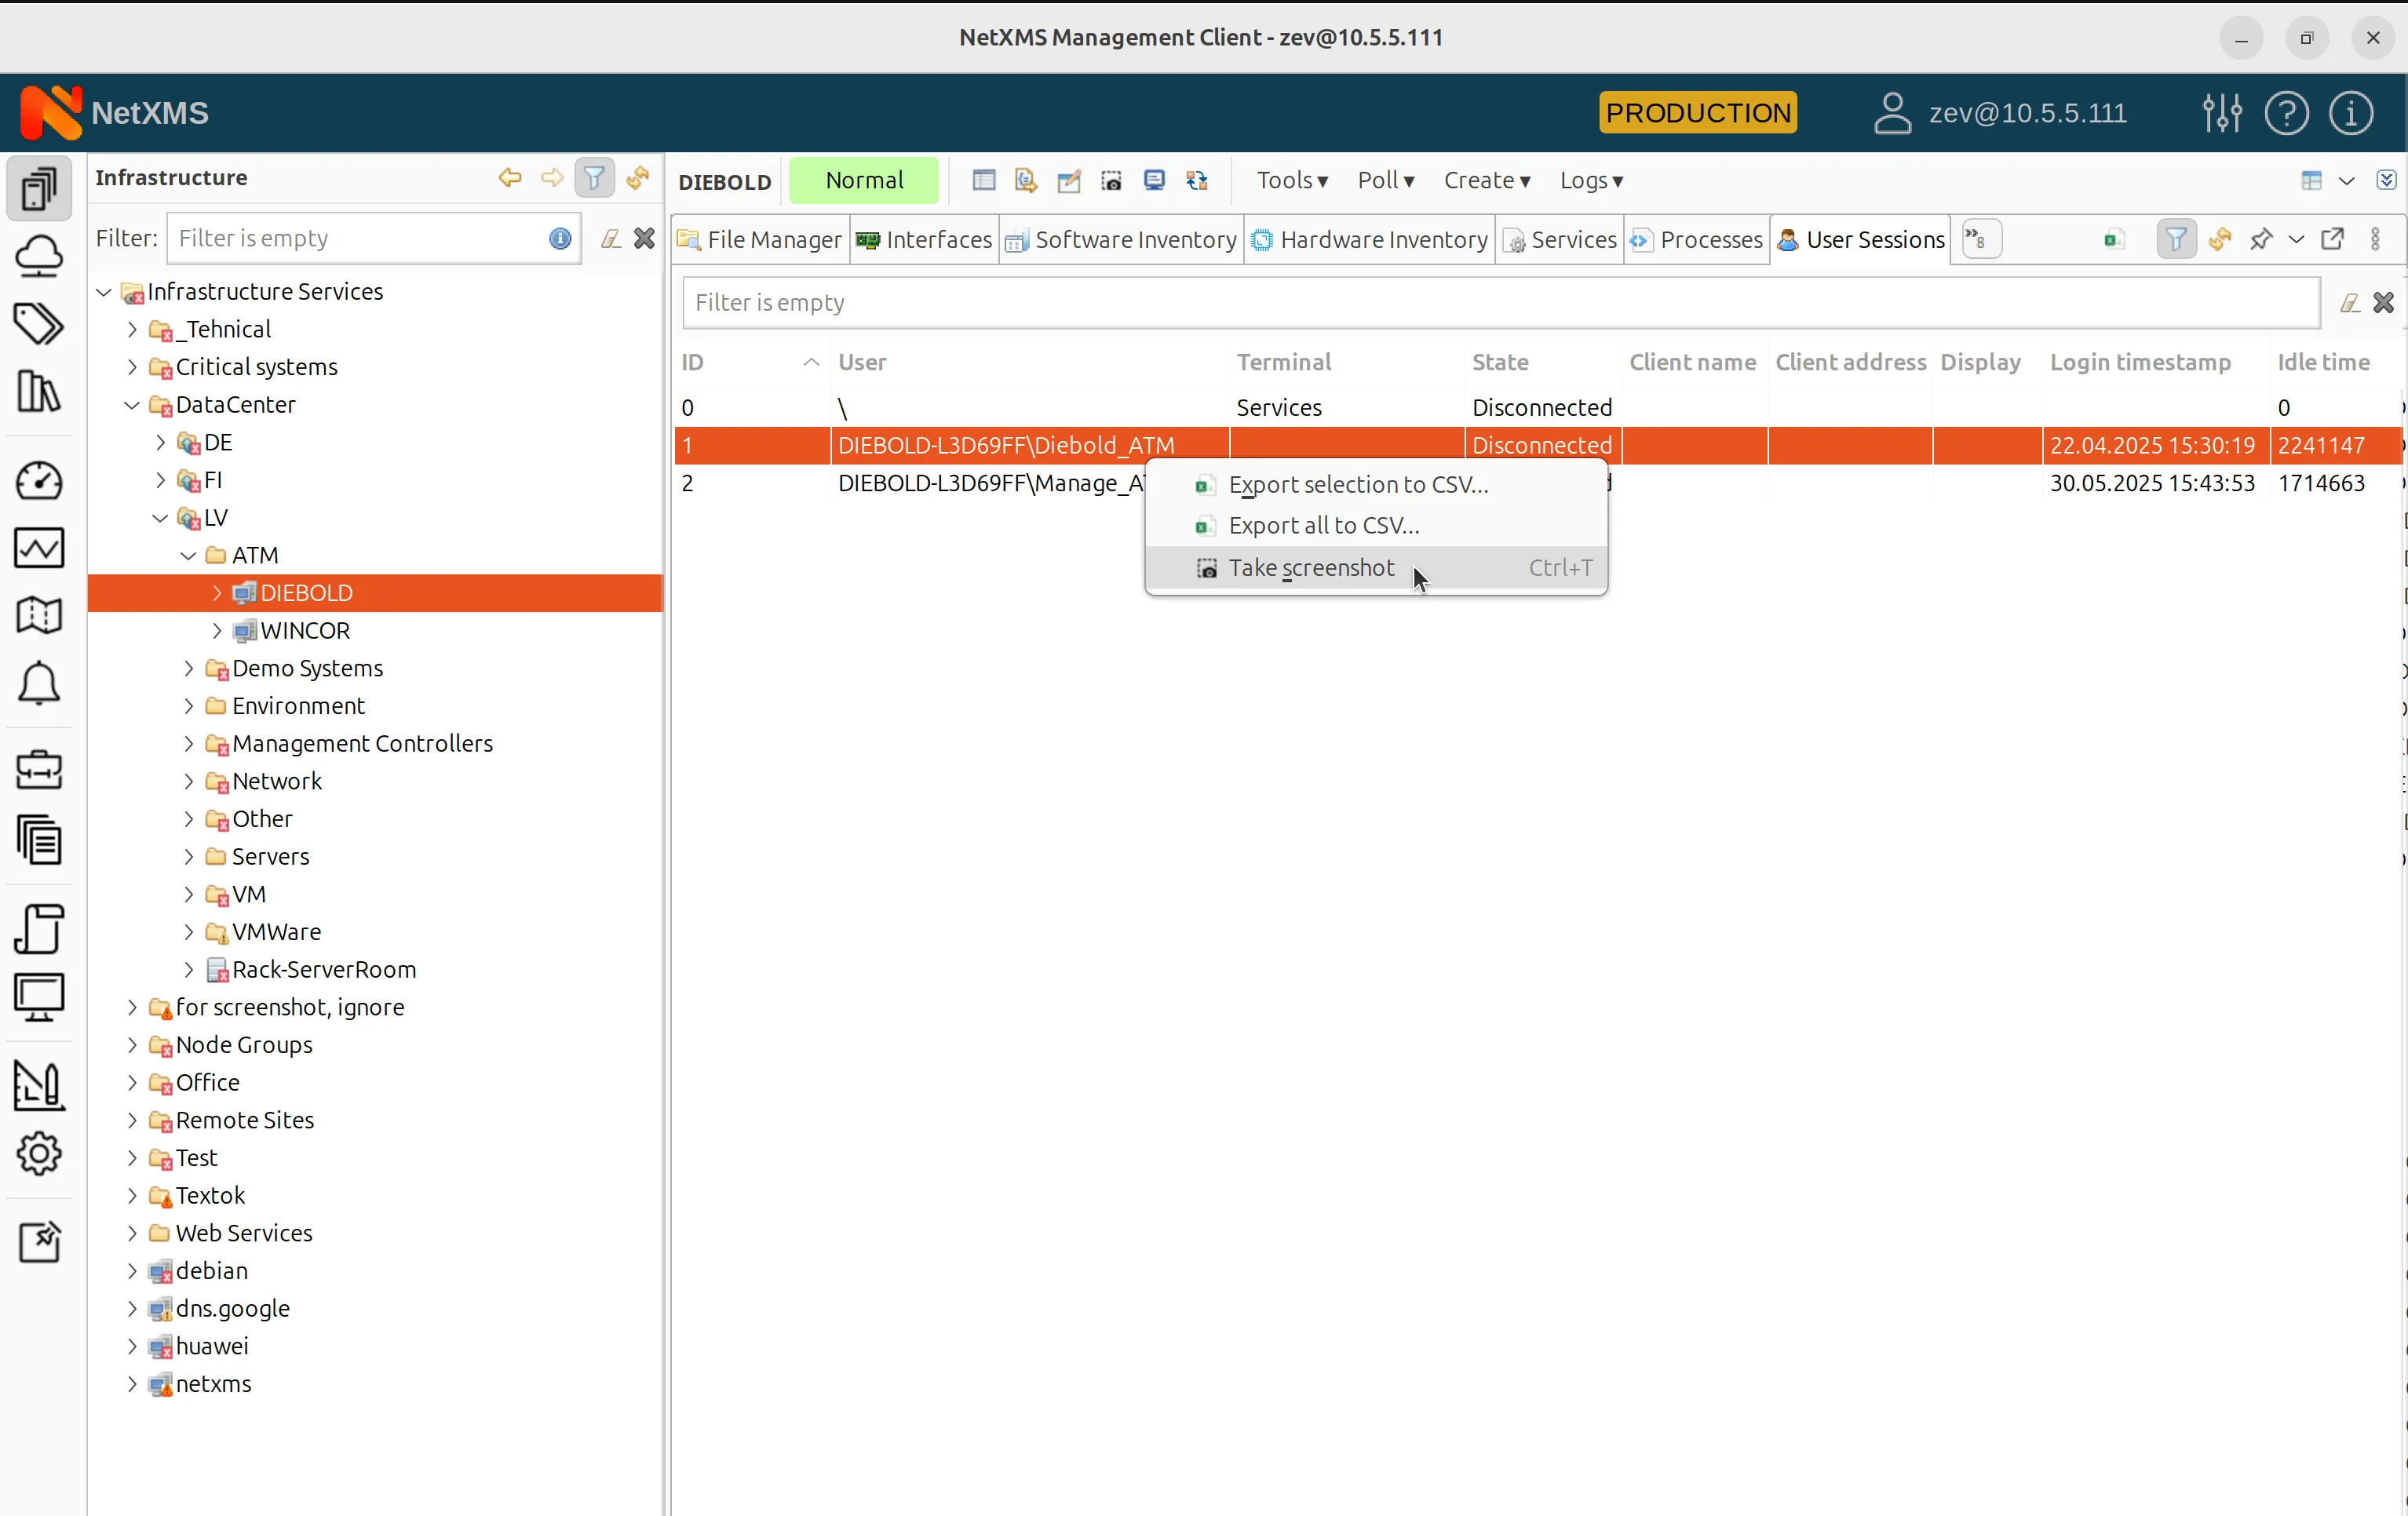
Selecting a Specific Session — if multiple user sessions exist (e.g., remote desktop connections), a session can be selected in the User Session View before taking a screenshot.
Screencast Mode — enabling Auto-Refresh (top-right corner) updates the screen periodically, creating a real-time screencast effect. If no activity is happening on the remote machine, the screen remains static.
Linux Screenshot Support
NetXMS plans to extend screenshot capabilities to Linux machines. However, in that case, for security reasons, the session agent must be running inside the active GUI session. As the operating system does not allow screenshots of other sessions unless explicitly permitted.
Built-in VNC Integration
It’s finally happenned! NetXMS now offers built-in integration with VNC, enabling remote access to machines running a VNC server. If VNC is detected on a remote system, the Remote Control option appears in the interface, allowing you to establish a VNC session directly from NetXMS.
Key Features of NetXMS Remote Control
Remote control works on both Web and Desktop interfaces. Moreover, no direct TCP connection is required:
- The connection is established via the NetXMS server and a proxy agent (which can be installed on the target machine or another system within the network).
- This allows remote control of machines that are not directly accessible via TCP.
The feature supports dynamic addresses. It means that the agent maintains an outbound connection to the server, ensuring accessibility even on machines with changing IPs.
Of course, there is also an end-to-end encryption — standard VNC connections are not encrypted by default. In NetXMS, all VNC traffic is tunneled through encrypted agent-to-server communication, enhancing security. For most secure configuration, VNC server should be configured to listen on loopback interface only, with connection proxied through NetXMS agent on same machine.
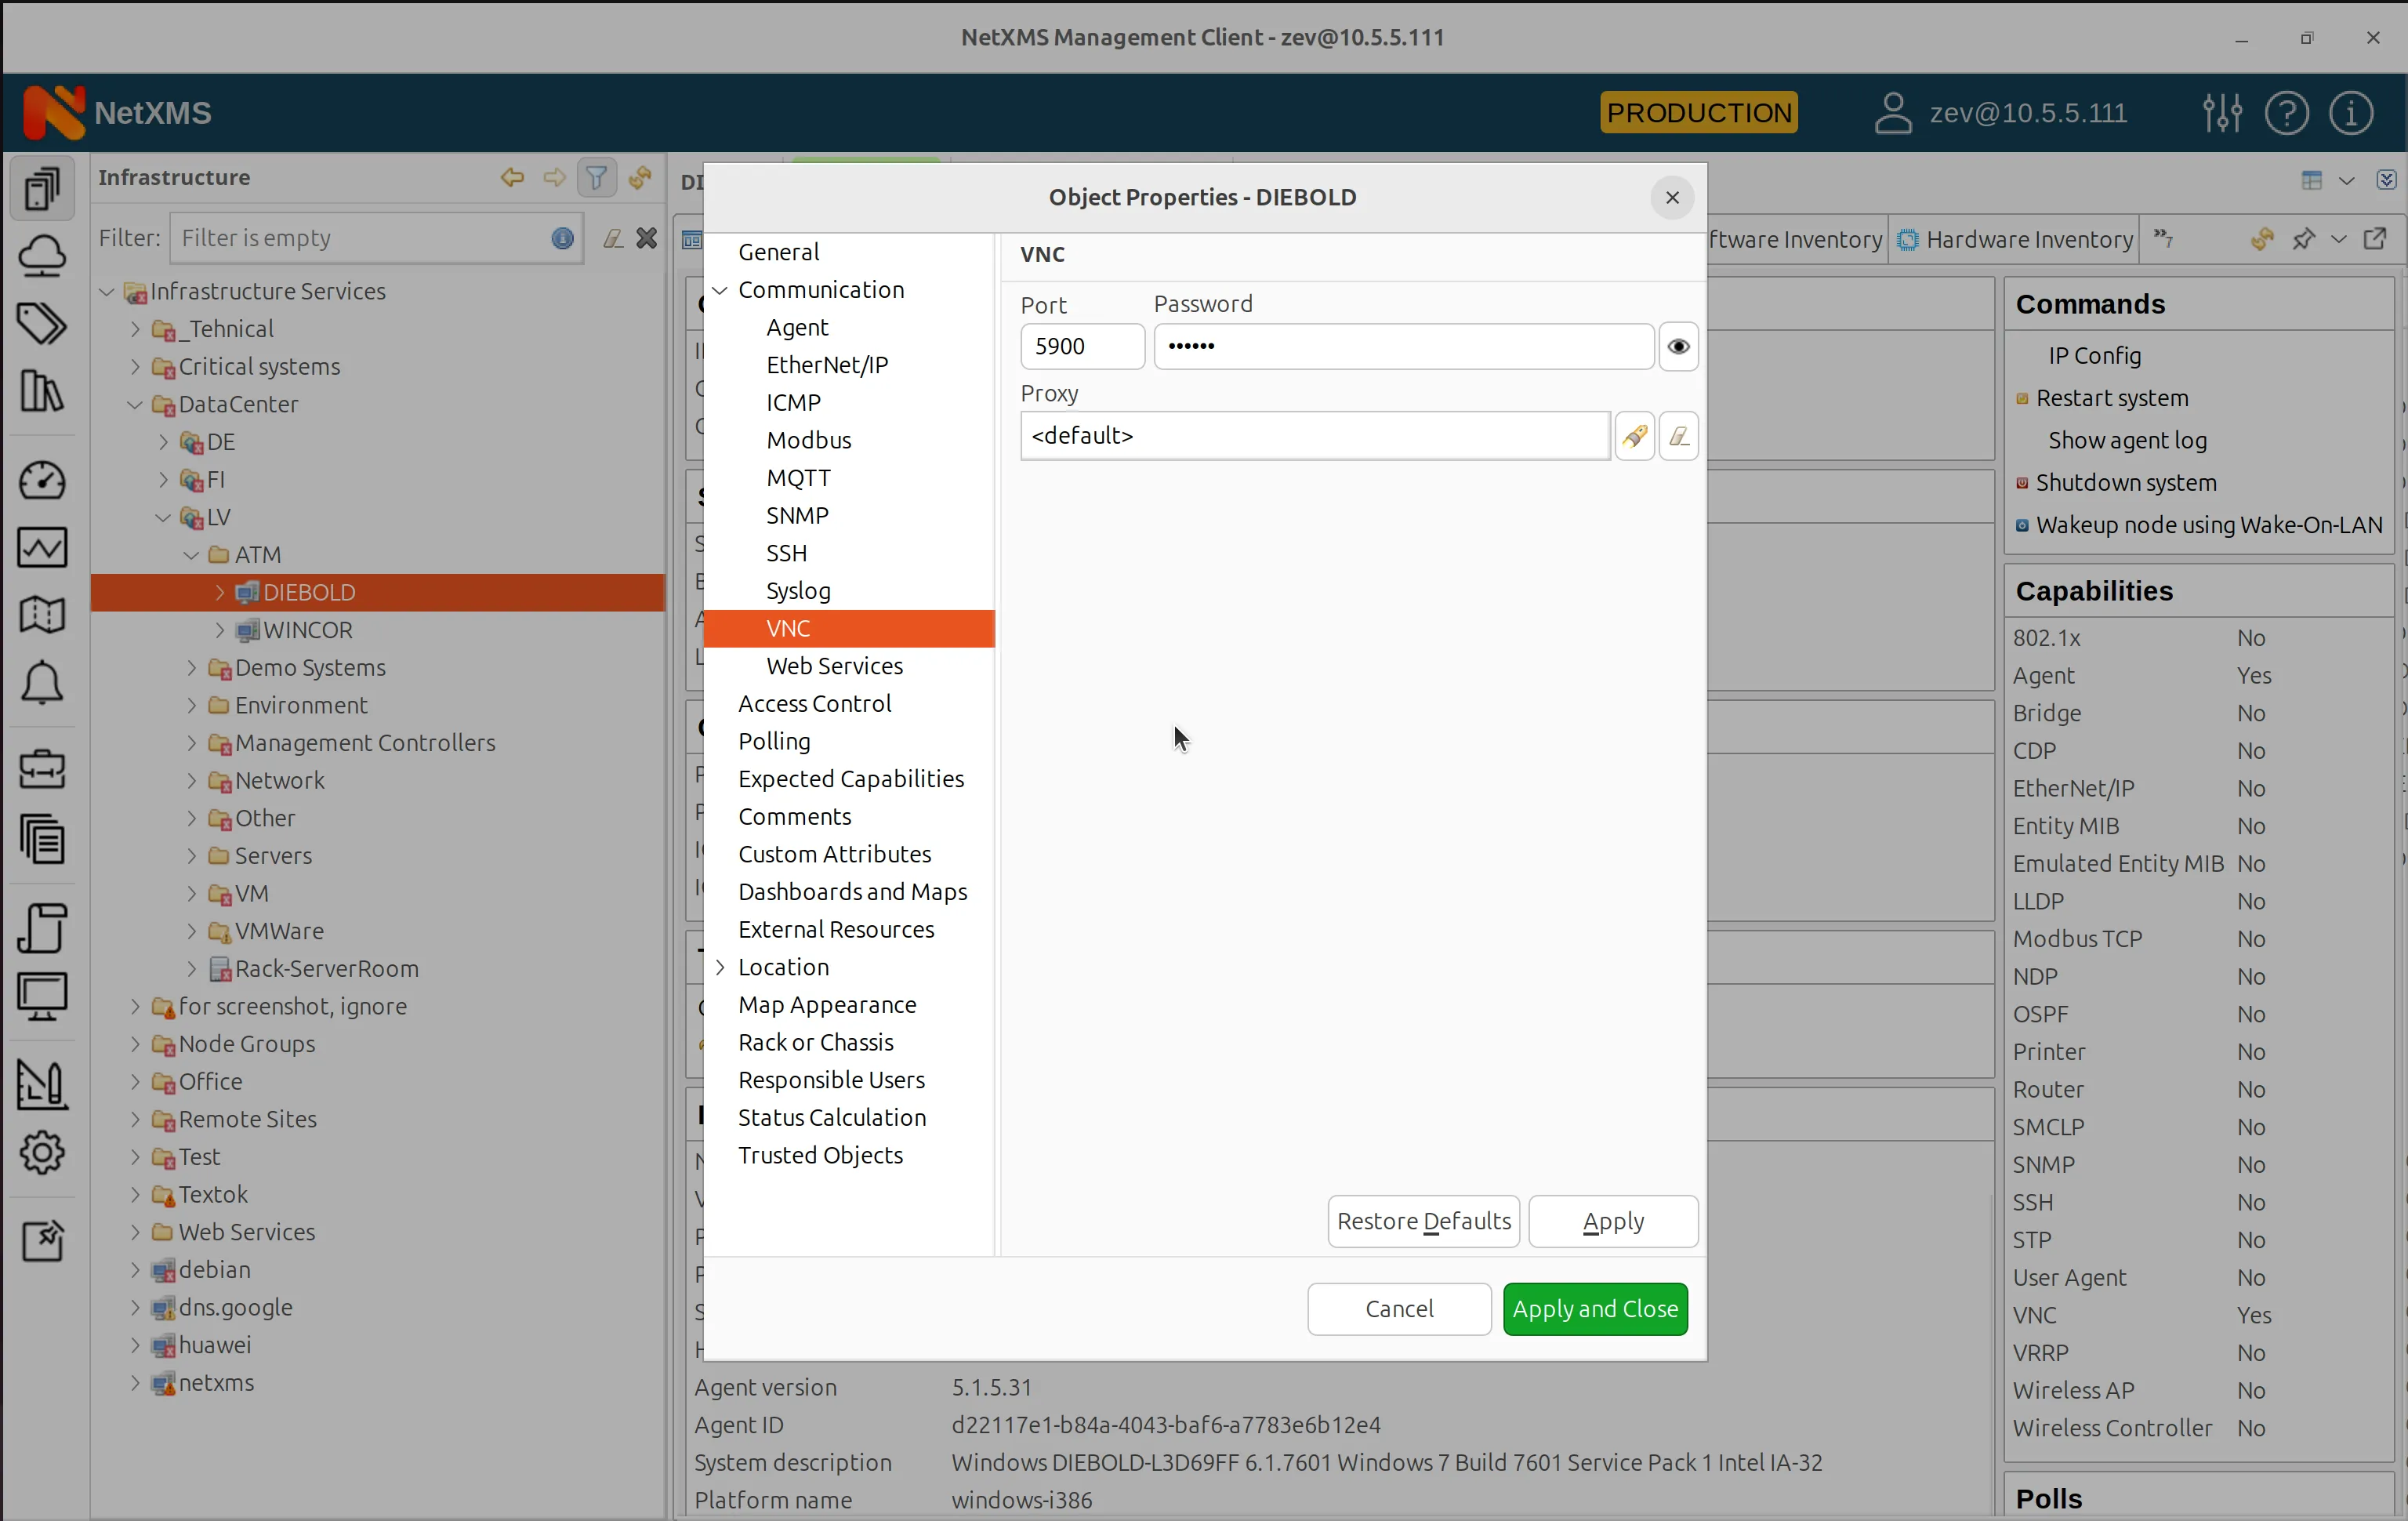
VNC Configuration in NetXMS
In the Node Properties, a new VNC tab allows you to:
- Set a VNC password (if applicable).
- Select a proxy node for VNC connections.
- View VNC capability status (automatically detected on VNC-enabled machines).
NetXMS supports any VNC server, though TightVNC is commonly used due to its stability.
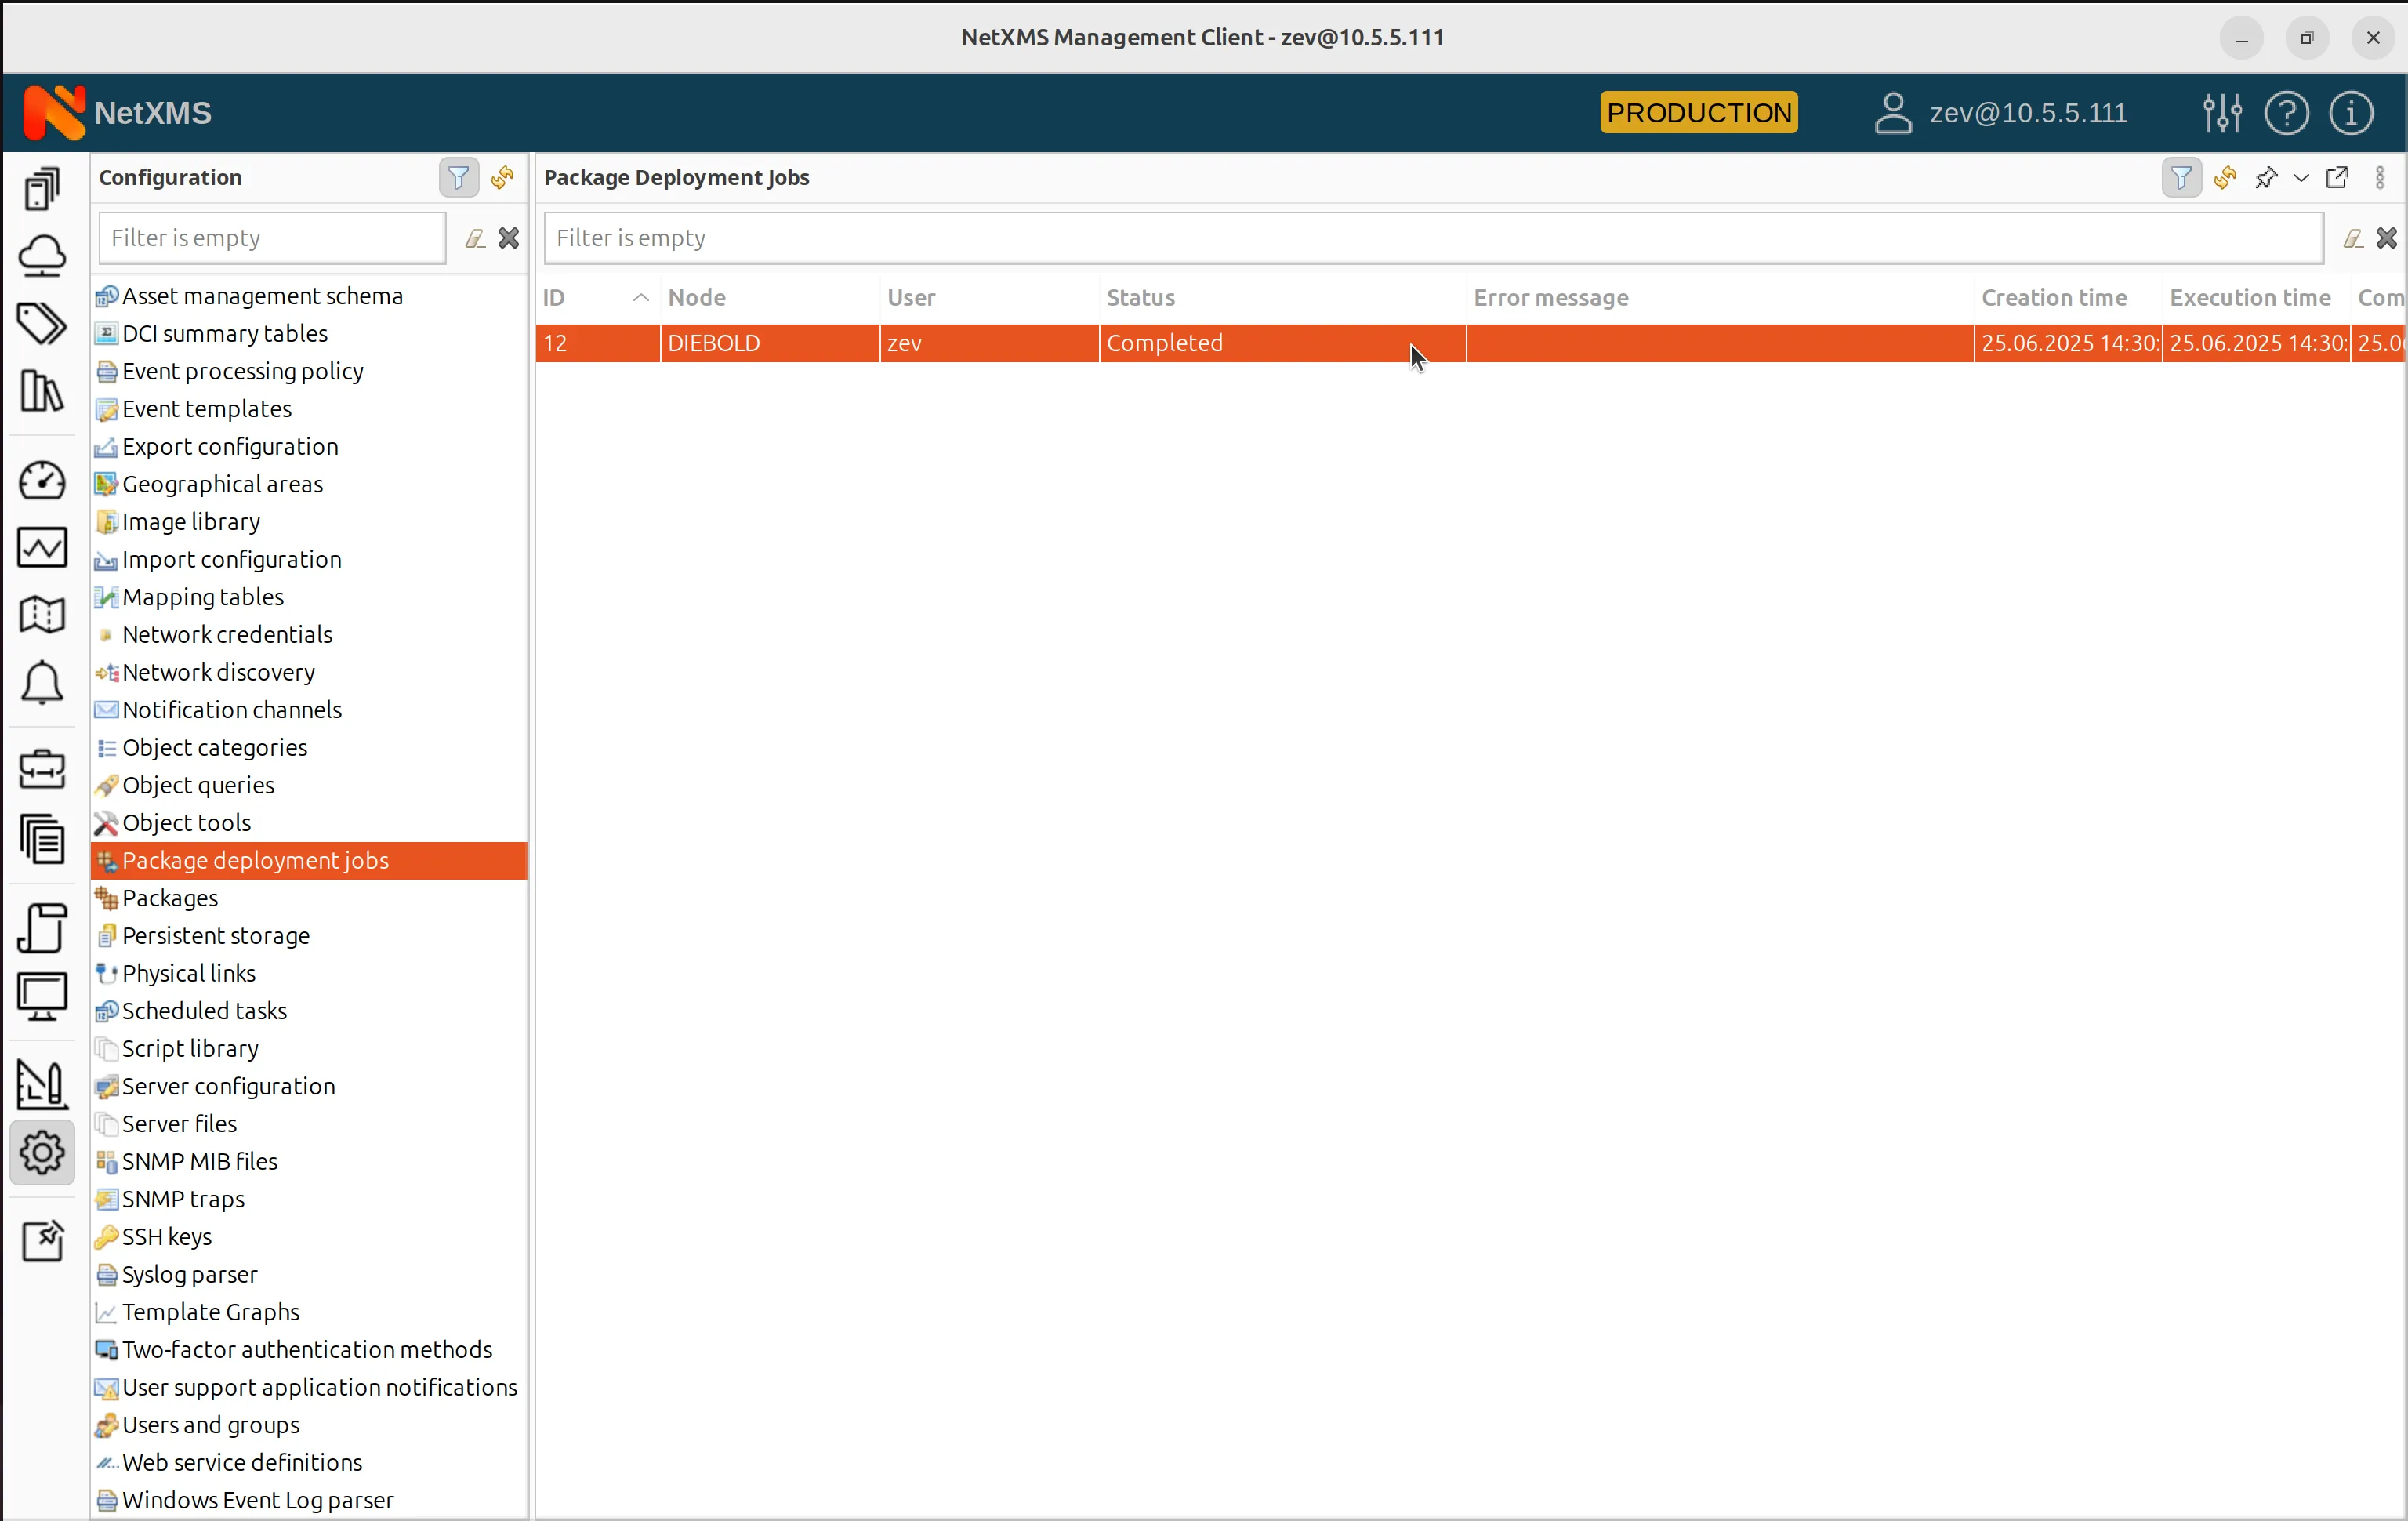
Software Package Deployment in NetXMS
NetXMS includes a software package management feature, allowing you to remotely upload, distribute, and install various packages on agent-managed systems.
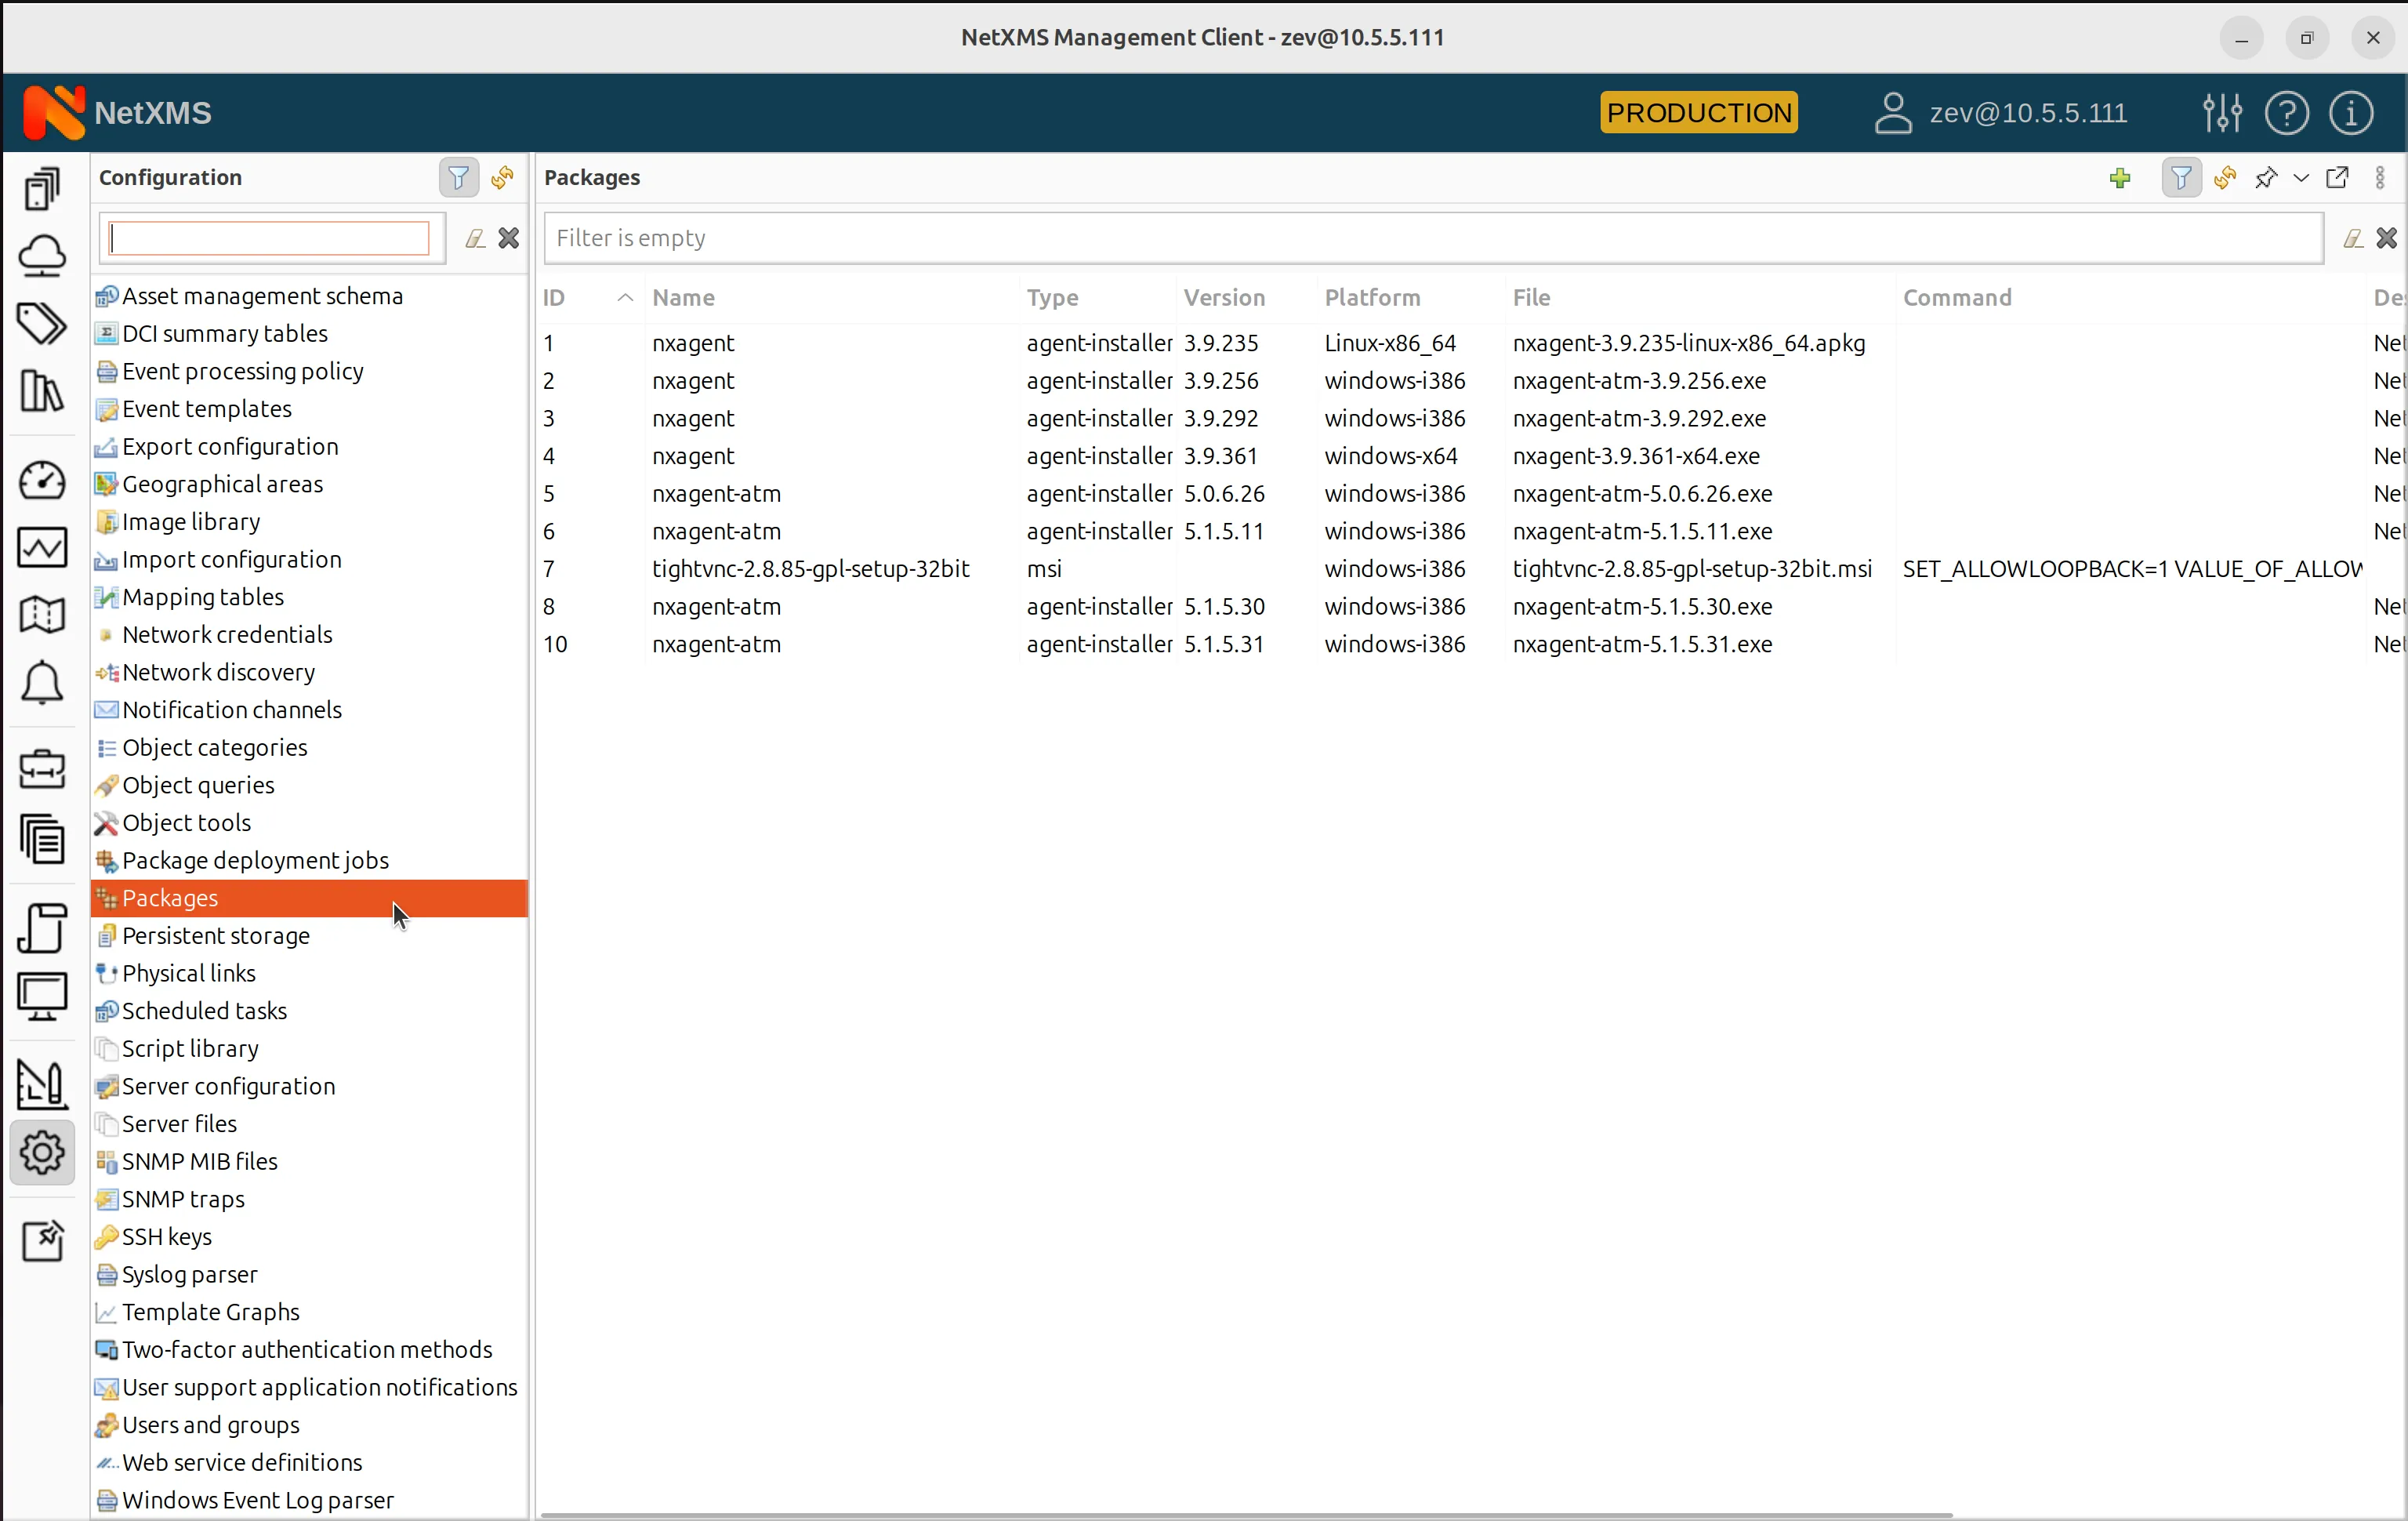
Uploading a Package
-
Navigate to Configuration > Packages in NetXMS.
-
Select a package file to upload (e.g., a Debian package, RPM, Windows MSI, EXE, or ZIP archive).
-
NetXMS automatically detects the platform and package type based on the filename.
- If the version is not detected, it can be manually entered.
- Comments and descriptions can be added for reference.
-
Once uploaded, the package is available for deployment.
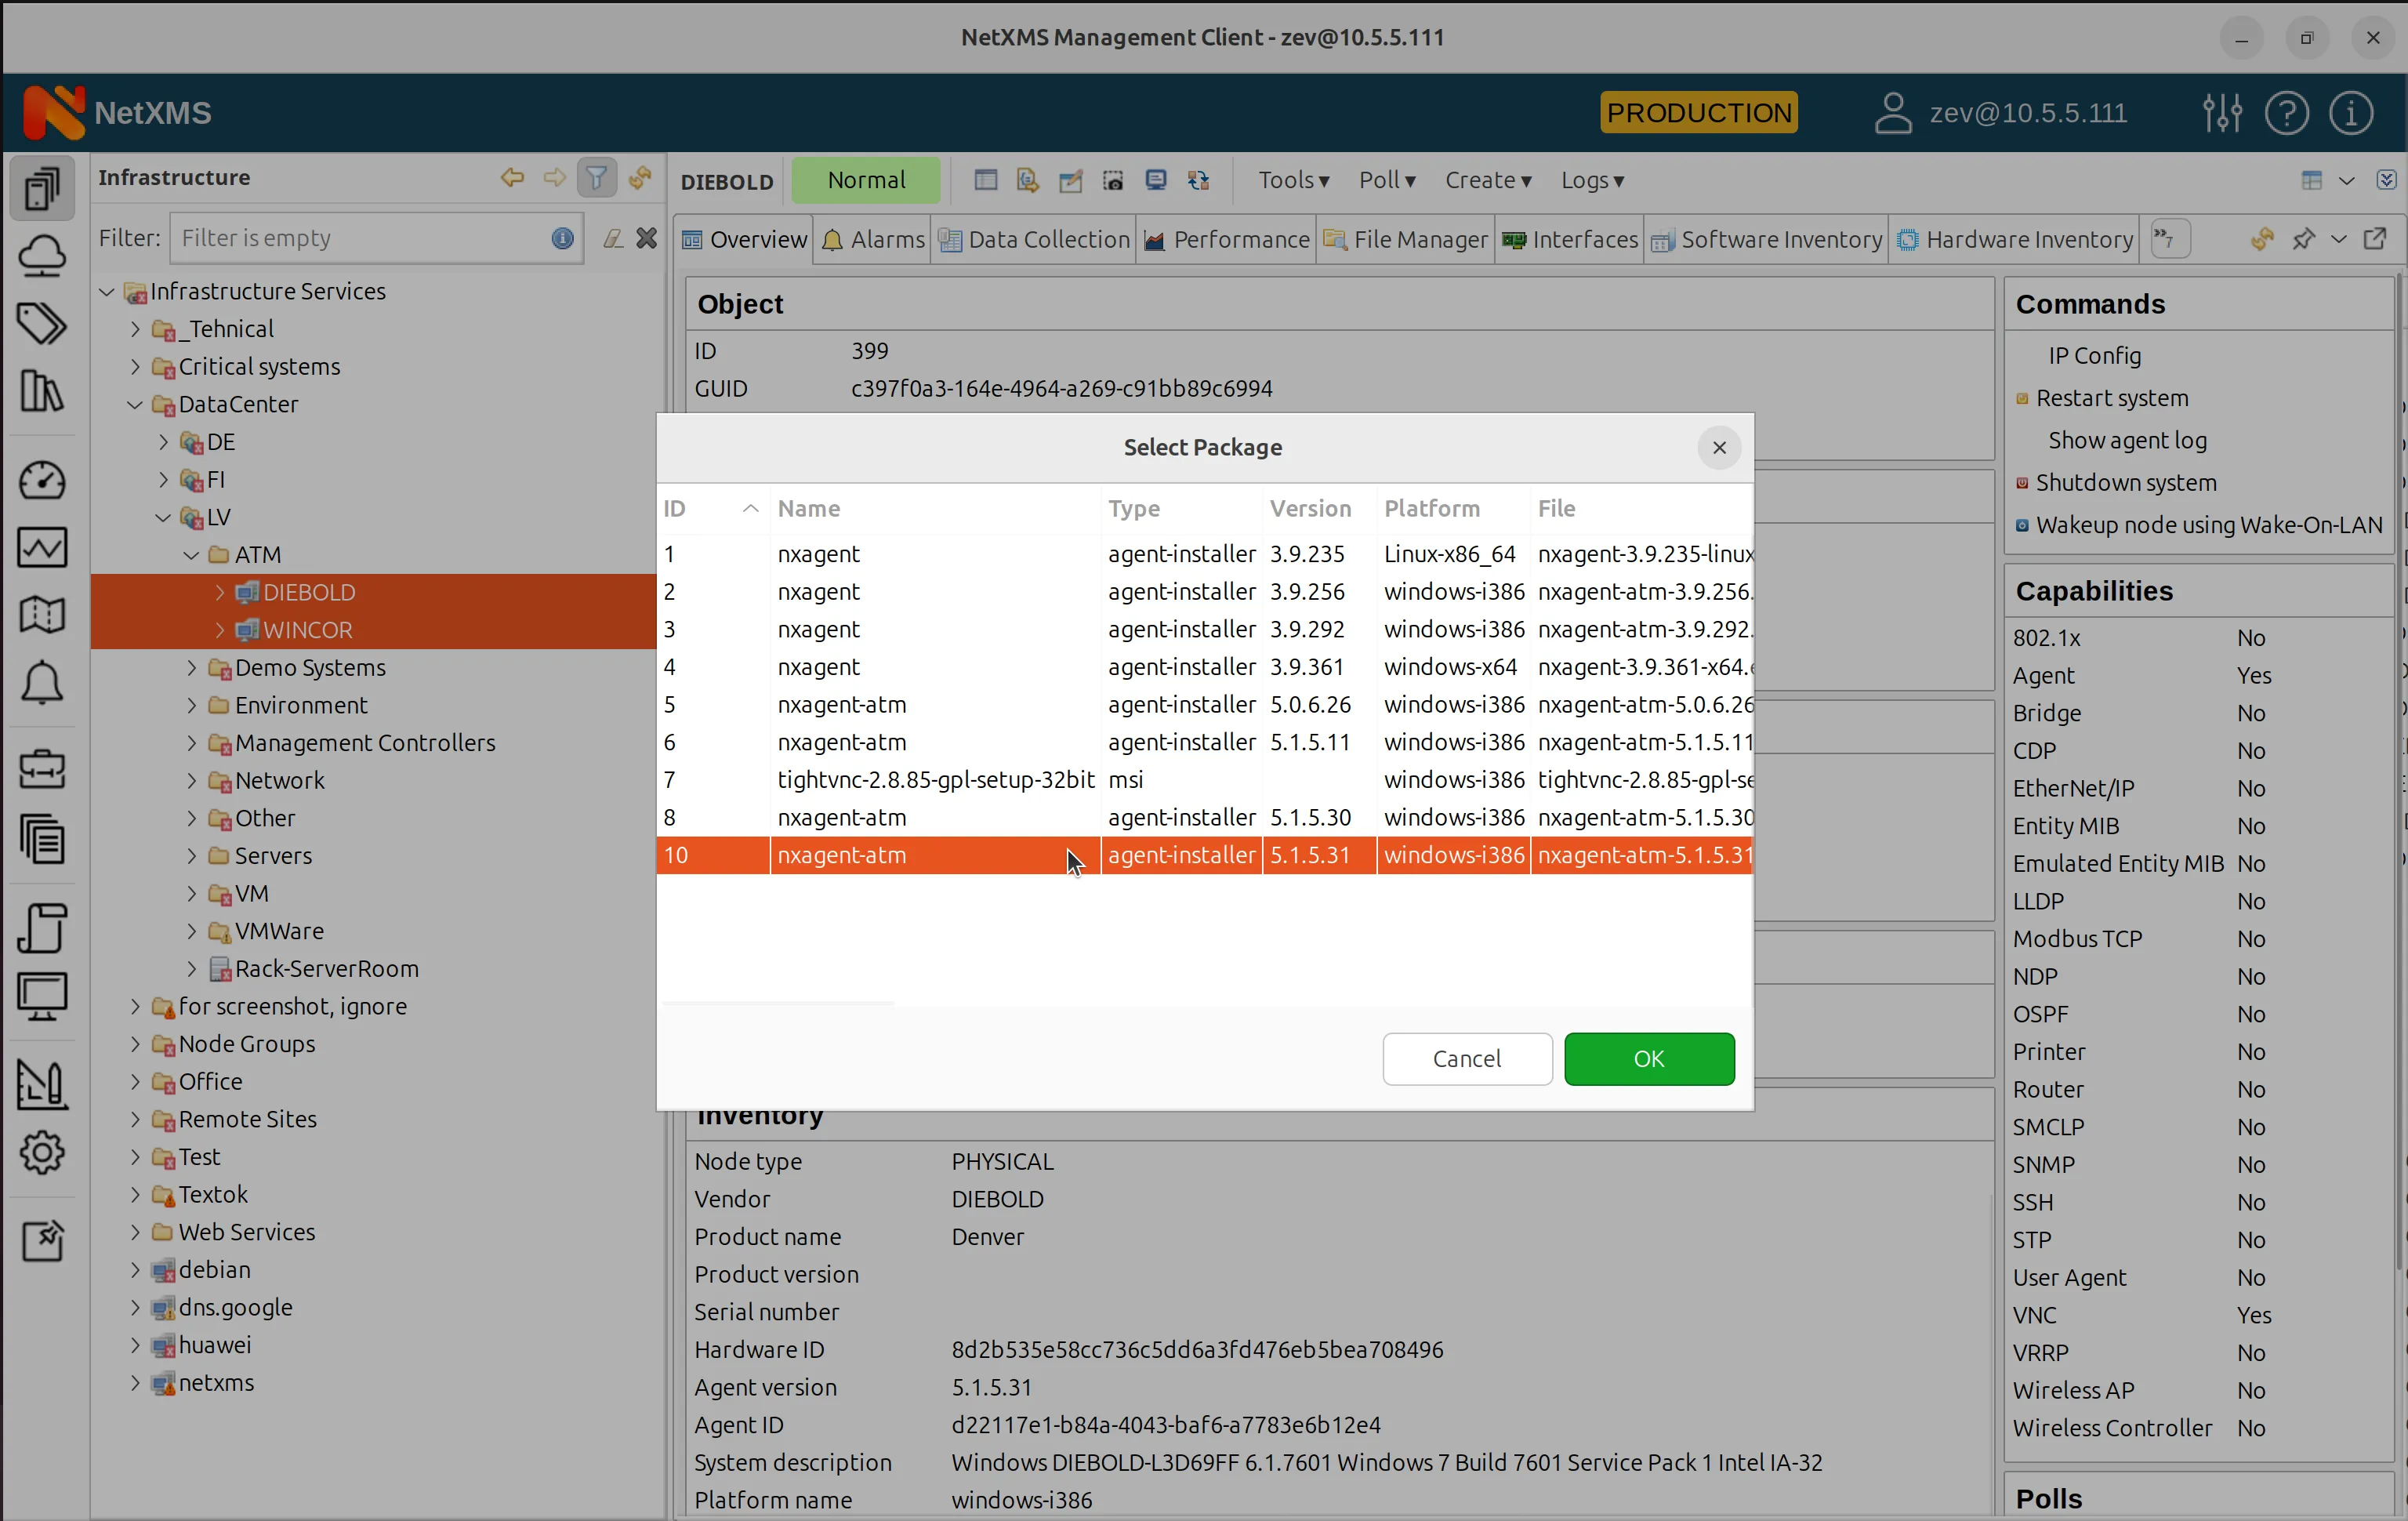
Deploying a Package
To deploy a package to a target machine, first ensure the NetXMS agent is installed on the machine.
Then select the target node (e.g., a Linux system) and choose the package and initiate deployment.
In this way NetXMS will
- Transfer the package from the server to the agent.
- Execute installation commands based on the package type.
After installation, you can verify that the package is successfully installed on the target system.
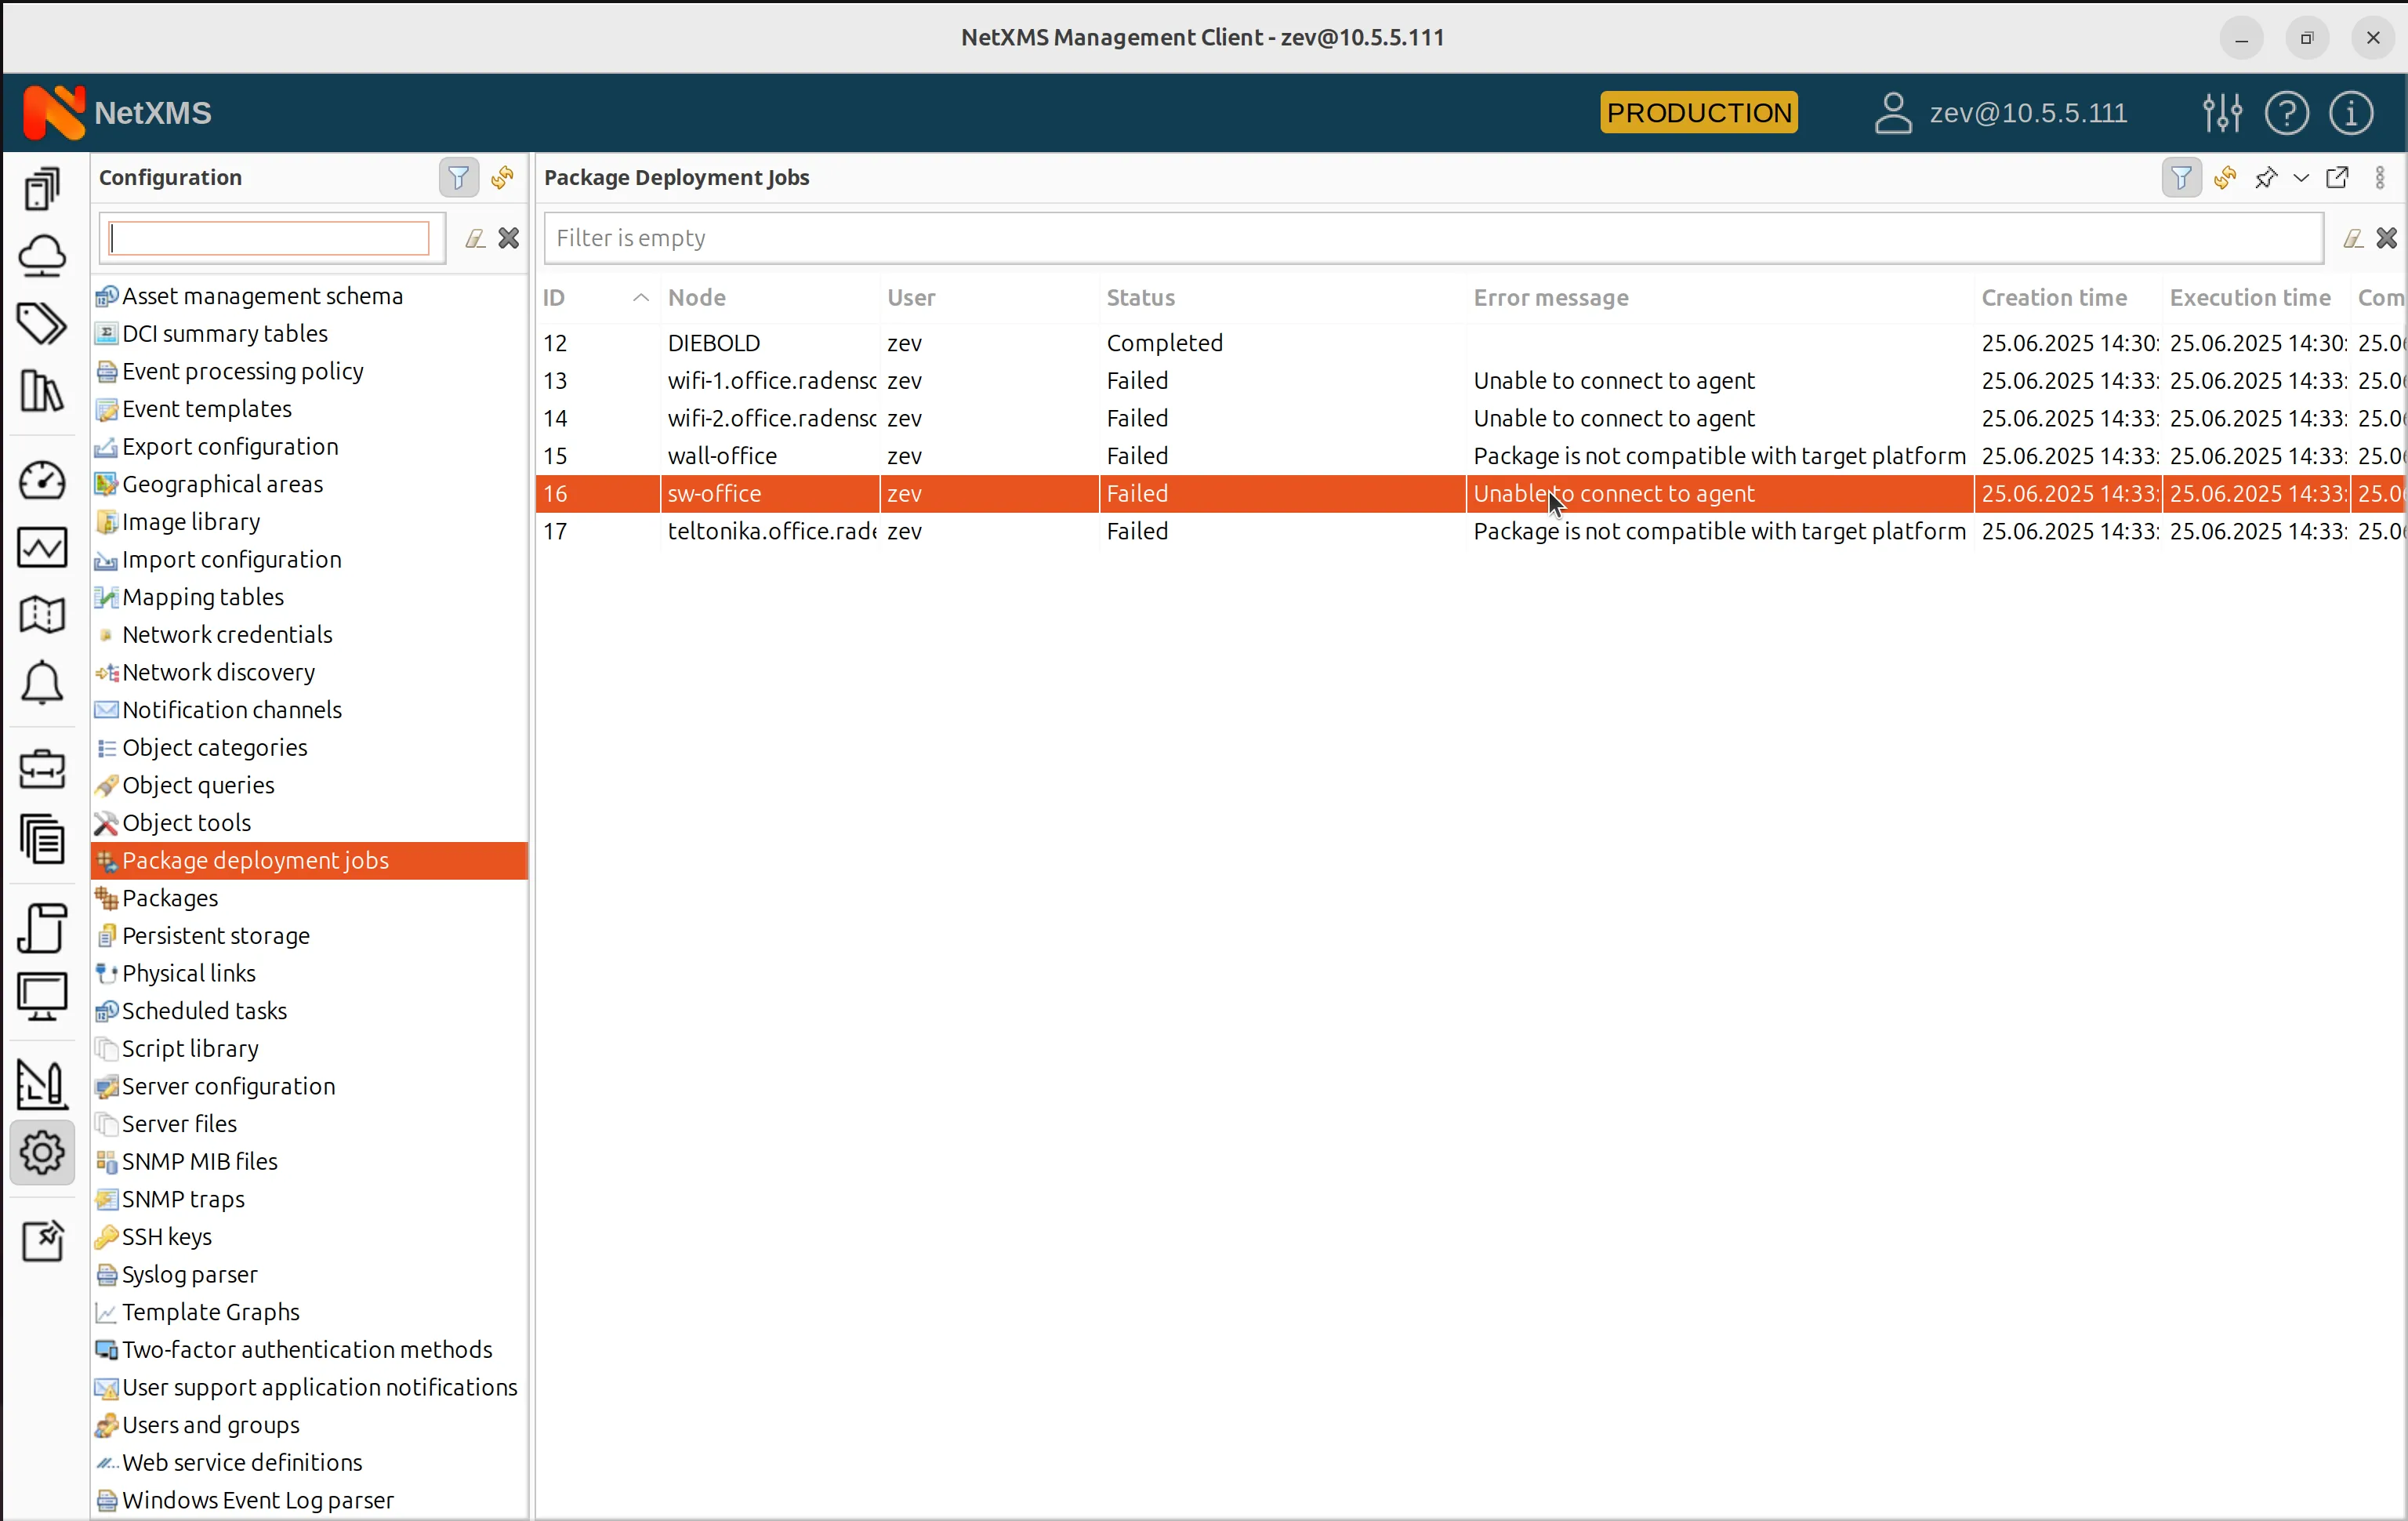
Bulk Deployment
NetXMS supports bulk deployment to multiple nodes. Please note, that the nodes without an agent will be skipped. If a package is incompatible with a machine’s platform, it will not be installed (e.g., deploying a Linux package on Windows).
You can also define platform-specific deployment rules, such as:
- Installing a package only on x86-64 Linux systems by specifying x86_64.
- Deploying a general package across all Linux distributions.
Delivering Files via Packages
For simple file distribution, you can create a custom package containing the necessary files, and then upload it.
Deploy it to selected nodes, ensuring all required files are delivered efficiently.
Remote Software Deployment supports multiple package formats (DEB, RPM, MSI, EXE, ZIP, etc.), and the platform will be detected automatically.
These features make NetXMS a powerful tool for remote access, monitoring, and software management across distributed networks.
Managing and monitoring networks efficiently is critical. With the increasing complexity of networks and the need for real-time troubleshooting, remote access functionality has become a game-changer. We offer you to explore NetXMS today and experience the power of remote access functionality firsthand.